
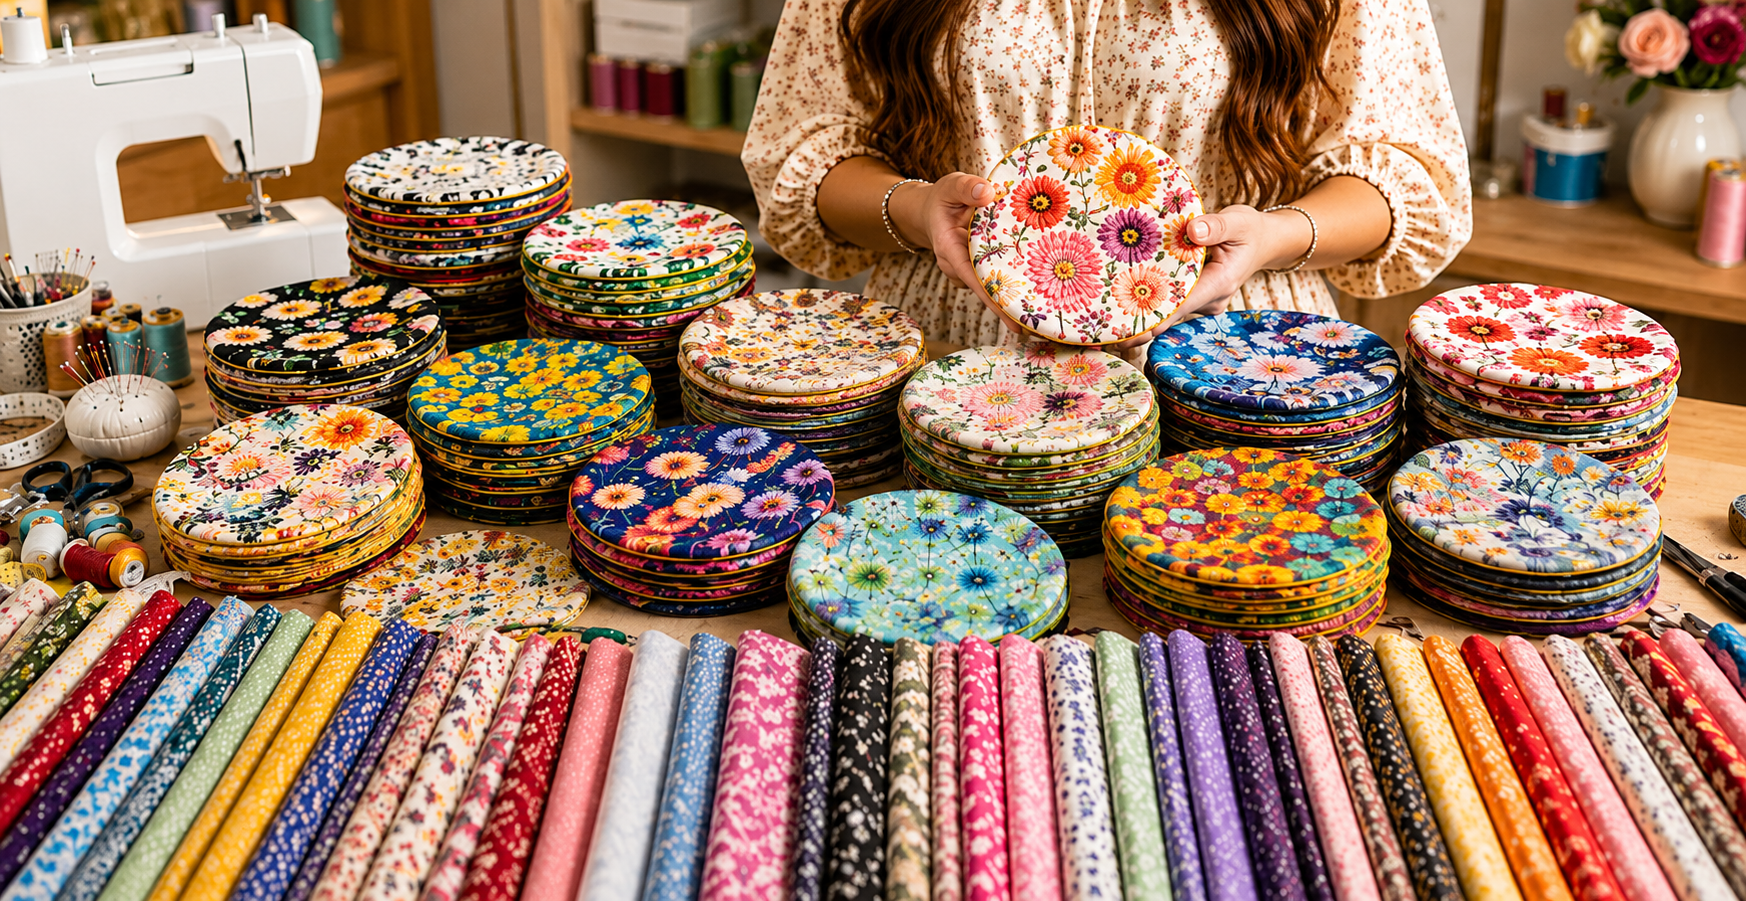
The Fabric circle bag Pattern is a charming sewing project that transforms colorful fabric, batting, and a few basic notions into a practical round pouch with a polished handmade appearance. Inspired by the vibrant circular fabric pieces shown in the reference photo, this project focuses on combining attractive prints with careful construction so the finished bag looks neat from every angle. A circular shape is especially appealing because it feels different from the traditional rectangular zipper pouch while still being useful for storing sewing notions, cosmetics, small accessories, jewelry, craft supplies, or personal items. The project can also be adapted to different sizes without changing the basic construction method. With thoughtful fabric selection and accurate cutting, even relatively simple materials can create a professional-looking result. For makers who enjoy quilting, patchwork, and practical sewing projects, this pattern offers a satisfying balance between creativity and technique.
One of the best features of a Fabric circle bag Pattern is the opportunity to showcase beautiful printed fabrics. The floral designs visible in the inspiration image demonstrate how effective bold prints can look when placed inside a circular shape. Instead of hiding an attractive motif within a complicated patchwork arrangement, the circle becomes a natural frame for the fabric design. Beginners can choose one coordinating fabric for the exterior and another for the lining, while experienced sewists can experiment with patchwork, decorative quilting, appliqué, or pieced circles. The most important part is maintaining a smooth curve and keeping the layers properly aligned. Because curved sewing requires a little more control than straight seams, working slowly and using plenty of clips or pins will produce a cleaner result and make the construction process much easier.
This tutorial explains the complete process for creating a Fabric circle bag Pattern, from preparing the template and cutting the fabric to quilting the circular panels, installing the zipper, assembling the lining, and completing the final finishing details. The measurements can easily be adjusted, but a finished diameter of approximately 20 cm is a comfortable starting point because it provides enough room for useful storage without making the project difficult to manage. You will generally need exterior cotton fabric, lining fabric, thin batting or fusible fleece, a zipper, coordinating thread, scissors or a rotary cutter, pins or sewing clips, and a sewing machine. Pressing tools are also important because careful pressing helps each seam sit properly. Before cutting expensive fabric, making a paper circle template allows you to confirm the size and visualize how the printed motif will appear on the finished bag.
Choosing Fabric and Preparing the Circular Pattern Pieces
The first step in a successful Fabric circle bag Pattern is choosing fabrics that complement the circular design. Quilting cotton is an excellent option because it is stable, easy to sew, available in many prints, and strong enough for a small accessory bag. Floral fabrics like those seen in the inspiration photo create a cheerful handmade appearance, but geometric prints, polka dots, small botanical patterns, gingham, or solid colors can work equally well. If the print contains a large central flower or decorative element, position the paper template carefully before cutting so the most attractive part of the pattern appears near the center of the finished circle.
DISCOVER MORE FREE PATTERNS HERE!
For a medium-size bag, create a circle template measuring approximately 22 cm in diameter. This measurement includes the seam allowance and will produce a finished bag that is slightly smaller after sewing. Trace the circle onto sturdy paper or lightweight cardboard, then cut carefully along the drawn line. A perfectly symmetrical template is important because irregular edges can become more noticeable once the zipper and side sections are attached. Folding the paper circle into quarters before cutting can help verify that all sections are balanced.
Using the template, cut two circles from the exterior fabric. Then cut two matching circles from the lining fabric and two circles from thin batting or fusible fleece. These pieces form the front and back panels of the Fabric circle bag Pattern. If you want a softer bag, choose lightweight batting. If you prefer a bag that maintains a firmer circular shape, fusible fleece provides more structure. Avoid extremely thick stabilizers when making your first round pouch because excessive bulk can make curved seams more difficult to sew smoothly.
Fuse or baste the stabilizer to the wrong side of each exterior circle according to the material being used. Smooth the fabric carefully so there are no wrinkles or bubbles between the layers. Once the batting is positioned, optional quilting can add both stability and decorative texture. Straight lines, diagonal grids, gentle curves, or simple concentric circles are all attractive choices. Quilting also helps prevent the fabric from shifting while the bag is being assembled.
After quilting, place the paper template over each panel again and trim away any distortion caused by stitching. This small step makes a noticeable difference in the final appearance. Both exterior circles should be identical in size before the zipper section is attached. Accurate trimming is particularly important in a round fabric pouch, because even a small difference between the two panels can create wrinkles or uneven edges when the pieces are joined.
Finally, prepare the lining circles in the same way by checking their size against the exterior panels. The lining does not usually require batting, although lightweight interfacing can be added if the fabric is very thin. Press all pieces carefully and keep them organized in pairs. At this stage, you should have two structured exterior circles and two lightweight lining circles ready for assembly. Taking time to prepare each layer properly creates the foundation for a neat and durable finished project.
Making the Zipper Section and Building the Bag Structure
The zipper opening is one of the most important elements of the Fabric circle bag Pattern because it allows the bag to open widely while maintaining its round shape. Choose a zipper that is slightly longer than half the circumference of the circle. For a 22 cm circle, a zipper approximately 30 to 35 cm long is convenient because any excess can be trimmed later. A nylon coil zipper is particularly easy to work with because it bends smoothly around curved shapes.
Cut two exterior fabric strips and two lining strips approximately 4 cm wide and slightly longer than the zipper. Place one exterior strip right side up, position the zipper right side down along the edge, and place one lining strip on top with its right side facing the exterior fabric. Sew along the zipper tape using a zipper foot. Fold the fabrics away from the zipper, press carefully, and topstitch close to the folded edge. Repeat the same process on the opposite side.
Once both sides of the zipper are covered, the result should resemble a neat fabric zipper panel. Test the zipper several times to make sure the fabric does not interfere with its movement. Smooth operation is important because correcting zipper problems after the circular bag is assembled can be difficult. Topstitching provides additional strength and gives the zipper section a professional appearance.
The remaining part of the circumference can be completed with a fabric gusset. Cut an exterior strip and a lining strip approximately 6 cm wide. The exact length will depend on the size of your circle and zipper panel, so measure around the circular edge before cutting the final length. The combination of zipper panel and gusset should fit around the entire circumference of the circular front and back pieces without stretching.
Join the ends of the gusset to the ends of the zipper section to form a complete loop. Press the seams flat and check the loop against one of the circular panels. Mark the quarter points of both the circle and the loop. These reference marks are extremely helpful when sewing curved pieces because they distribute the fabric evenly around the circumference. Add additional marks between each quarter if you want even more control.
If desired, a small carrying loop can be added near one end of the zipper. Cut a fabric strip approximately 6 cm by 10 cm, fold the long edges toward the center, fold again, and topstitch. Fold the finished strip in half and baste it to the zipper section. This optional feature makes the Fabric circle bag Pattern easier to carry or hang and adds another useful handmade detail.
Before attaching the circular panels, open the zipper halfway. This simple action is extremely important because the zipper opening will later provide access for turning the bag right side out. Check that all raw edges are aligned and that the zipper slider is safely positioned away from the areas where you will sew. Your project should now have a complete circular side section ready to connect to the exterior panels.
Sewing the Circular Panels and Creating Smooth Curves
Place the side loop around the edge of the first exterior circle with right sides facing. Match the quarter marks and secure them with sewing clips or pins. Continue clipping between each reference point until the entire circumference is evenly distributed. Curves naturally require more clips than straight seams, so do not hesitate to place them close together. This helps prevent small folds from forming while you sew.
Sew around the circle using approximately a 1 cm seam allowance. Work slowly and guide the fabric instead of pulling it. Stop periodically with the needle lowered, lift the presser foot, and gently adjust the fabric when necessary. This technique allows the seam to follow the curve more naturally. Accuracy during this stage is one of the most important factors in achieving the polished appearance associated with a carefully made Fabric circle bag Pattern.
After completing the seam, examine the outside edge for puckers. If everything looks smooth, clip small notches into the seam allowance approximately every 1.5 to 2 cm. Be careful not to cut through the stitches. These notches allow the seam allowance to spread when the circle is turned, which reduces bulk and helps the finished edge maintain a smooth rounded shape.
Attach the second exterior circle to the opposite side of the zipper and gusset loop using the same process. Match the quarter marks, clip carefully, and sew slowly around the circumference. Once both circles are attached, the basic three-dimensional shape of your round fabric bag will become visible. Check the shape from several angles before continuing so any uneven areas can be corrected while the seams remain accessible.
Depending on your preferred construction method, the lining can either be sewn simultaneously with the exterior or assembled separately and hand-finished around the zipper. For a particularly clean interior, create a matching lining structure using the two lining circles and a lining gusset. Leave an opening of approximately 8 to 10 cm along one lining seam so the entire project can be turned right side out later.
After assembling the lining, place the exterior and lining together according to the chosen zipper construction method, keeping corresponding seams aligned. Trim excessive bulk around seam intersections and carefully clip the curves. The inside of a handmade bag deserves the same attention as the outside. Smooth lining fabric, enclosed seams, and accurate stitching make the project more durable and give it a finished quality that distinguishes handmade work from a rushed craft project.
Finishing, Pressing, Decorating, and Personalizing the Circle Bag
Turn the Fabric circle bag Pattern right side out through the opening left in the lining. Work slowly and avoid pulling aggressively on the zipper or seams. Use your fingers or a blunt turning tool to gently shape the curved edges. Because the bag contains batting and several fabric layers, the circle may initially look slightly compressed, but careful shaping will restore its smooth appearance.
Close the lining opening by folding the raw edges inward and stitching close to the fold. A machine stitch is quick and durable, while a small ladder stitch provides a nearly invisible handmade finish. Push the lining inside the bag and smooth it evenly along the circular panels. Check the corners near the zipper ends to make sure the fabric is fully turned and nothing is caught inside the seams.
Pressing should be done carefully because excessive heat can damage some stabilizers or zippers. Use moderate heat suitable for cotton and avoid pressing directly over plastic zipper teeth. Instead of flattening the bag completely, shape it gently with steam and your hands. The goal is to define the circular profile while preserving the soft dimensional appearance created by the batting.
Decorative topstitching can enhance the finished project. A line of stitching around the circular edges emphasizes the shape and helps control the seam allowances inside the bag. Coordinating thread creates a subtle finish, while contrasting thread can become a decorative feature. If you enjoy quilting, additional stitched designs can be added before construction, including spirals, grids, free-motion flowers, or simple geometric patterns.
Another advantage of the Fabric circle bag Pattern is how easily it can be personalized. You can create a matching collection using several different floral prints, similar to the colorful assortment seen in the inspiration photo. Small versions can hold coins or jewelry, medium versions work well for sewing notions and cosmetics, and larger versions can store craft tools or travel accessories. Changing only the diameter of the circle allows the same basic construction technique to produce an entire coordinated collection.
For the best long-term results, inspect all seams once the bag is complete. Reinforce the zipper ends if necessary, trim loose threads, and confirm that the zipper moves smoothly. A well-made circular fabric pouch should feel structured without being overly stiff, open comfortably, and maintain a balanced round silhouette. These final details may take only a few minutes, but they significantly improve the appearance and durability of the finished handmade project.
FAQ – Frequently Asked Questions About the Fabric circle bag Pattern
What is a Fabric circle bag Pattern?
A Fabric circle bag Pattern is a sewing pattern based on circular fabric panels rather than traditional rectangular pieces. Usually, two circles create the front and back while a zipper panel and gusset form the side of the bag. This construction produces a compact round pouch suitable for storing many small items.
Is this project suitable for beginners?
Yes, although beginners should sew the curves slowly. If you already know how to sew a straight seam and use a zipper foot, this project is an excellent introduction to curved bag construction. Using quilting cotton and lightweight stabilizer makes the process easier.
What fabric works best for a circular bag?
Medium-weight quilting cotton is one of the easiest materials to use. Canvas can create a firmer bag, while linen blends provide a natural appearance. Very stretchy or slippery fabrics can be more challenging because keeping the circular panels accurately aligned becomes more difficult.
Do I need batting inside the bag?
Batting is not absolutely required, but it gives the Fabric circle bag Pattern softness, stability, and a lightly quilted appearance. Fusible fleece can be used when more structure is desired. If you want a very lightweight pouch, interfacing may be enough.
How large should I make the circle?
A circle approximately 22 cm in diameter is a useful starting point for a medium bag. Smaller circles create coin or accessory pouches, while larger circles can create storage bags. Remember that the finished measurement will be slightly smaller because of the seam allowance.
How can I prevent puckers while sewing the curve?
Mark quarter points, use plenty of clips, and sew slowly. Never stretch the circular fabric to make it fit. After stitching, clip small notches into the seam allowance so the curve can spread naturally when the bag is turned right side out.
Can I make the Fabric circle bag Pattern without a zipper?
Yes. Depending on the intended use, the zipper can be replaced with snaps, buttons, drawstring sections, or other closures. However, a zipper offers good security and allows the finished round pouch to remain compact and practical.
Can leftover fabric scraps be used for this project?
Absolutely. Scraps can be joined together before cutting the circular panels, creating a patchwork circle bag. This is a creative way to use small pieces of favorite fabrics while producing a completely original design.
Should the fabric be prewashed before sewing?
Prewashing cotton is recommended when you expect the finished bag to be washed regularly. It helps reduce the possibility of shrinkage later. After washing, press the fabric thoroughly before cutting so your circular pieces remain accurate.
How can I make several matching bags like the colorful pieces in the inspiration photo?
Use the same circle template and construction method while changing the exterior fabric. Floral collections are especially effective because each bag can feature a different print while retaining the same shape, size, zipper color, and construction style.
Conclusion
The Fabric circle bag Pattern combines simple materials with thoughtful sewing techniques to create a colorful, functional, and attractive handmade accessory. Throughout this tutorial, we covered how to select coordinating fabric, create an accurate circular template, cut exterior and lining pieces, add batting or fusible fleece, quilt the panels, construct the zipper section, prepare the gusset, sew smooth curved seams, install the lining, and complete the final finishing details.
The key to a successful result is accuracy rather than speed. Carefully matched quarter marks, evenly distributed clips, slow stitching around the curves, and properly clipped seam allowances help the finished bag maintain its attractive circular shape. Fabric selection is equally important, especially when working with floral or decorative prints where the circle can beautifully frame a favorite motif.
Once you understand the basic construction, the Fabric circle bag Pattern becomes highly adaptable. You can change the size, combine different prints, create patchwork panels, add decorative quilting, include a carrying loop, or produce several coordinating bags as a colorful handmade collection. The same technique can be used repeatedly while still allowing every finished project to feel unique.
Most importantly, enjoy the creative process. Handmade sewing does not need to look identical every time; fabric combinations, quilting choices, and small decorative details are what give each project personality. If you make this Fabric circle bag Pattern, leave your sincere opinion about the project and share your suggestions for future patterns, fabric combinations, sizes, or sewing techniques you would like to see explored.