
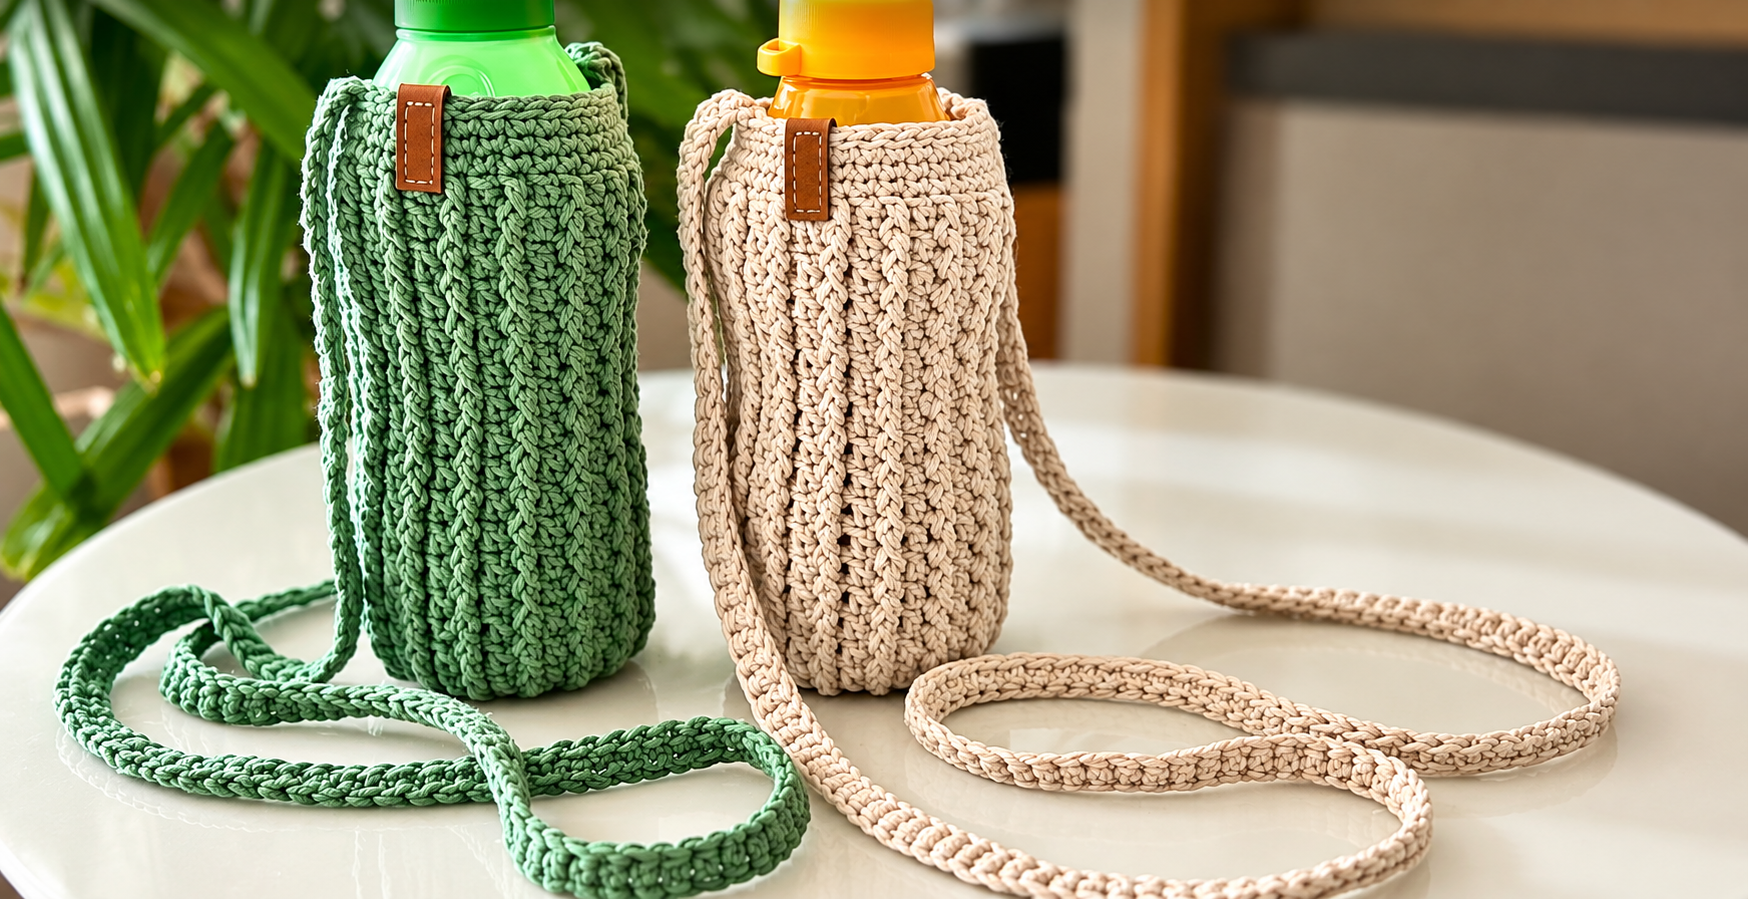
The Crochet Bottle Holder Pattern is a practical and attractive project for anyone who enjoys making useful crochet accessories with a handmade finish. A crocheted bottle carrier can help keep a reusable water bottle close at hand while adding texture, color, and personality to an everyday item. This project is especially appealing because it can be adapted to many bottle sizes, from compact drink containers to taller reusable bottles. The design combines a sturdy circular base, a textured body, a fitted upper edge, and a long crocheted strap that allows the holder to be carried comfortably over the shoulder or across the body. For beginners, the project is also an excellent opportunity to practice crocheting in the round while learning how stitch counts affect the shape of a cylindrical piece. Once the basic construction is understood, the same Crochet Bottle Holder Pattern can be customized with different yarn colors, stitch textures, strap lengths, and decorative details.
Another advantage of this Crochet Bottle Holder Pattern is that it does not require complicated shaping or a large collection of materials. Most of the holder is worked using basic US crochet stitches, making the project approachable while still producing a professional-looking result. The essential crochet abbreviations used throughout this tutorial are ch = chain, sl st = slip stitch, sc = single crochet, hdc = half double crochet, dc = double crochet, st = stitch, sts = stitches, inc = increase, BLO = back loop only, and FO = fasten off. When the instructions say inc, work two stitches into the same stitch to increase the circumference of the piece. When you see BLO, insert the hook only through the back loop of the stitch instead of working through both loops. Understanding these crochet keys before starting will make every step easier to follow.
Choosing the right materials is just as important as understanding the stitches because a bottle holder should be firm enough to support weight without stretching excessively. Cotton or a cotton-blend yarn is usually a practical choice because it provides good stitch definition and tends to feel sturdy when crocheted tightly. A medium-weight yarn can create a durable carrier, although the exact hook size should always be adjusted to match the yarn and the desired tension. You will also need a crochet hook, yarn needle, scissors, stitch marker, and the bottle you plan to use as a sizing reference. A removable stitch marker is particularly helpful because the body can be worked continuously in rounds. Before beginning the full Crochet Bottle Holder Pattern, crochet a small sample and check whether the fabric feels dense, supportive, and flexible enough for comfortable everyday use.
Materials, Crochet Keys, and Measuring the Bottle
Start the Crochet Bottle Holder Pattern by measuring the bottom diameter, circumference, and height of your bottle. These measurements allow you to make a fitted carrier rather than relying on one universal stitch count. Measure around the widest part of the bottle because this is the area the crocheted body must accommodate. The holder should fit snugly without being so tight that removing the bottle becomes difficult.
DISCOVER MORE FREE PATTERNS HERE!
For a medium reusable bottle, approximately 500 to 750 ml, a medium-weight cotton yarn usually gives a balanced combination of strength and flexibility. Depending on yarn thickness, approximately 100 to 180 grams of yarn may be enough for the body and strap. Keep additional yarn available if you want an especially long crossbody strap or a taller holder.
The crochet hook should create firm stitches rather than loose, open fabric. If the yarn label suggests several hook sizes, consider using a hook toward the smaller end of that range. A slightly tighter gauge helps prevent the bottle from pulling the crochet downward when the carrier is being worn.
The main stitch sequence uses sc, hdc, and optional dc stitches. Single crochet produces a compact fabric and works particularly well for the base. Half double crochet adds a little more height and texture, making it useful for the main body. Double crochet may be added if you prefer a more open or decorative section.
Remember the essential crochet key: ch means chain, sl st means slip stitch, sc means single crochet, hdc means half double crochet, and dc means double crochet. The term BLO means back loop only, which can create visible horizontal ridges. The abbreviation FO tells you when to fasten off and secure the yarn.
Before starting the foundation, place your bottle beside the yarn and decide how high you want the crochet to reach. Some people prefer the holder to stop just below the bottle neck, while others prefer a slightly shorter design. Leaving the lid exposed makes drinking easier without removing the bottle from the crochet bottle carrier.
How to Crochet the Circular Base and Main Body
Begin with a magic ring, which creates a neat center for the bottom of the holder. For Round 1, work 6 sc into the magic ring, pull the ring closed, and place a stitch marker in the first stitch. You can work in continuous rounds for a nearly invisible seam, moving the marker upward after every completed round.
For Round 2, work 2 sc in each stitch around, giving you 12 stitches. For Round 3, use the sequence [sc in next st, inc in next st] around, finishing with 18 stitches. For Round 4, work [sc in next 2 sts, inc] around, which gives you 24 stitches.
Continue increasing evenly until the circle is approximately the same size as the bottom of your bottle. The next rounds can follow the same mathematical pattern: Round 5: [sc in next 3 sts, inc] around; Round 6: [sc in next 4 sts, inc] around. Each round adds one regular stitch between increases, allowing the circle to remain relatively flat.
Place the bottle directly on the crochet circle to check the diameter. Ideally, the crochet base should be equal to or slightly smaller than the bottle bottom because the fabric will usually stretch a little. If the circle extends far beyond the edges of the bottle, the finished holder may feel too loose.
Once the base is the right size, stop increasing. Work one round of sc in BLO around. Crocheting into the back loops creates a subtle ridge and encourages the fabric to turn upward, marking the transition between the circular base and the vertical sides.
For the next round, work hdc in each stitch around without any increases. Continue repeating this round until the holder begins to cover the lower section of the bottle. Slip the bottle into the work occasionally to verify that the fit remains comfortable and that the sides are rising evenly.
To create a textured effect similar to many handmade bottle carriers, alternate rounds of hdc with rounds of BLO hdc. Another attractive option is to work [hdc in next st, BLO hdc in next st] around if your stitch count allows the sequence to repeat evenly. Continue until the crocheted body reaches approximately 2 to 4 cm below the bottle neck.
Creating the Upper Edge and Strong Crochet Strap
The top of the Crochet Bottle Holder Pattern should be firm enough to prevent the bottle from tipping sideways. When the body reaches the desired height, work one round of sc in each stitch around. Single crochet tightens the upper edge slightly and creates a clean foundation for the strap attachment.
If the opening feels too wide, decrease only a few stitches evenly around the top. A simple decrease is made by working sc2tog, which means single crochet two stitches together. Avoid making too many decreases because the bottle still needs to slide easily into and out of the carrier.
Work another complete round of sc after any decreases. This reinforces the upper border and gives the bag a polished appearance. You may also work the final round in BLO if you want an additional decorative ridge around the bottle opening.
To begin the strap, decide where you want the first attachment point. Work several sl sts until you reach the side of the holder, then ch the number of stitches required for your preferred strap length. For a shoulder strap, approximately 90 to 110 cm may work well, while a crossbody design may require approximately 110 to 140 cm, depending on the wearer.
After creating the long chain, begin working back along it. Starting in the second chain from the hook, work sc in each ch across. A single row creates a narrow strap, while two or three additional rows of sc can make the strap wider, stronger, and more comfortable against the shoulder.
Attach the free end securely to the opposite side of the holder using several sl sts or sturdy hand stitches with a yarn needle. Reinforce both strap connection points because these areas receive the greatest amount of tension. Weave the yarn tails through several stitches before trimming them so the finished crochet bottle holder remains durable.
Finishing, Customizing, and Caring for Your Crochet Bottle Holder
After the construction is complete, inspect the entire Crochet Bottle Holder Pattern for loose yarn ends. Thread each end onto a yarn needle and weave it through the wrong side of several stitches. Change direction once or twice while weaving because this makes the yarn less likely to work itself loose during regular use.
Place the bottle inside the finished holder and test the strap before considering the project complete. The base should remain centered beneath the bottle, the sides should hug the container without distortion, and the strap attachments should remain stable. If the holder feels slightly tight, cotton crochet often relaxes with normal handling.
Customization is one of the most enjoyable parts of this pattern. Try using sage green, cream, beige, terracotta, mustard, navy, or natural cotton shades for a modern handmade look. You can also combine two colors by making the base and upper border in one shade while working the main body in another.
Decorative texture can be created by alternating stitch types. For example, you can work several rounds of hdc, followed by a round of BLO sc, then return to hdc. These subtle changes produce visible bands without making the pattern unnecessarily difficult.
You can also personalize the holder with a small crocheted flower, wooden button, fabric tag, or simple contrasting border. Any decoration should be securely attached and positioned where it will not interfere with the bottle or strap. A minimalist design often works especially well because the textured crochet stitches already provide visual interest.
For care, follow the washing instructions recommended for your chosen yarn. Cotton holders can often be gently hand washed, reshaped, and dried flat, but yarn labels should always guide your cleaning method. Avoid carrying a leaking bottle because repeated moisture inside the crochet can affect the yarn and make the holder uncomfortable to use.
FAQ About the Crochet Bottle Holder Pattern
What is the best yarn for a Crochet Bottle Holder Pattern?
Cotton and cotton-blend yarns are popular choices because they offer good structure, visible stitch definition, and practical durability. A yarn with too much stretch may cause the carrier to lengthen considerably when a full bottle is placed inside.
What crochet hook size should I use?
The ideal hook depends on the yarn. For many medium-weight cotton yarns, a hook around 3.5 mm to 5 mm may work well. Choose a hook that produces firm fabric without making the stitches painfully tight to work.
Can a beginner make this crochet bottle holder?
Yes. The pattern mainly uses chain, slip stitch, single crochet, half double crochet, increases, and basic work in the round. Beginners may want to practice the magic ring and continuous rounds before starting the full holder.
How do I resize the Crochet Bottle Holder Pattern?
Resize the circular base first. Continue the increase rounds until the base matches your bottle diameter. Once the correct width has been reached, stop increasing and work the sides upward with the same stitch count.
How do I stop the bottom from becoming wavy?
A wavy circle usually indicates that too many increases have been added. Keep the increases evenly distributed and avoid adding extra stitches beyond the established increase sequence.
Why is my crochet circle curling into a bowl too early?
Curling may happen when there are too few increases or when your tension is especially tight. Check your stitch count after each round. If necessary, adjust the hook size or repeat the increase sequence carefully.
How long should the bottle holder strap be?
A shoulder strap is often around 90 to 110 cm, while a crossbody strap can be approximately 110 to 140 cm. The best measurement depends on height, personal preference, and where you want the bottle to rest.
How can I make the strap stronger?
Work several rows of single crochet rather than using only a chain. You can also make the strap wider and reinforce its connection to the holder with additional stitches.
Can I use double crochet for the whole bottle holder?
You can, but dc stitches create a more open and flexible fabric. A full bottle can stretch that fabric considerably. For better support, use sc or hdc for at least the base, upper edge, and strap attachment areas.
Should the crochet holder be larger than the bottle?
Usually not. A slightly snug fit is preferable because crochet naturally has some flexibility. Make the circular base approximately equal to or slightly smaller than the bottle base and test the fit throughout the project.
Can I make this pattern for children’s bottles?
The basic sizing method can be adapted to smaller bottles, but long straps can present entanglement risks for young children. For items intended for children, use an age-appropriate design and prioritize safe dimensions and supervision.
How can I make a striped version of this Crochet Bottle Holder Pattern?
Change yarn colors at the end of selected rounds. For a clean transition, complete the final yarn-over of the previous stitch with the new color, then continue crocheting normally. Carrying unused yarn is optional depending on how frequently the colors change.
Conclusion
The Crochet Bottle Holder Pattern combines simple construction with a highly useful finished accessory. By starting with a properly sized circular base, working the body upward without unnecessary increases, creating a reinforced upper edge, and adding a secure strap, you can crochet a bottle carrier that is both attractive and practical. The project also introduces important crochet techniques such as working in the round, increasing, crocheting in the back loop, using sc and hdc stitches, creating a strap, and adjusting a pattern according to measurements.
One of the biggest advantages of this pattern is its flexibility. Once you understand the basic structure, you can adapt the size for different bottles, experiment with colors, create textured stitch combinations, adjust the strap length, and add simple decorative details. That makes the Crochet Bottle Holder Pattern a useful project for developing crochet skills while creating something that can become part of your everyday routine. If you make your own version, leave your sincere opinion about the pattern and share any suggestions you have. Your ideas about colors, stitches, strap styles, and finishing details can inspire new variations of this Crochet Bottle Holder Pattern and help other crochet lovers discover creative ways to personalize their projects.