
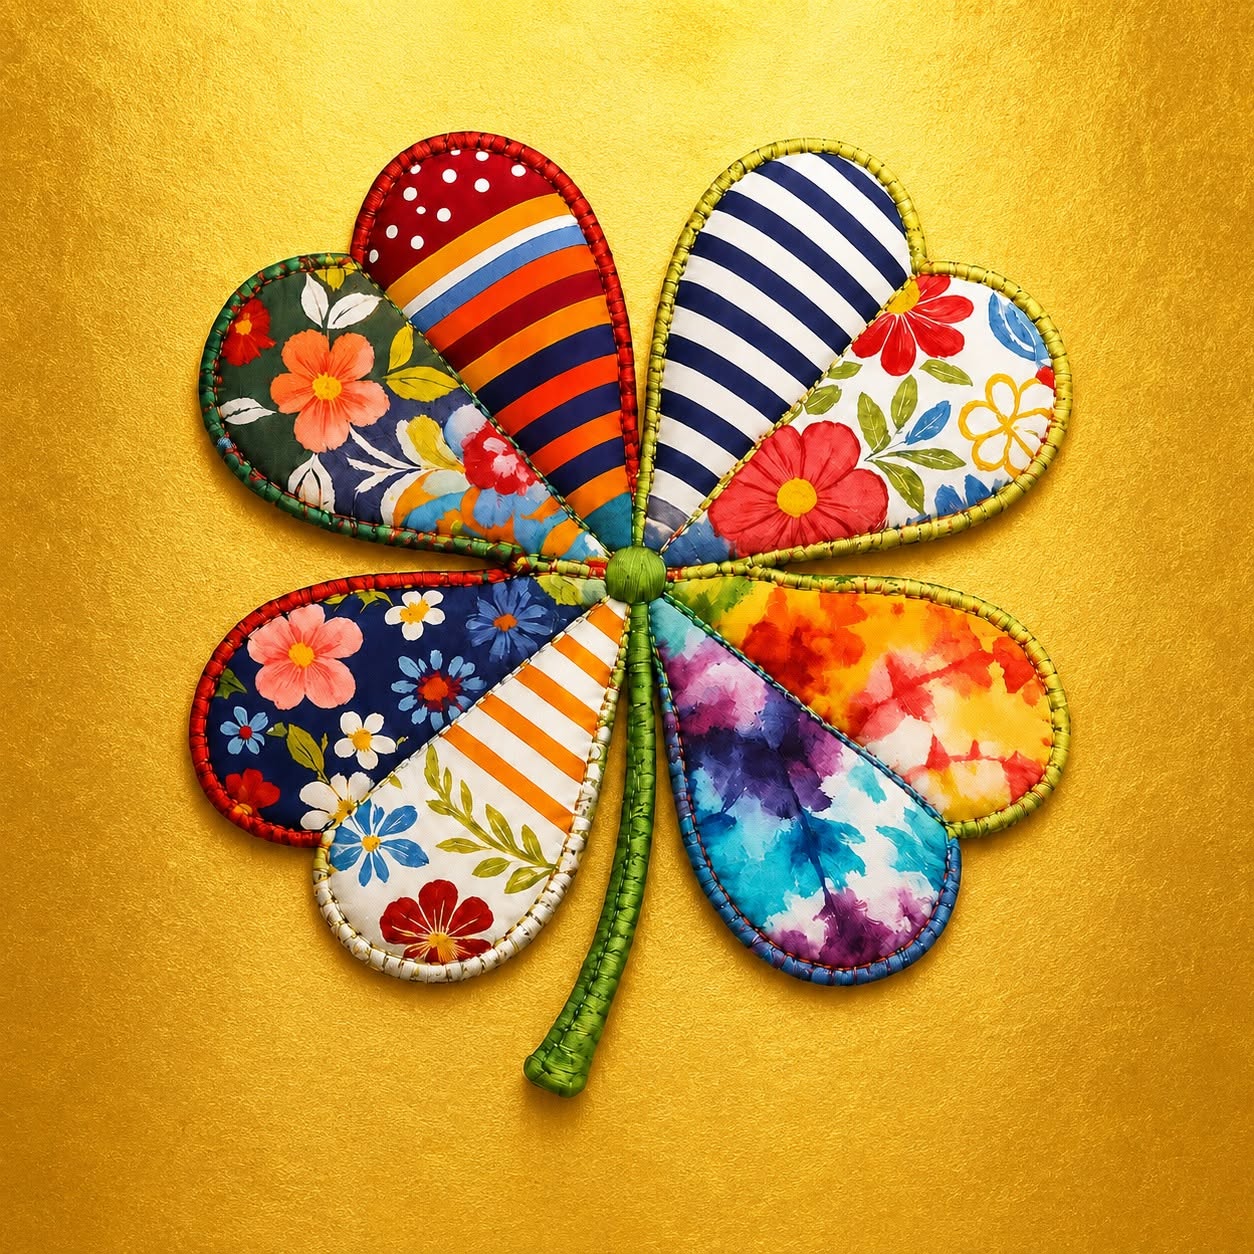
Clover Motif Patchwork Quilt and Sewing Tutorial Pattern is a beautiful project that combines the timeless charm of patchwork with simple sewing techniques to create a decorative fabric clover inspired by colorful quilting traditions. Whether you are a beginner or an experienced quilter, this design offers an enjoyable way to experiment with fabric combinations, curved shapes, and creative finishing details. Throughout this guide, you will learn every stage required to complete the project while improving your sewing confidence. This tutorial focuses on clear instructions, practical tips, and professional finishing techniques so your final piece looks polished and durable. By following each step carefully, you can easily recreate a vibrant clover that serves as wall décor, table decoration, quilt block inspiration, or even part of a larger handmade project.
The beauty of the Clover Motif Patchwork Quilt and Sewing Tutorial Pattern lies in its versatility. Every leaf can feature a completely different fabric, allowing endless combinations of floral prints, stripes, polka dots, watercolor designs, solids, or seasonal collections. Because every fabric contributes to the final appearance, no two projects will ever look exactly alike. This makes the pattern ideal for using fabric scraps while creating something visually striking. Besides being economical, scrap quilting encourages creativity and gives each finished clover its own personality.
Another reason why the Clover Motif Patchwork Quilt and Sewing Tutorial Pattern has become increasingly popular among sewing enthusiasts is its beginner-friendly construction. Although the finished design appears detailed, each petal follows the same basic construction method, making the project repetitive in the best possible way. Once the first petal is completed, the remaining pieces become much easier. Careful pressing, accurate seam allowances, and thoughtful fabric placement are the keys to achieving a professional-looking result that can be proudly displayed or gifted to family and friends.
Choosing Materials and Preparing the Fabric
The first step in creating the Clover Motif Patchwork Quilt and Sewing Tutorial Pattern is selecting your fabrics. Cotton quilting fabric is highly recommended because it is stable, easy to sew, and available in countless prints. Combining florals with geometric patterns creates visual contrast while maintaining harmony.
DISCOVER MORE FREE PATTERNS HERE!
Choose eight different fabrics for the clover leaves if you want a colorful appearance similar to the featured project. You may also use coordinated collections for a softer, more elegant style. The center circle and stem can be made using complementary solid fabrics.
Wash and press all fabrics before cutting. Prewashing helps minimize future shrinkage and prevents color bleeding after the project is completed. Pressing removes wrinkles that could affect cutting accuracy.
Prepare lightweight batting if you want a slightly padded finish. Thin batting gives the petals more structure while keeping them flexible enough for decorative use.
Use quality sewing thread that closely matches your fabrics. Neutral thread works well for most seams, while decorative topstitching may use contrasting colors if desired.
Gather your sewing tools before beginning. Fabric scissors, rotary cutter, cutting mat, acrylic ruler, sewing clips, pins, iron, seam gauge, and fabric marking pen will make the construction process much smoother.
Cutting and Sewing the Clover Petals
Begin by creating a paper template for one petal. Once you are satisfied with its proportions, trace the template onto fabric eight times, remembering to include a standard seam allowance around every piece.
Cut coordinating backing pieces for each petal. If using batting, cut identical batting pieces that fit inside the seam allowance to reduce bulk along the edges.
Place each front fabric right sides together with its backing fabric. Sew around the curved edges while leaving the straight bottom edge open for turning.
Carefully clip the curved seam allowance without cutting through the stitching. This allows the curved edges to lie flat after turning the fabric right side out.
Turn every petal right side out using a blunt turning tool. Gently push the curves into shape before pressing each piece with an iron. Crisp pressing dramatically improves the final appearance.
Arrange all completed petals into a clover shape before attaching them together. Experiment with the placement of prints until the colors appear balanced from every viewing angle.
Assembling the Clover and Creating the Stem
After arranging the petals, temporarily secure them using sewing clips or pins. Check that every petal overlaps evenly around the center before stitching.
Cut a small fabric-covered circle for the center of the clover. This circle hides the raw joining edges while creating a clean professional finish.
Hand stitch or machine stitch the petals together near their lower edges. Since the center circle will conceal these stitches, perfect appearance is not essential at this stage.
Create the stem by cutting a long strip of green fabric. Fold it lengthwise with right sides together, sew along the edge, then turn it right side out before pressing.
Lightly stuff the stem if you want a rounded dimensional appearance. For a flatter decorative style, simply press the fabric tube without stuffing.
Position the stem beneath the petals and secure it firmly before attaching the center circle. Double-check the overall symmetry before completing the final stitching.
Finishing Techniques and Creative Ideas
Once the clover is assembled, inspect every seam for consistency. Trim loose threads and lightly press the finished project one final time.
Decorative topstitching around each petal adds definition while helping the layers remain securely in place. This step is optional but provides a professional handcrafted appearance.
Consider adding quilting lines inside each leaf. Simple echo quilting or gentle curved stitching enhances texture while emphasizing the individual fabrics.
The finished Clover Motif Patchwork Quilt and Sewing Tutorial Pattern can be used in many creative ways. It works beautifully as a wall decoration, table centerpiece, seasonal ornament, pillow accent, quilt block, tote bag embellishment, or framed textile artwork.
If making multiple clovers, experiment with different fabric themes. Holiday prints, vintage florals, farmhouse fabrics, batiks, modern geometric prints, or pastel collections all produce unique visual effects while following the same construction process.
Store your finished project flat whenever possible. Gentle cleaning by hand and careful pressing will help preserve the fabric colors and maintain the shape of the petals for many years.
FAQ
What skill level is required for the Clover Motif Patchwork Quilt and Sewing Tutorial Pattern?
This project is suitable for beginners with basic sewing knowledge as well as experienced quilters looking for a relaxing decorative project.
Which fabric works best?
High-quality quilting cotton is the preferred choice because it is stable, easy to sew, and available in a wide variety of prints and colors.
Can I use fabric scraps?
Yes. This project is ideal for scrap quilting since each petal uses only a relatively small amount of fabric.
Do I need batting?
Batting is optional. Thin batting adds dimension and softness, while omitting it creates a lighter decorative piece.
Can I sew everything by hand?
Absolutely. Although a sewing machine speeds up the process, the entire project can be completed by hand using careful stitching.
How many petals should the clover have?
The featured design uses eight petals, but you may customize the project with six, seven, or even more petals depending on your preferred style.
Is this project suitable for gifts?
Yes. Handmade patchwork clovers make thoughtful gifts for birthdays, housewarmings, holidays, quilting friends, or anyone who appreciates handcrafted décor.
How can I personalize the design?
Try mixing different fabric collections, adding embroidery, decorative quilting, lace trim, buttons, or personalized labels to create a unique finished project.
Conclusion
The Clover Motif Patchwork Quilt and Sewing Tutorial Pattern is a rewarding sewing project that combines creativity, precision, and the timeless appeal of patchwork. Throughout this tutorial, you learned how to select fabrics, prepare templates, sew curved petals, assemble the clover, create the stem, and apply professional finishing techniques. Because every fabric combination produces a different visual result, this pattern offers endless opportunities for personalization while helping you build valuable quilting and sewing skills.
EASILY FIND THE PDF FOR THIS PATTERN HERE!
Whether displayed as home décor, incorporated into a larger quilt, or given as a handmade gift, this colorful clover is sure to stand out as a beautiful handcrafted creation. If you enjoyed this tutorial, please leave your honest opinion about the project and share your suggestions. Your feedback helps improve future tutorials and inspires even more creative patchwork and sewing ideas.