
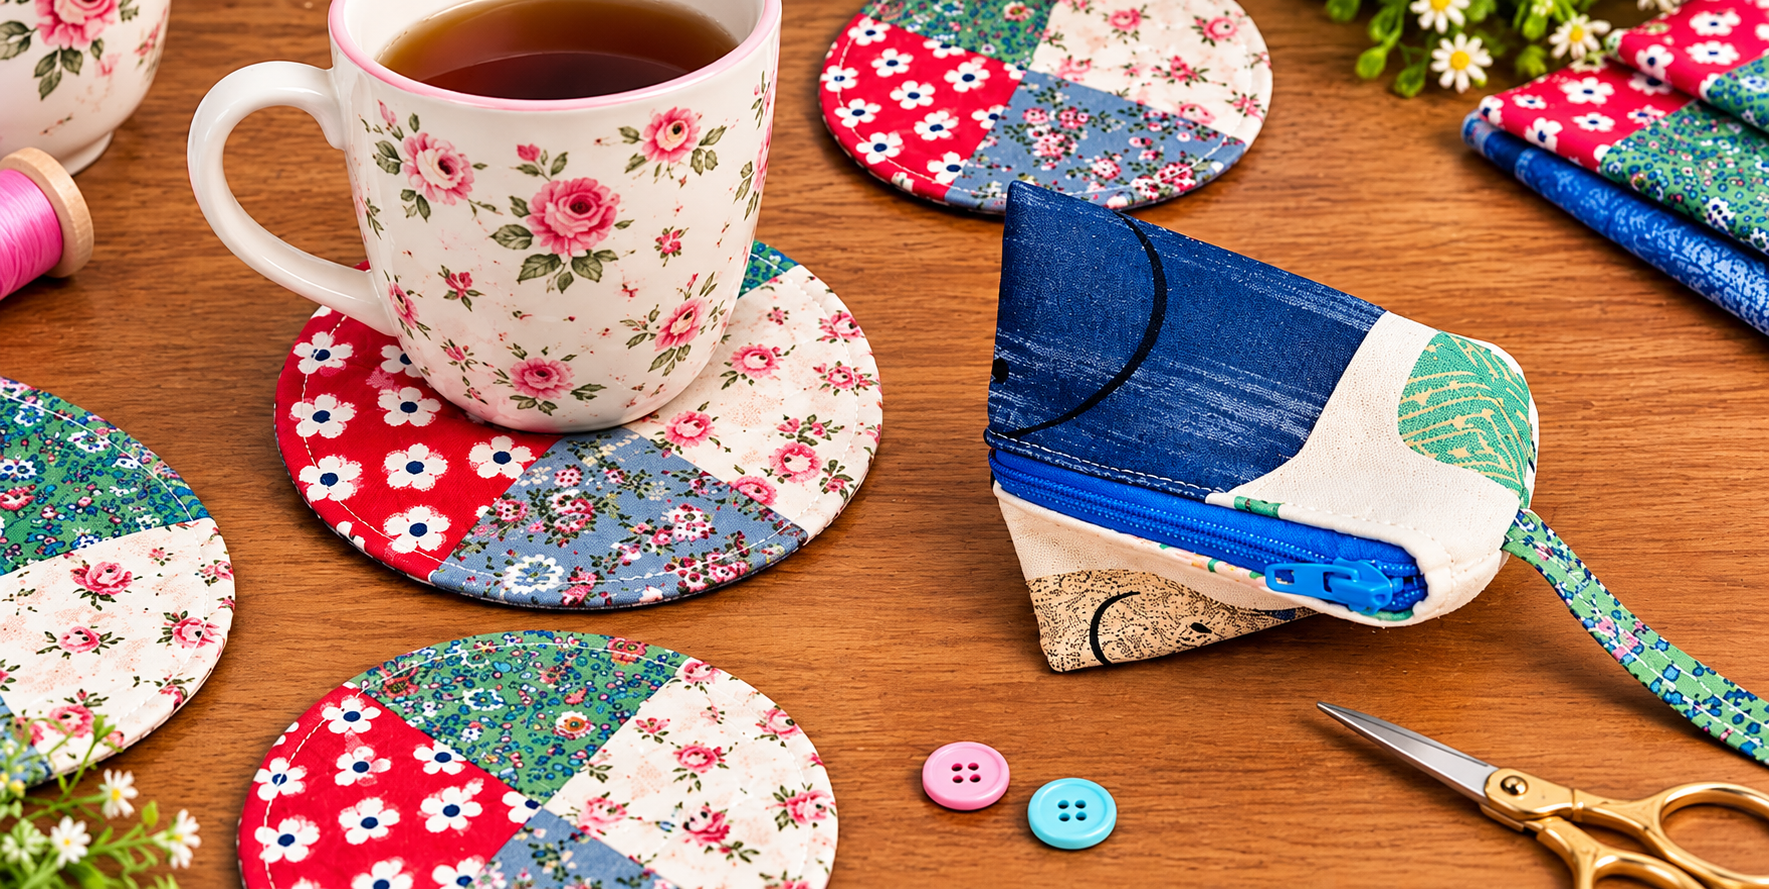
Cup placemat made from fabric scraps Pattern is a charming sewing project that transforms small pieces of leftover cotton into a useful, colorful, and reusable accessory for your table. Inspired by the round patchwork coaster shown in the image, this design combines several coordinating floral fabrics in a circular shape, creating a cheerful surface for a coffee mug, teacup, or small glass. The project is especially appealing because you do not need large pieces of fabric to complete it. Those beautiful scraps left from quilting, bag making, appliqué, or other sewing projects can finally become something practical. With careful cutting, simple piecing, light padding, and neat topstitching, even a small collection of remnants can produce a polished fabric scrap cup placemat.
The visual character of this project comes from mixing different prints while maintaining a balanced color palette. In the inspiration piece, red, green, blue, cream, and delicate floral patterns work together to produce a cottage-style patchwork appearance. You can recreate this feeling with four different fabrics or personalize the Cup placemat made from fabric scraps Pattern using scraps already available in your sewing basket. Small-scale prints are particularly effective because their details remain visible after the pieces are cut. Florals, dots, gingham, geometric motifs, solids, and vintage-inspired prints can all be combined. The secret is choosing fabrics with at least one or two colors in common so the finished placemat looks intentionally coordinated rather than randomly assembled.
Another advantage of this scrap fabric sewing project is that it can be adapted for both beginners and experienced sewists. The basic construction involves joining several fabric sections to create a patchwork circle, adding batting for protection and structure, attaching a backing, and finishing the curved perimeter neatly. A practical finished diameter is approximately 14 to 16 cm (5½ to 6¼ inches), which provides enough room for most standard mugs while still looking like a decorative coaster rather than a full-size table placemat. Once you understand the method, you can make an entire matching set, experiment with different patchwork arrangements, or enlarge the pattern to create coordinating trivets and table mats.
Choosing Materials and Preparing the Fabric Scrap Pattern
Begin your Cup placemat made from fabric scraps Pattern by selecting four coordinating cotton scraps. Quilting cotton is an excellent option because it is stable, easy to cut, and responds well to pressing. For a design similar to the photo, consider combining a bright red floral print, a green print, a soft blue floral, and a cream fabric with small roses. Each piece can be different, but the colors should communicate with one another visually.
DISCOVER MORE FREE PATTERNS HERE!
For one cup placemat, you only need relatively small scraps. Squares measuring approximately 10 x 10 cm (4 x 4 inches) provide plenty of material for most quarter-circle sections. You will also need a backing piece measuring approximately 18 x 18 cm (7 x 7 inches) and a similar-sized piece of thin batting. Cutting these layers slightly larger at first makes quilting easier because everything can be trimmed accurately after assembly.
Choose a lightweight batting rather than an extremely thick variety. Cotton batting works beautifully, while thin polyester batting or heat-resistant batting can also be considered depending on how you plan to use the finished mat. Remember that an ordinary fabric coaster is designed primarily for cups and mugs rather than extremely hot cookware. If you intend to make a trivet for hot pans, select materials specifically intended for that purpose.
Basic sewing supplies include a sewing machine, cotton or polyester thread, fabric scissors or a rotary cutter, cutting mat, ruler, pins or sewing clips, fabric marker, iron, and ironing board. A curved template is also useful. You can prepare a full circle template measuring around 16 cm (6¼ inches) in diameter and divide it into four sections to establish the patchwork layout.
Before cutting anything, press all your fabric scraps thoroughly. Small pieces can become distorted surprisingly easily, and wrinkles may affect both cutting accuracy and seam alignment. If a scrap has previously been folded for storage, use gentle steam when appropriate for the fabric. Flat, properly prepared cotton will make the following steps considerably easier.
When arranging the fabrics, think about contrast. Avoid placing two nearly identical prints next to each other unless you intentionally want a subtle transition. In the photographed style, the stronger red and green areas are balanced by lighter cream and blue sections. Lay the pieces on your table before sewing and move them around until the arrangement feels balanced. This simple preparation can dramatically improve the finished patchwork cup mat.
Cutting and Piecing the Round Patchwork Placemat
The easiest way to create the design is to first construct a square patchwork unit and then cut the circular shape. Cut four fabric squares approximately 9 x 9 cm (3½ x 3½ inches). These dimensions provide some extra working space and can be adjusted according to your preferred finished diameter. Arrange the four squares into a two-by-two layout, checking the orientation of flowers or other directional prints.
Take the two upper squares and place them right sides together. Sew along one edge using a consistent 0.6 cm (¼ inch) seam allowance. Repeat with the lower pair. Press the seams carefully. You can press them toward the darker fabric or press the seams in opposite directions so that they nest neatly when the two rows are joined.
Now place the two completed rows right sides together. Carefully match the center intersection, using a pin or sewing clip to prevent movement. Stitch across the joining edge with the same ¼-inch seam allowance. Press the finished patchwork unit flat. The meeting point of the four fabrics will become an important visual detail near the center of the finished circular mat.
At this stage, place your circular template over the patchwork square. Position the center of the template over the central seam intersection. Trace around the template with a removable fabric marker, but do not cut the circle yet if you plan to quilt the layers first. Keeping the surrounding fabric intact temporarily can make the layered construction easier to control.
If you prefer the slightly irregular segmented appearance suggested by the inspiration image, you can create sections of different sizes rather than four equal squares. For example, one fabric can occupy approximately one-third of the circle while the remaining fabrics fill smaller sections. This method requires more careful template preparation, but it creates a playful scrappy patchwork design.
Beginners should start with the four-section version because it provides the same colorful handmade character while keeping the sewing process straightforward. Once you have made one or two mats successfully, experiment with six wedges, narrow strips, log-cabin arrangements, or randomly pieced scraps. The fundamental idea behind the Cup placemat made from fabric scraps Pattern remains the same: build a stable decorative top before transforming it into a neatly finished circle.
Adding Batting, Quilting, and Finishing the Curved Edge
Place your completed patchwork top over a piece of thin batting. The right side of the patchwork should face upward. Smooth both layers carefully so there are no wrinkles. You can temporarily secure them with quilting pins, clips around the outside, or another appropriate basting method. The batting gives the placemat its softly padded appearance and helps protect the tabletop from ordinary warmth and moisture.
Next, add simple quilting stitches to hold the layers together. Straight stitching close to the patchwork seams is an easy option for beginners. You might also sew diagonal lines, a small diamond grid, or concentric curves. Keep the quilting relatively simple because the printed fabrics already provide plenty of visual detail. Matching thread creates a subtle result, while contrasting thread can emphasize the patchwork structure.
After quilting the top and batting together, place the circular template back onto the center of the project. Trace and cut the circle accurately through both layers. You now have a clean circular patchwork top. Use this piece as a guide to cut an identical circle from your selected backing fabric. A coordinating solid or small floral print works beautifully for the back.
Place the quilted top and backing right sides together. Match the circular edges carefully and secure them with clips or pins. Sew around the perimeter using approximately a 0.7 cm (¼ inch) seam allowance, leaving an opening of about 5 cm (2 inches) for turning. Sew slowly around the curve rather than trying to move the fabric quickly. Smooth, controlled stitching produces a much more attractive circle.
Before turning the placemat right side out, make small clips around the curved seam allowance. These clips allow the seam to spread properly when turned and help prevent puckering. Be careful not to cut through your stitching. Turn the project through the opening, then gently push the curved perimeter outward using your fingers or a blunt turning tool. Press the circle carefully until the edge looks smooth and even.
Fold the raw edges of the turning opening inward and press them so they align with the rest of the perimeter. Finish by topstitching around the entire circle approximately 2 to 3 mm from the edge. This closes the opening and creates a crisp professional finish at the same time. Your basic fabric scrap cup placemat is now ready to hold a favorite mug or teacup.
Creative Variations and Tips for a Beautiful Finished Set
Once you understand the basic construction, consider making several placemats at the same time. Batch sewing makes the process more efficient. Cut all the fabric pieces first, assemble every patchwork top, prepare the batting and backing, quilt the pieces, and then complete all the circular edges. A coordinated collection of four or six patchwork coasters can make an attractive table set.
You do not have to make every mat identical. In fact, slight variations are part of the charm of scrap sewing. Use the same four fabrics but rotate their positions on each placemat. One coaster might feature red prominently, while another emphasizes green or blue. Because the same fabrics repeat throughout the set, the pieces will still look coordinated when placed together.
Decorative topstitching is another easy way to customize the pattern. A simple straight stitch gives a clean traditional appearance, but you can experiment with a slightly longer stitch length or one of your sewing machine’s suitable decorative stitches. Always test decorative stitching on leftover fabric and batting first so you can confirm the tension and appearance before sewing the finished project.
You can also change the size. A smaller 10 to 12 cm (4 to 4¾ inch) version works as a traditional coaster, while an 18 to 20 cm (7 to 8 inch) circle provides more space for a mug and a small snack. Larger versions can become decorative table mats, although projects intended for very hot cookware require appropriate heat-resistant materials.
Fabric choice can completely transform the personality of the pattern. Pastel florals create a soft spring look, orange and brown prints create an autumn version, and red, green, cream, and gold fabrics can produce a festive Christmas set. Denim scraps mixed with printed cotton can create a more rustic style, although differences in fabric thickness should be managed carefully.
Most importantly, enjoy the imperfect individuality of each handmade piece. A Cup placemat made from fabric scraps Pattern is meant to celebrate creative reuse. Slight differences in print placement make each mat unique. Focus on accurate seams, smooth curves, secure quilting, and a neatly topstitched edge rather than trying to make every printed flower or patch sit in exactly the same position.
FAQ About the Cup Placemat Made From Fabric Scraps Pattern
What is the best fabric for a cup placemat?
Quilting cotton is one of the most convenient choices because it is stable, washable, and available in countless prints. Cotton scraps from previous quilt and sewing projects are particularly useful. Try to combine fabrics of similar weight so the finished mat lies evenly on the table.
How large should a cup placemat be?
A finished diameter of approximately 14 to 16 cm (5½ to 6¼ inches) works well for many mugs and teacups. You can make the circle smaller for a traditional coaster or enlarge it if you want room for both a cup and a small snack.
Do I need batting inside the placemat?
Batting is recommended because it provides structure, absorbs a small amount of condensation, and creates the softly padded appearance associated with quilted projects. Thin batting is generally easier to sew than thick batting, especially around curved edges.
Can I make this pattern entirely from scraps?
Yes. That is one of the main advantages of the Cup placemat made from fabric scraps Pattern. The top can be constructed from very small pieces, and the backing can also come from a larger leftover scrap. Even narrow strips can be pieced together before being cut into a circle.
Can beginners sew this pattern?
Yes. The project uses fundamental sewing skills such as straight seams, a ¼-inch seam allowance, pressing, simple quilting, curved sewing, turning, and topstitching. Beginners should work slowly when sewing the circular perimeter because consistent stitching will help create a smooth shape.
How do I get a smooth circular edge?
Use an accurate template, sew with a consistent seam allowance, and clip the seam allowance around the curve before turning. After turning, gently work the edge outward with your fingers and press carefully. Final topstitching will help stabilize the shape.
Can I wash fabric cup placemats?
Washability depends on the fabrics, batting, and thread used. If you want easily washable mats, prewash fabrics when appropriate and choose compatible materials throughout the project. Gentle washing and reshaping while damp can help preserve the circular form.
Can I use denim scraps?
Yes, but denim is heavier than quilting cotton. Lightweight denim works best, especially when paired with other fabrics of similar thickness. If the denim is already quite heavy, consider using thinner batting to prevent excessive bulk around the seams.
What can I do with very tiny scraps?
Join tiny scraps together to create a larger patchwork panel. Small strips and irregular pieces can be sewn using a free-form approach and then trimmed into the required circular shape. This is an excellent way to reduce the amount of useful fabric discarded after larger sewing projects.
Can I add binding instead of turning the edge?
Yes. Instead of placing the backing right sides together and turning the project, quilt all layers together and finish the raw circular perimeter with bias binding. Bias-cut binding bends around curves more successfully than straight-grain binding and gives the coaster a traditional quilted finish.
How can I keep the patchwork center aligned?
Pin carefully where the seams intersect before joining the two rows. Press the first pair of seams in opposite directions so they nest together at the center. Sew slowly across the intersection and check the alignment before continuing with the remaining construction.
Can I make matching accessories from the same scraps?
Certainly. Once your placemats are complete, remaining scraps can be used for small pouches, mug rugs, fabric baskets, patchwork ornaments, keychain tabs, or other decorative sewing projects. Repeating the same fabrics helps create a coordinated handmade collection.
Conclusion
The Cup placemat made from fabric scraps Pattern is a simple way to transform leftover fabric into something attractive and useful. The project begins by selecting coordinating cotton scraps, arranging them into a balanced patchwork design, and joining the sections with accurate ¼-inch seams. Adding lightweight batting provides structure and a comfortable quilted texture, while a coordinating backing completes the layered construction.
The finishing process is equally important. Careful quilting keeps the layers stable, accurate circular cutting creates the characteristic shape, and clipping the curved seam before turning helps produce a smooth perimeter. A final line of edge topstitching closes the turning opening while giving the project a clean, polished appearance.
Once you have mastered the basic version, the possibilities become much broader. Change the number of fabric sections, experiment with floral and geometric prints, create seasonal color combinations, or make an entire set using different arrangements of the same scraps. You can also adjust the dimensions to create traditional coasters, generous mug mats, or larger decorative table pieces.
Most of all, this project demonstrates how even small remnants can still have creative value. Instead of leaving colorful pieces forgotten in a scrap basket, the Cup placemat made from fabric scraps Pattern turns them into a practical handmade item that can be enjoyed every day. If you make your own version, leave your sincere opinion about the project and share your suggestions, favorite fabric combinations, or creative variations. Your ideas may inspire an entirely new way to use those beautiful fabric scraps.