
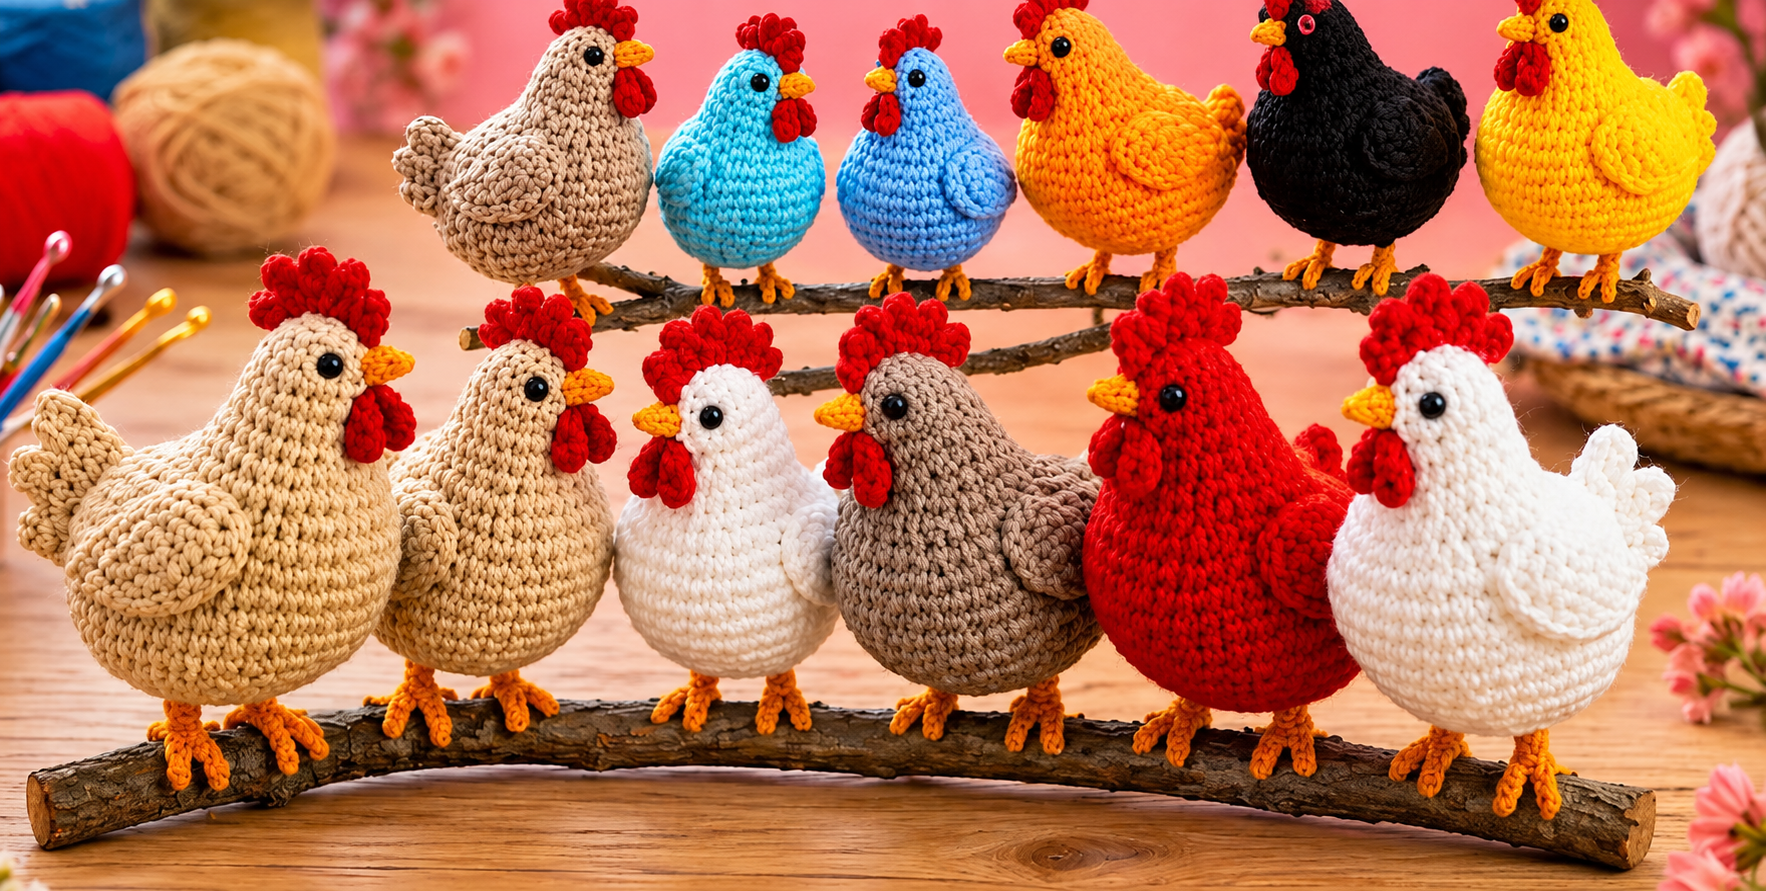
The Keychain sized crochet chicken Pattern is a charming project for anyone who enjoys creating small, practical, and decorative crochet pieces. This miniature chicken can be attached to keys, backpacks, handbags, craft-room organizers, zipper pulls, or even used as a small handmade gift. Because the finished piece is compact, it is also an excellent way to use leftover yarn from previous projects instead of letting small amounts go unused. The design combines a rounded crocheted body with tiny wings, a colorful comb, a beak, and simple facial details that give the chicken plenty of personality. Although the project looks detailed when finished, the construction is based mainly on basic amigurumi crochet techniques, including the magic ring, single crochet, increases, and decreases. By following the rounds carefully and keeping the stitches firm, even crocheters with limited amigurumi experience can create an attractive little chicken that is sturdy enough to work as a keychain.
One of the most useful features of this Keychain sized crochet chicken Pattern is that it can easily be customized. Traditional chicken colors such as cream, brown, white, red, yellow, and orange look beautiful, but there is no requirement to stay with realistic shades. A turquoise chicken with a red comb, a pastel pink chicken with a yellow beak, or a black chicken with bright orange details can make the finished keychain even more playful. Cotton yarn is especially suitable because it creates clear, defined stitches and holds its shape well, while acrylic yarn can provide a softer and slightly lighter result. The final dimensions will depend on yarn thickness, hook size, and personal tension, but a small chicken approximately 7 to 9 cm tall works particularly well for a keychain. The pattern can also be made slightly smaller by using thinner yarn and a smaller crochet hook while following the same general construction.
Before beginning the Keychain sized crochet chicken Pattern, it helps to understand the crochet abbreviations used throughout the instructions. In this pattern, MR means magic ring, ch means chain, sc means single crochet, inc means increase by working two single crochet stitches into one stitch, dec means decrease by joining two stitches into one, sl st means slip stitch, st means stitch, and FO means fasten off. The project is worked primarily in continuous spiral rounds, so a stitch marker is strongly recommended. Move the marker to the first stitch of every new round so you always know where the round begins. Crochet tension should be firm enough that the stuffing does not show between the stitches, but the fabric should not become so tight that inserting the hook becomes uncomfortable. Once these basic terms and techniques are understood, the remaining construction becomes a straightforward sequence of shaping, stuffing, sewing, and finishing.
Materials, Crochet Abbreviations, and Preparation
To make one crochet chicken keychain, prepare a small amount of DK or sport-weight cotton yarn for the body. Approximately 20 to 30 grams is normally more than enough for a miniature project. You will also need small amounts of red yarn for the comb and wattle, orange or yellow yarn for the beak and feet, and a coordinating shade for the wings if you want them to contrast with the body.
DISCOVER MORE FREE PATTERNS HERE!
Choose a crochet hook that produces a dense fabric. For many DK cotton yarns, a hook between 2.5 mm and 3.0 mm works well. The exact hook is less important than the finished tension. If large openings appear between the stitches, try moving down one hook size. A firmly crocheted surface is particularly important for an amigurumi keychain because it will be handled frequently.
Other useful supplies include polyester fiberfill, a yarn needle, scissors, a removable stitch marker, sewing pins, and a metal keychain ring with a short chain or loop. For the eyes, you may use small safety eyes or embroider them with black yarn. Embroidered eyes can be a practical choice when making the chicken for situations where removable plastic components are undesirable.
The main body begins with an MR, or magic ring. The magic ring is an adjustable starting loop that allows the center of the first crochet round to close tightly. Insert the hook into the loop, pull through the yarn, and crochet the required stitches into the center. When the stitches are finished, pull the yarn tail firmly until the opening closes.
An increase, abbreviated inc, means working two single crochet stitches into the same stitch. Increases expand the circumference of the chicken and create its rounded body. A decrease, abbreviated dec, does the opposite by combining two stitches. Invisible decreases are especially helpful in amigurumi because they create a smooth surface without obvious gaps.
Before starting the body, place all supplies within reach and decide on the chicken’s color combination. For a classic appearance, try a beige, cream, brown, white, yellow, or red body with a bright red comb. Preparing the materials first makes it easier to work through the Keychain sized crochet chicken Pattern without interrupting the shaping process.
Step-by-Step Crochet Chicken Body Pattern
Begin the body using your main yarn color. Round 1: make an MR and crochet 6 sc into the ring. Pull the tail firmly to close the center. Round 2: work inc in each st around, giving you 12 stitches. Round 3: repeat (1 sc, inc) six times for a total of 18 stitches. Place your stitch marker after completing the first stitch of every new round.
For Round 4, repeat (2 sc, inc) six times to reach 24 stitches. In Round 5, repeat (3 sc, inc) six times, finishing with 30 stitches. These gradual increases create the rounded lower section of the mini crochet chicken. Keep the tension consistent so that the increases are distributed evenly rather than forming noticeable points.
Work Rounds 6 through 10 with 30 sc around, without additional increases. These straight rounds build the height of the body. If you prefer a shorter chicken, you can work four straight rounds instead of five. For a slightly taller version, add one extra round. Small modifications like these allow the same Keychain sized crochet chicken Pattern to produce several different silhouettes.
Now begin shaping the upper body and neck. For Round 11, repeat (3 sc, dec) six times to reduce the stitch count to 24. For Round 12, crochet 24 sc around. In Round 13, repeat (2 sc, dec) six times, leaving 18 stitches. Begin adding polyester fiberfill at this stage, inserting small amounts rather than one large piece.
Continue with Round 14: 18 sc around. For Round 15, repeat (1 sc, dec) six times to reduce to 12 stitches. Add more stuffing and shape the chicken gently with your fingers. The bottom should remain rounded, while the upper area can be slightly narrower. Avoid overstuffing because excessive filling can stretch the crochet fabric and expose the fiber through the stitches.
For Round 16, work 6 dec around, leaving 6 stitches. Fasten off with a long tail, thread the tail through the front loops of the remaining stitches, and pull gently to close the opening. Secure the yarn and weave it into the body. At this stage, the main body of your crochet chicken keychain pattern is complete and ready for the decorative chicken features.
Creating the Wings, Comb, Beak, Feet, and Keychain Loop
The wings add dimension to the design without making the keychain bulky. Make an MR and work 6 sc into it. In the next round, work inc around for 12 stitches. Crochet one more round of 12 sc, flatten the small circle, and fasten off with a long sewing tail. Make a second identical wing and position both pieces on the sides of the chicken.
For the red comb, attach red yarn near the top of the head. A simple comb can be formed directly on the body using small loops. Crochet ch 3, then sl st into the same or neighboring stitch. Repeat this sequence three times to create three rounded points. If you want a more pronounced comb, use ch 4 for the center point and ch 3 for the two outer points.
Create the beak using orange or yellow yarn. One simple method is to attach the yarn to the front of the chicken and crochet ch 2, then work a slip stitch back into the attachment point. Alternatively, make a very small triangular piece separately and sew it in place. Keep the beak proportional to the head so it does not overpower the small amigurumi chicken.
The wattle can be made with red yarn just below the beak. Attach the yarn, ch 3, and slip stitch back near the starting position. Repeat once if you want two small wattles. For the feet, use orange yarn to embroider three short toes at the base of each leg area. Because this is a keychain-sized design, flat embroidered feet are often more practical than bulky three-dimensional legs.
Add the eyes symmetrically above and slightly behind the beak. If using embroidery, make two or three small black stitches for each eye. A tiny white highlight stitch may be added for extra expression. If using safety eyes, they should normally be installed before the body is completely closed, so plan their position before finishing the stuffing stage.
Finally, attach the keychain loop securely to the top of the chicken. Thread a strong piece of matching yarn through several internal stitches near the top, pass it through the keychain chain or ring, and sew through the body several times. Do not rely on a single crochet stitch to hold the metal hardware. Reinforcing the attachment across multiple stitches helps the Keychain sized crochet chicken Pattern withstand regular handling.
Keychain Sized Crochet Chicken Pattern FAQ
What size should a crochet chicken keychain be? A practical finished height is usually around 7 to 9 cm, although the result can vary depending on yarn thickness and crochet tension. Smaller hooks and thinner yarn create a more miniature chicken, while thicker yarn creates a larger plush-style version. The most important consideration is keeping the design comfortable to carry on keys or a bag.
What yarn is best for the Keychain sized crochet chicken Pattern? Cotton yarn is one of the best choices because it gives excellent stitch definition and creates a durable fabric. Cotton-acrylic blends are also suitable. Acrylic yarn works well when you want a softer finish. Try to avoid very fuzzy yarn for your first chicken because fuzzy fibers can make individual stitches more difficult to identify.
Can beginners make this crochet chicken? Yes. The project uses mostly single crochet, increases, decreases, chains, and slip stitches. These are common beginner-friendly amigurumi techniques. The most challenging part may be working with small pieces and attaching them neatly, but using pins before sewing can make positioning the wings and facial details much easier.
How can I make the chicken smaller? Use thinner yarn with a smaller crochet hook while keeping the same stitch counts. For example, moving from DK yarn to sport or fingering-weight yarn can significantly reduce the finished size. You can also remove one straight body round, although changing too many rounds may alter the proportions of the miniature crochet chicken.
How much stuffing should I use? Add enough fiberfill to give the chicken a firm, rounded shape without stretching the stitches. Insert small pieces gradually and use the blunt end of your crochet hook or another suitable tool to distribute the stuffing. The final chicken should feel softly firm rather than hard. Correct stuffing helps maintain a smooth, professional-looking shape.
How do I keep the keychain attachment from coming loose? Use strong yarn and sew the hardware through several stitches at the top of the chicken. Pass the yarn through the body multiple times before knotting and weaving in the tail. Inspect the attachment gently before using the keychain. Reinforcement is especially important because keychains experience more movement and pulling than decorative amigurumi displayed on a shelf.
Conclusion
The Keychain sized crochet chicken Pattern is a small project that combines simple amigurumi construction with plenty of room for creativity. You learned how to shape the rounded body using single crochet increases and decreases, how to stuff the piece evenly, and how to add recognizable chicken details such as wings, a red comb, a tiny beak, wattles, eyes, and embroidered feet.
You also learned the meaning of important crochet abbreviations such as MR, sc, inc, dec, sl st, ch, st, and FO. Understanding these basic crochet terms makes the pattern much easier to follow and also prepares you for many other amigurumi crochet patterns that use similar construction methods.
Color is one of the easiest ways to personalize this project. Cream and brown create a rustic farmhouse-style chicken, while bright red, blue, yellow, orange, or pastel yarns can create a cheerful collection. Making several chickens in different colors is also a useful way to practice consistent tension and improve small-piece assembly skills.
The compact format makes this pattern ideal for using leftover yarn, practicing crochet in the round, or preparing small handmade items for gifts. Once you understand the basic construction, you can experiment with different wing shapes, comb sizes, embroidered expressions, or even create a coordinated group of colorful crochet chicken keychains.
Remember that careful finishing makes a major difference in a miniature crochet project. Secure every yarn tail, position the details before sewing, distribute the stuffing evenly, and reinforce the metal keychain attachment. These simple finishing steps help the completed chicken look cleaner and remain more durable during everyday use.
Now that you know how to complete the Keychain sized crochet chicken Pattern from the first magic ring to the final keychain loop, try creating your own color combination and personality for the design. Leave your sincere opinion about the pattern and share any suggestions, color ideas, or modifications you would like to try. Your creative ideas can inspire even more variations of this adorable little crochet chicken.