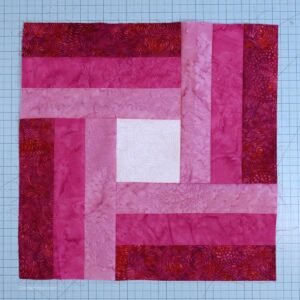
The Rainbow Rail Fence Quilt Block Tutorial is an exciting project for quilters of all skill levels. This pattern combines the traditional rail fence design with a vibrant rainbow color scheme, resulting in a stunning visual effect.
Whether you’re a beginner or an experienced quilter, this tutorial will guide you step-by-step in creating a beautiful quilt block that can be used for a variety of quilting projects.
This quilt block is perfect for adding a splash of color to your quilting collection. The Rainbow Rail Fence Quilt Block Tutorial provides clear instructions and measurements, making it easy to follow and ensuring that your finished block looks fantastic. With simple strip piecing techniques and careful color placement, you’ll achieve a dynamic and eye-catching result.

In this tutorial, you’ll learn how to select the right fabrics, cut your strips accurately, and sew them together with precision. The Rainbow Rail Fence Quilt Block is not only fun to create but also an excellent way to experiment with colors and patterns. Follow along as we break down the process step by step.
1. Materials and Tools Needed
To begin your Rainbow Rail Fence Quilt Block, gather the necessary materials and tools. Having everything prepared in advance will ensure a smooth quilting experience.
- Fabric Selection: Choose six different colors that represent the rainbow. Opt for high-quality cotton fabric to ensure durability and vibrant colors.
- Cutting Tools: A rotary cutter, self-healing cutting mat, and a quilting ruler will help you achieve precise cuts.
- Sewing Machine: A reliable sewing machine with a quarter-inch foot for accurate seams.
- Thread: Use a high-quality cotton thread that complements your fabric colors.
- Iron and Ironing Board: Pressing your fabric strips helps to achieve clean and crisp seams.
- Pins or Clips: These will help hold your fabric strips in place while sewing.
Having these tools and materials on hand will make the process easier and more enjoyable. The key to a successful Rainbow Rail Fence Quilt Block is organization and precision.
2. Cutting and Preparing Your Fabric
Proper fabric preparation is crucial for achieving a professional-looking quilt block. Follow these steps to ensure your pieces fit together perfectly.
- Measure and Cut Strips: Using your quilting ruler and rotary cutter, cut your chosen fabrics into strips that measure 2.5 inches wide.
- Organize Colors: Arrange your fabric strips in the desired rainbow order to visualize the final look.
- Press Fabric: Use your iron to remove any wrinkles and press the fabric strips for accurate sewing.
- Stack Strips: Layer the strips in the correct order to maintain consistency when sewing.
- Label Pieces: If you’re working with multiple blocks, labeling your fabric can help avoid confusion.
- Check for Accuracy: Double-check measurements to prevent errors that could affect the final assembly.
Taking the time to prepare your fabric correctly will result in a neat and visually appealing Rainbow Rail Fence Quilt Block.
3. Sewing the Strips Together
Once your fabric is cut and prepared, it’s time to sew the strips together to form the rail fence pattern. Follow these steps carefully.
- Arrange Strips: Lay out your strips in the desired order to ensure a balanced color distribution.
- Sew with a 1/4″ Seam: Use a consistent seam allowance to achieve precise and even rows.
- Press Seams: After sewing each strip, press the seams open or to one side to reduce bulk.
- Trim Edges: Square up the edges to remove any uneven sections.
- Repeat for Multiple Blocks: If making several blocks, maintain consistency by following the same process.
- Inspect the Block: Check for any sewing mistakes or misaligned strips before proceeding.
With careful stitching and attention to detail, your Rainbow Rail Fence Quilt Block will come together beautifully.
4. Assembling and Finishing the Quilt Block
Now that your strips are sewn together, it’s time to assemble and finish your quilt block to create the final design.
- Cut Units: Slice the sewn strip sets into 6.5-inch squares to form the individual block units.
- Arrange the Blocks: Lay out the blocks in a rail fence pattern, alternating the strip direction to create the design.
- Join Blocks: Sew the blocks together with a 1/4″ seam allowance.
- Press the Final Seams: Ensure all seams are well-pressed for a polished look.
- Check for Accuracy: Measure your completed block to ensure it aligns with the intended dimensions.
- Trim if Needed: Make final trims to achieve perfect alignment.
By following these steps, your Rainbow Rail Fence Quilt Block will be ready to be incorporated into larger quilt projects.
FAQ
Q: What size should the finished Rainbow Rail Fence Quilt Block be? A: The finished block typically measures 6.5 inches square before sewing it into a quilt.
Q: Can I use scraps for this quilt block? A: Yes! This pattern is perfect for using fabric scraps, especially in a variety of rainbow colors.
Q: What type of fabric works best for this pattern? A: High-quality quilting cotton is recommended for its durability and vibrant color retention.
Q: How can I make the quilt block larger? A: Simply increase the number of strips and adjust the cutting dimensions accordingly.
Q: Is this quilt block suitable for beginners? A: Absolutely! The strip piecing technique makes it a great project for beginners.
PATTERN HERE 🔥
The Rainbow Rail Fence Quilt Block Tutorial provides a fun and colorful way to enhance your quilting skills. By following the step-by-step instructions outlined in this guide, you can create a stunning quilt block that adds a vibrant touch to any quilt. We hope you enjoyed this tutorial and found it helpful. Share your thoughts and suggestions in the comments below!

