
Rag Quilt: A Step-by-Step Guide – Quilt Pattern is one of the most popular quilting projects for beginners and experienced crafters alike. A rag quilt combines comfort, texture, and rustic beauty into a single handmade creation that can be cherished for years. Its distinctive frayed seams create a cozy appearance that makes every quilt feel warm and inviting.
Creating a rag quilt is a rewarding experience because it does not require advanced sewing skills. Unlike traditional quilts that hide seams inside the layers, a rag quilt pattern places the seams on the outside, producing the signature fluffy edges that make this quilting style unique. This feature also makes the construction process simpler and more enjoyable for many sewing enthusiasts.
Whether you are making a gift for a loved one, decorating your home, or starting a new quilting hobby, following a Rag Quilt: A Step-by-Step Guide can help you achieve beautiful results. The combination of practical techniques and creative fabric choices allows every project to become a personal masterpiece. With patience and attention to detail, even beginners can create a stunning quilt.
A major advantage of a rag quilt pattern is the flexibility it offers. Quilters can use cotton, flannel, denim, or a combination of fabrics to create different textures and visual effects. The finished quilt can be tailored to match any room décor, making it both functional and decorative. Another reason for the popularity of rag quilts is their durability. The multiple fabric layers provide warmth and comfort, while the exposed seams become softer with every wash. Over time, the quilt develops even more character, enhancing its handmade charm. If you have been searching for a creative sewing project that is both practical and beautiful, this Rag Quilt: A Step-by-Step Guide – Quilt Pattern will provide the knowledge you need to begin confidently. Let’s explore the process from start to finish.
Understanding the Basics of a Rag Quilt
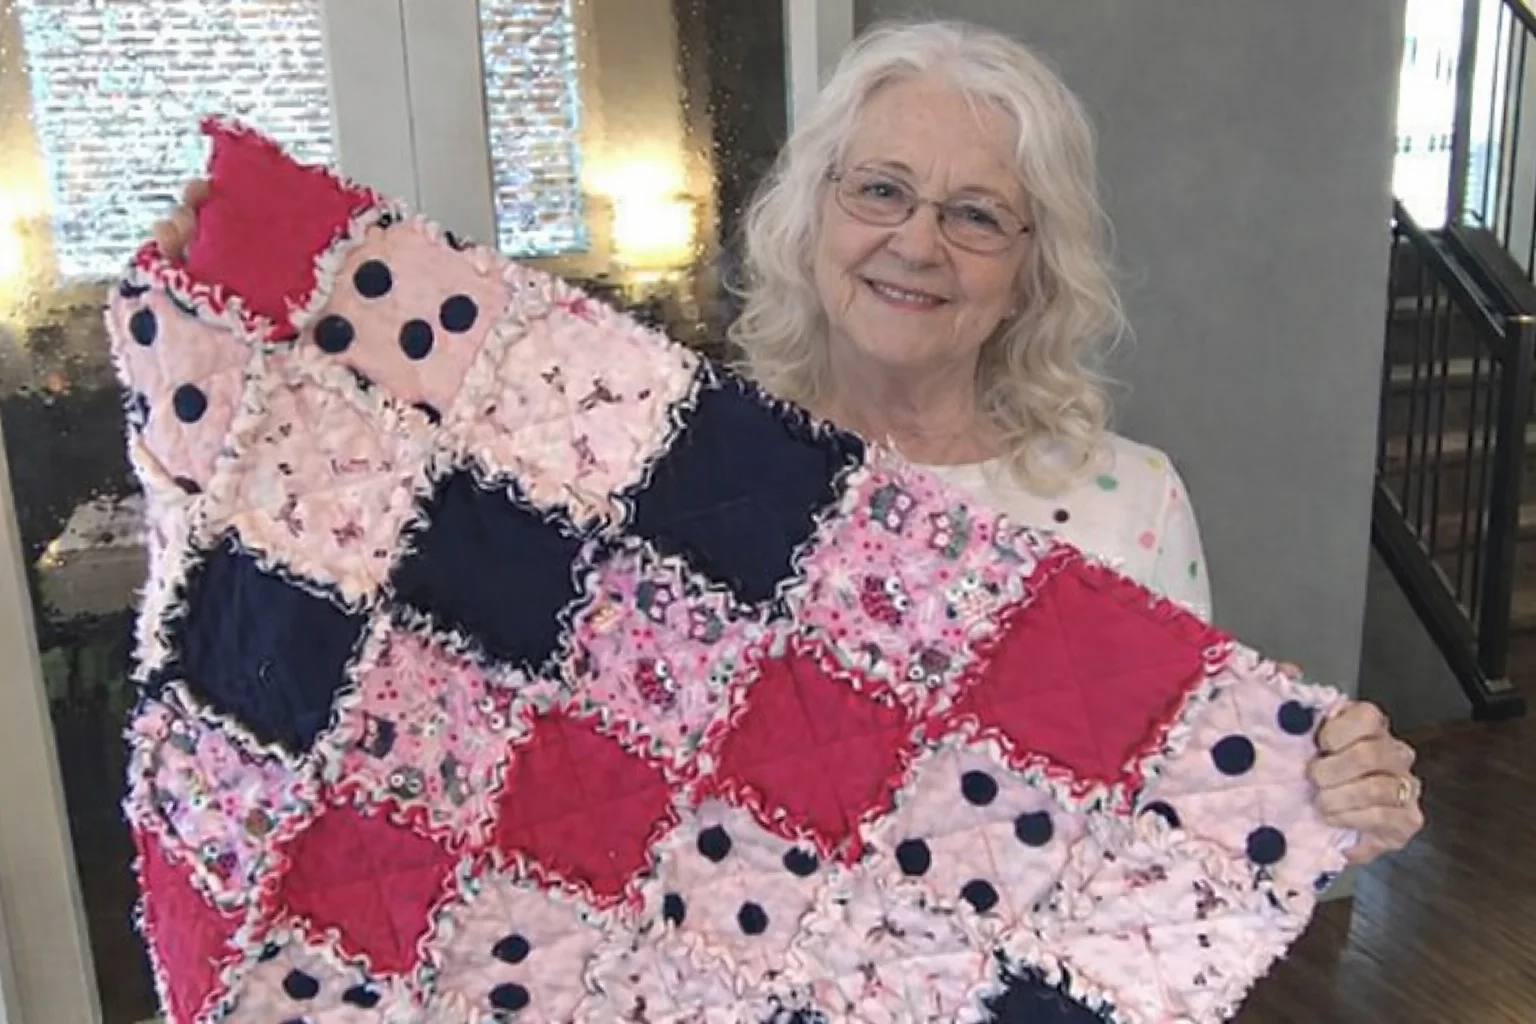
A rag quilt differs from traditional quilting because the seam allowances are intentionally exposed on the front side of the quilt. These exposed seams are clipped and washed to create the signature ragged appearance.
DISCOVER MORE FREE PATTERNS HERE!
Most rag quilt patterns use squares cut to the same size, making assembly straightforward. This simplicity makes the project ideal for beginners who want to practice sewing and quilting techniques.
The typical rag quilt consists of three layers: a top fabric, batting or middle layer, and backing fabric. These layers are sewn together before being joined to other blocks.
Flannel is one of the most popular materials for a rag quilt because it frays beautifully and creates a soft, cozy finish. However, cotton fabrics are also widely used.
Choosing complementary colors and patterns can significantly enhance the visual appeal of your quilt. Coordinated fabric collections often make the design process easier.
The beauty of a Rag Quilt: A Step-by-Step Guide lies in its versatility. You can create baby quilts, lap quilts, bed quilts, or decorative throws using the same fundamental technique.
Choosing Materials and Preparing Your Fabric
The first step in creating a successful rag quilt pattern is selecting quality materials. Durable fabrics will ensure the quilt lasts for years while maintaining its appearance.
Cotton and flannel fabrics are excellent choices because they are easy to sew and fray attractively after washing. Many quilters enjoy combining both materials for added texture.
Before cutting your fabric, it is recommended to prewash and dry it. This helps prevent future shrinkage and ensures consistent results.
Accurate cutting is essential for a professional-looking quilt. Rotary cutters, quilting rulers, and self-healing mats can improve precision significantly.
Most beginners start with squares measuring between five and ten inches. Larger squares create quicker projects, while smaller squares allow for more intricate designs.
Organizing your fabric pieces before sewing can save time and reduce mistakes. Lay out the arrangement on a flat surface and experiment with different color combinations until you achieve a pleasing design.
Step-by-Step Construction Process
The construction of a rag quilt begins by creating individual quilt sandwiches. Each sandwich typically consists of a top fabric square, a middle layer, and a backing square.
Align the layers carefully and sew an X from corner to corner across each square. This secures the layers and adds decorative stitching.
Once all squares are prepared, begin sewing them together in rows. Remember that the seam allowances should face outward rather than inward.
Continue joining the rows until the entire quilt top is assembled. Take your time to maintain consistent seam allowances throughout the project.
After assembly, trim and clip the exposed seam allowances at regular intervals. Be careful not to cut through the stitching. These clips are what create the characteristic ragged texture after washing.
Wash and dry the finished quilt according to the fabric requirements. The agitation of the washing machine helps the seams fray, producing the soft and textured finish that defines a rag quilt pattern.
Tips for Finishing and Caring for Your Rag Quilt
Proper finishing techniques can greatly improve the durability and appearance of your rag quilt. Always inspect seams before washing to ensure they are secure.
Using a lint trap during the first few washes can help manage the excess fibers produced during the fraying process. This is a normal part of creating a rag quilt.
Regular washing softens the quilt and enhances its cozy texture. Many quilters find that the quilt becomes even more beautiful over time.
If loose threads appear after washing, simply trim them carefully with scissors. This maintenance helps keep the quilt looking neat and attractive.
Storage is also important. Keep the quilt in a clean, dry area away from excessive moisture to prevent fabric damage.
With proper care, a Rag Quilt: A Step-by-Step Guide – Quilt Pattern project can become a treasured family heirloom passed down through generations.
FAQ About Rag Quilt: A Step-by-Step Guide – Quilt Pattern
What is a rag quilt?
A rag quilt is a quilt featuring exposed seam allowances that are clipped and frayed to create a soft, textured appearance.
Is a rag quilt suitable for beginners?
Yes. Many beginners choose a rag quilt pattern because it is simpler than traditional quilting and requires fewer advanced techniques.
What fabrics work best for rag quilts?
Flannel and cotton are the most popular choices. Both fabrics fray well and provide excellent comfort and durability.
Do I need batting inside a rag quilt?
Not necessarily. Some rag quilts use batting for added warmth, while others use only fabric layers for a lighter finish.
How often should I wash a rag quilt?
Wash as needed following the fabric care instructions. Frequent washing helps soften the seams and improve the texture.
Why do I need to clip the seams?
Clipping allows the seam allowances to fray properly during washing, creating the signature ragged appearance.
Can I make a rag quilt without a sewing machine?
While possible by hand, using a sewing machine makes the process much faster and ensures stronger seams.
How long does it take to make a rag quilt?
The time depends on the quilt size and your experience level. Small projects may be completed in a weekend, while larger quilts can take several days.
Conclusion
Creating a Rag Quilt: A Step-by-Step Guide – Quilt Pattern project is a wonderful way to combine creativity, comfort, and practical sewing skills. From selecting fabrics and preparing materials to assembling blocks and finishing the quilt, every step contributes to a beautiful handmade result. The simplicity of the construction process makes rag quilts ideal for beginners, while the endless design possibilities keep experienced quilters inspired.
By following the techniques discussed in this guide, you can confidently create a durable, cozy, and visually appealing quilt that will be enjoyed for years. The unique texture, warmth, and rustic charm of a rag quilt pattern make it a timeless addition to any home. Thank you for reading this guide. If you found it helpful, please leave your honest opinion and share your suggestions. Your feedback can help improve future quilting guides and inspire other quilting enthusiasts to start their own creative projects.