
The Mug Mat Quilt – Tutorial – Pattern has become a favorite project among quilting enthusiasts who enjoy crafting useful, decorative, and personalized items for the home. A mug mat, also known as a mug rug, is a charming mini-quilt designed to hold a cup and a small treat, combining functionality with creativity. This project is ideal for beginners who want to practice simple quilting techniques while creating something beautiful and practical. Throughout this article, you will learn everything you need to know to create your own mug mat from start to finish.
Many crafters appreciate how the Mug Mat Quilt – Tutorial – Pattern allows them to experiment with fabric scraps, color combinations, and creative stitching methods. Mug mats are small, quick to complete, and incredibly customizable, making them perfect for thoughtful gifts or seasonal home décor. Because they require only minimal materials, they are also affordable and environmentally friendly, helping you repurpose leftover fabrics from larger quilting projects. This tutorial will guide you through essential steps, ensuring a successful and enjoyable experience.
This article provides a detailed and humanized explanation of the full process: choosing fabrics, cutting pieces, assembling blocks, quilting, and binding. Even if you are new to sewing or quilting, this Mug Mat Quilt – Tutorial – Pattern will make the process accessible and fun. We will explore techniques, creative ideas, technical tips, and decorative options so that you can personalize every detail. After reading, you will feel confident crafting your own mug mats and expanding your skills into more complex quilting projects.
Materials and Preparation for Your Mug Mat Quilt
Before diving into the Mug Mat Quilt – Tutorial – Pattern, gathering the right materials is essential for a smooth and enjoyable project. Fortunately, mug mats require only small cuts of fabric, making them perfect for scrap-friendly quilting. You will typically need a piece of cotton fabric for the front, a piece for the back, some batting, and optional decorative elements. Cotton is the most recommended choice because it is durable, washable, and easy to sew for beginners and professionals alike.
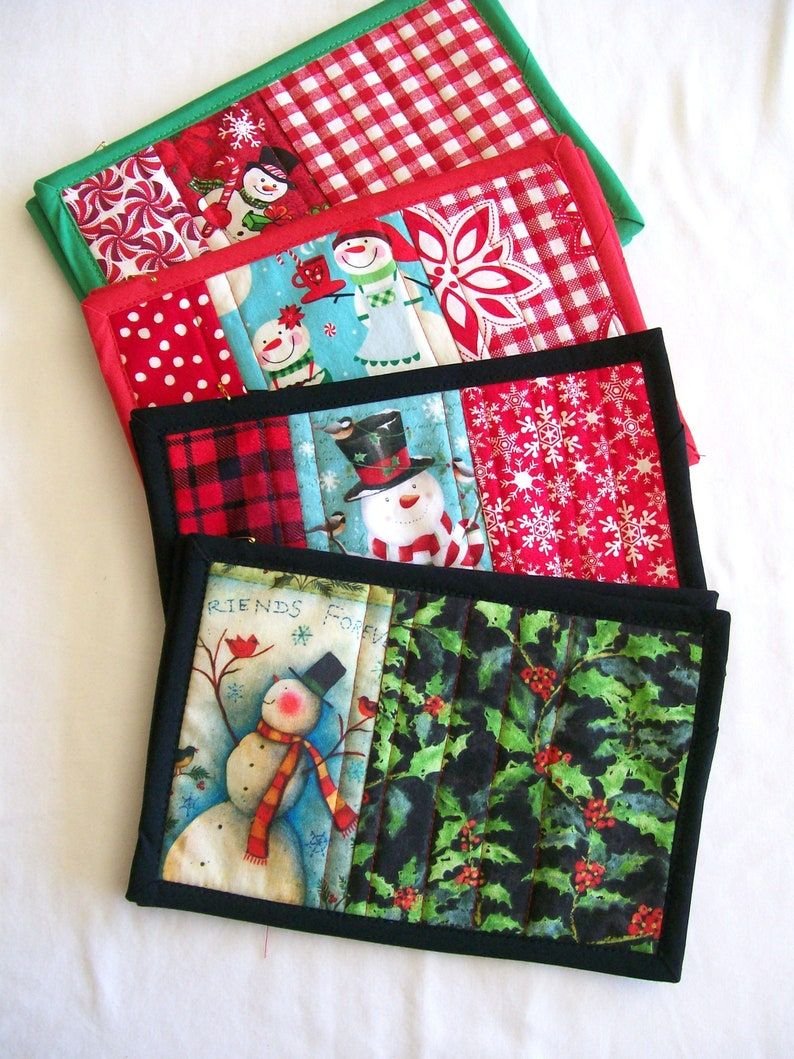
When choosing fabrics, consider the theme or color palette you want for your mug mat. Many crafters select bright, cheerful designs, or seasonal fabrics for holidays such as Christmas, spring, or autumn. This is where the Mug Mat Quilt – Tutorial – Pattern allows personalization and creativity. You can mix prints, solids, or even quilt blocks left over from other projects. Matching colors with your home décor can also make your mug mats a cohesive part of your kitchen or dining room.
Batting is another important component that gives your mug mat structure and softness. For a small project like this, low-loft cotton batting works well because it creates a flat, even surface for your mug. It also absorbs condensation from cold drinks, protecting your table. Make sure the batting piece is slightly larger than your fabric front so you can trim it cleanly after quilting.
Preparing your tools helps make the process efficient. Essentials include a rotary cutter, a cutting mat, fabric scissors, sewing clips or pins, and a sewing machine. If you prefer hand sewing, you can still follow the Mug Mat Quilt – Tutorial – Pattern, but a machine offers faster, more consistent results. Marking tools and rulers ensure your fabric pieces are cut accurately and assembled neatly.
Ironing your fabrics before cutting them is an important step that beginners sometimes overlook. Pressing your fabric helps it lay flat, preventing distortion and ensuring precise cuts. A clean, well-pressed fabric foundation leads to a cleaner finished project. In addition, ironing seams during assembly enhances the crispness and professional appearance of your mug mat.
Before you start quilting, consider your design layout. Some mug mats are simple rectangles, while others include patchwork blocks, appliqués, or embroidered details. Sketching your idea or laying out fabrics on a table helps you visualize the final result. This is one of the most enjoyable parts of the Mug Mat Quilt – Tutorial – Pattern, as it lets your creativity guide the direction of your work.
Step-by-Step Assembly Based on the Pattern
Once you have your materials prepared, it’s time to begin the assembly stage of the Mug Mat Quilt – Tutorial – Pattern. Start by cutting your fabric front and backing according to the desired size. Most mug mats range between 5×7 inches and 6×9 inches, but you can adjust the dimensions based on your preference. A larger mug mat can even function as a small placemat, offering more room for snacks or accessories.
If your design includes patchwork, begin by sewing your smaller pieces together first. Use a quarter-inch seam allowance and press each seam flat. Piecing is where quilters get to showcase their creativity, experimenting with traditional quilt blocks or modern geometric designs. This flexibility is one reason why the Mug Mat Quilt – Tutorial – Pattern is loved by quilters at every skill level.
Once the front panel is completed, prepare your quilt sandwich. Lay the backing fabric with the wrong side facing up, place the batting on top, and finally add the patchwork or fabric front. Smooth the layers and secure them using sewing clips or pins. This prevents shifting while quilting. With small projects like this, you won’t need basting spray unless you prefer it.
The next step is quilting the layers together. You can choose simple straight-line quilting, diagonal lines, free-motion designs, or decorative stitching. Straight-line quilting is especially beginner-friendly and matches well with most fabric styles. The beauty of the Mug Mat Quilt – Tutorial – Pattern is that it encourages both creativity and simplicity, allowing your quilting style to shine.
After quilting, trim the edges to make them neat and even. This step helps prepare the mug mat for binding, ensuring smooth corners and a professional finish. Accurate trimming also ensures that the binding fits perfectly around the edges. Use a rotary cutter and ruler to maintain straight sides.
The final step in assembly is applying the binding. You may use pre-made binding or create your own from matching fabric strips. Binding can be sewn fully by machine or partially hand-stitched for an elegant, invisible finish. Once your binding is attached, your mug mat is complete and ready to use or gift. This simple yet rewarding process highlights the practicality of the Mug Mat Quilt – Tutorial – Pattern.
Creative Variations and Design Ideas
One of the most enjoyable aspects of the Mug Mat Quilt – Tutorial – Pattern is the freedom to personalize your design. While the basic structure remains the same, the details allow for endless creativity. You can adapt your mug mat to match holidays, seasons, special occasions, or everyday décor. This makes mug mats both functional and decorative additions to the home.
Many quilters enjoy adding appliqués to their mug mats. Simple shapes such as hearts, stars, leaves, or geometric designs can be fused and stitched onto the front panel, adding dimension and charm. Appliqués also create opportunities to use tiny fabric scraps that might otherwise go to waste. This enhances the sustainability aspect of your quilting projects.
Embroidery is another beautiful way to customize your mug mat. Hand-stitching names, initials, inspirational words, or decorative motifs transforms a simple mat into a personalized keepsake. Combining embroidery with the Mug Mat Quilt – Tutorial – Pattern creates meaningful gifts for birthdays, holidays, and special events.
Fabric themes also play an important role in design. For example, you can create a cozy winter mug mat using flannel fabrics, or a cheerful spring-inspired mat using florals and pastel colors. Seasonal mug mats bring joy throughout the year and keep your décor fresh and engaging. Many quilters enjoy creating a full set for each season.
You can also explore modern quilting techniques such as improv piecing, wonky blocks, or minimalistic designs. These methods involve fewer rules and more freedom, allowing your creativity to flourish. If you love bold colors and abstract shapes, this is a great direction to explore using the Mug Mat Quilt – Tutorial – Pattern.
Another fun idea is to incorporate textural elements. Quilting with decorative threads, adding lace trims, or using textured fabrics such as linen or denim can add depth and interest to your mug mat. Mixing textures creates a unique tactile experience and highlights your craftsmanship.
If you enjoy themed décor, consider designing a series of mug mats for holidays like Halloween, Valentine’s Day, Thanksgiving, or Christmas. Coordinated sets look beautiful in the kitchen or dining room and also make wonderful handmade gifts. The possibilities within the Mug Mat Quilt – Tutorial – Pattern truly are endless once you start experimenting.
Using and Caring for Your Mug Mat Quilt
Now that your mug mat is complete, the Mug Mat Quilt – Tutorial – Pattern becomes even more valuable as you learn how to use and maintain your handmade creation. Mug mats are extremely practical additions to everyday routines, offering both protection and decoration. Place your mug mat on a coffee table, office desk, nightstand, or dining table for instant warmth and charm.
Mug mats protect your furniture from heat, spills, and condensation. The batting layer absorbs moisture and keeps cold drinks from leaving water rings. Hot beverages can be placed safely on the quilted surface without damaging wood or glass surfaces. This practical functionality is one of the biggest reasons why mug mats have grown so popular.
Caring for your mug mat is simple. Most mug mats made with cotton fabrics and batting are machine washable. Wash them in gentle cycles and lay them flat to dry. This keeps them looking fresh and helps them last for years. Handwashing is also an option for delicate or heavily embellished designs. The durability of the Mug Mat Quilt – Tutorial – Pattern ensures your creations remain beautiful with proper care.
Beyond everyday use, mug mats make wonderful gifts for family, friends, coworkers, or teachers. Their small size makes them ideal for gifting during holidays or special occasions. You can pair a mug mat with a matching mug, a tea bag, or a small treat to create a thoughtful and personal gift set. Many people appreciate the handmade quality and sentiment behind a quilted item.
Another fun use for mug mats is incorporating them into kitchen décor such as coffee stations or breakfast nooks. A set of coordinating mug mats can add color, warmth, and personality to these spaces. You can design mats that match your mug collection, tablecloths, or placemats for a cohesive look.
Finally, mug mats are great introductory quilting projects for children or beginners. Their small size, simple construction, and creative possibilities make them approachable and enjoyable. Teaching someone the Mug Mat Quilt – Tutorial – Pattern can inspire new quilters to continue exploring the hobby and develop new skills.
FAQ – Mug Mat Quilt – Tutorial – Pattern
1. What size should a mug mat be?
Most mug mats range from 5×7 inches to 6×9 inches, but you can customize the size to your preference.
2. Do I need a sewing machine to follow the pattern?
No, you can sew a mug mat by hand, although a sewing machine provides faster and more consistent stitching.
3. What is the best batting for a mug mat?
Low-loft cotton batting is ideal because it provides a flat, absorbent surface without too much bulk.
4. Can I wash my mug mat?
Yes, most mug mats are machine washable, especially if made with cotton fabrics and batting.
5. What fabrics are best for mug mats?
100% cotton fabrics are recommended because they are durable, easy to sew, and handle heat well.
6. Can I add decorations like appliqué or embroidery?
Absolutely. Appliqués, embroidery, and decorative stitching are excellent ways to personalize your mug mat.
Conclusion
The Mug Mat Quilt – Tutorial – Pattern is a delightful and accessible project that allows quilters of all skill levels to create functional and personalized mini quilts. From choosing fabrics to adding creative embellishments, this tutorial encourages you to explore your artistic skills while producing something practical for everyday use. Mug mats are perfect for home décor, thoughtful gifts, or quick quilting practice.
I hope this article has inspired you to create your own mug mat quilts and explore all the creative possibilities they offer. Please leave your sincere opinion and suggestions — your feedback helps us continue improving and sharing meaningful crafting content. Happy quilting!