
The Half Log Cabin quilt is a variation of the traditional Log Cabin pattern, combining modern aesthetics with classic charm.
As quilters embrace different quilt patterns, the Half Log Cabin stands out for its versatility and ease, making it perfect for beginners and advanced quilters alike.
This article delves into the history of the pattern, its unique appeal, and provides a comprehensive tutorial with fabric measurements and cutting tips to help you create your own Half Log Cabin quilt.
The Origins and Appeal of the Half Log Cabin Quilt
The Half Log Cabin quilt has its roots in the traditional Log Cabin quilt pattern, a design that dates back to the 1800s. Originally, the Log Cabin quilt symbolized the pioneer spirit, with the center square representing the hearth of the home and the surrounding strips symbolizing the walls. The Half Log Cabin is a modern twist, focusing on one corner, giving the pattern a fresh and dynamic look.
This quilt pattern is popular because it’s easy to assemble and can be adapted to create various designs, from bold geometric layouts to more subtle, delicate quilts. It’s a great way for beginners to hone their skills while producing stunning results. Quilters often use this pattern to showcase contrast between light and dark fabrics, creating a visual depth that’s both simple and complex.
Aside from its aesthetic appeal, the Half Log Cabin is also highly functional. The quilt’s structure allows for quick assembly and flexibility in size, making it ideal for everything from small baby quilts to large bedspreads. Whether you’re looking to make a cozy throw or a statement piece, this pattern provides endless possibilities.
Essential Tools and Materials for Your Half Log Cabin Quilt
Before diving into the tutorial, it’s essential to gather all necessary tools and materials. The right equipment ensures precision and makes the quilting process smoother. You’ll need a rotary cutter, a self-healing cutting mat, quilting rulers, and a sewing machine fitted with a 1/4 inch foot. If you’re hand-piecing, a basic needle and thread will suffice.
Fabrics play a crucial role in the success of your quilt. For the Half Log Cabin, you’ll need at least two contrasting fabric sets: one light and one dark. The contrast between these fabrics is what gives the quilt its unique look. You can experiment with solids, prints, or batiks depending on the aesthetic you want to achieve. Don’t forget backing fabric, batting, and binding materials for finishing your quilt.
Lastly, a good iron and ironing board are essential. Pressing your seams open as you go ensures that your blocks lie flat and your quilt looks professional. A spray bottle with water or a starch spray can also help when pressing, ensuring crisp, clean lines.
Step-by-Step Half Log Cabin Quilt Tutorial
Now, let’s get into the fun part: making your Half Log Cabin quilt. For this tutorial, we will create a block measuring 12 inches square. The number of blocks needed will depend on the size of your quilt.
- Fabric Cutting Guide:
- Center Square: Cut one 3.5″ x 3.5″ square from your dark fabric.
- Log Strips: You will need strips of fabric in various lengths. Cut two 2″ x 3.5″ strips, two 2″ x 5″ strips, two 2″ x 6.5″ strips, and two 2″ x 8″ strips from your light fabric.
- Sewing the First Round: Start by sewing the 3.5″ x 3.5″ center square to a 2″ x 3.5″ strip from your light fabric. Align the edges and sew with a 1/4 inch seam allowance. Press the seam open. Next, attach another 2″ x 3.5″ strip to the opposite side of the center square. Continue by adding the 2″ x 5″ strips to complete the first round.
- Adding the Second Round: Once the first round is complete, repeat the process with the 2″ x 6.5″ strips, followed by the 2″ x 8″ strips. Always sew two adjacent sides first before moving to the next set of strips. This creates the half-log-cabin effect, with the design building outward from the center square.
Tips for Choosing Fabrics and Color Placement
Choosing the right fabrics is key to the success of your quilt. The Half Log Cabin quilt is based on the contrast between light and dark fabrics, so ensure there is a noticeable difference in value between the fabrics you choose. You can opt for bold colors for a dramatic effect or stick to neutrals for a more subtle design.
When planning your quilt, consider how you want the blocks to come together. If you’re making multiple blocks, arranging the lights and darks differently in each block can create intricate secondary patterns. For example, arranging your blocks in a zigzag or diagonal pattern can create a modern, eye-catching design.
Many quilters prefer to pre-wash their fabrics before starting the cutting process. This removes any chemicals or sizing from the fabric and ensures that the colors won’t bleed during washing. If you’re mixing fabrics from different manufacturers, pre-washing can also prevent shrinkage inconsistencies.
Piecing and Assembling Your Half Log Cabin Quilt
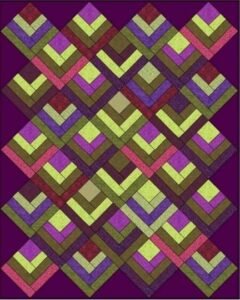
Once you’ve completed all your Half Log Cabin blocks, it’s time to lay them out and determine your quilt’s final arrangement. Take your time to experiment with different layouts. Some popular arrangements include the Barn Raising layout (where blocks are arranged in concentric circles), the Chevron layout, or even a more traditional straight set.
To assemble the quilt top, start by sewing blocks together in rows. Match the seams carefully to ensure a clean and professional finish. Once all the rows are assembled, sew them together to complete the quilt top. Remember to press the seams as you go, alternating the direction of the seams to reduce bulk.
At this stage, you can also add sashing or borders to your quilt if desired. Sashing is a thin strip of fabric placed between blocks, while borders frame the quilt. Both elements can add interest to your design and increase the overall size of your quilt.
Finishing Your Half Log Cabin Quilt
After the quilt top is completed, it’s time to quilt and bind your Half Log Cabin creation. Layer the quilt top, batting, and backing fabric, and use safety pins or quilting clips to hold everything together. You can either hand-quilt, machine-quilt, or send your quilt to a long-arm quilter for professional quilting.
When quilting your Half Log Cabin, consider using straight-line quilting to emphasize the geometric design. Alternatively, you could opt for free-motion quilting for a more organic look. Remember to quilt evenly across the entire quilt to prevent puckering.
Finally, bind the edges of your quilt with a fabric strip to give it a clean, finished edge. Cut binding strips 2.5 inches wide, fold them in half lengthwise, and sew them around the quilt’s perimeter. Once the binding is attached, hand-sew or machine-sew it to the back of the quilt to secure it.
Conclusion: Why the Half Log Cabin is a Must-Try Quilt Pattern
The Half Log Cabin quilt is an exciting and versatile pattern that appeals to quilters of all skill levels. Its simplicity allows beginners to practice essential quilting techniques, while its potential for customization offers endless possibilities for experienced quilters. Whether you’re using bold fabrics for a modern look or soft pastels for a more traditional feel, the Half Log Cabin is a timeless quilt pattern that belongs in every quilter’s repertoire.
So grab your rotary cutter, gather your favorite fabrics, and get ready to create a quilt that’s not only beautiful but a joy to make. Happy quilting!