
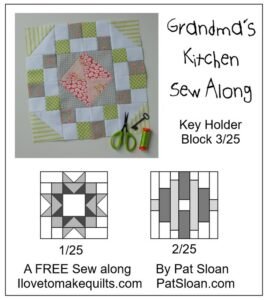
Creating a quilt is more than just stitching fabric together; it’s about weaving stories, memories, and traditions. One of the most beloved quilt patterns designed by Pat Sloan is the Grandma’s Kitchen Block 3, a nostalgic and beautifully crafted piece that brings warmth and charm to any quilt project. Whether you are a beginner or an experienced quilter, this block is a must-try addition to your quilting journey.
The Grandma’s Kitchen Block 3 carries a vintage aesthetic, reminiscent of cherished moments spent in the cozy kitchens of our grandmothers. This block features a balanced and structured design that perfectly complements both modern and classic quilt layouts. If you love quilt patterns that tell a story, this block is an excellent choice for your next project.
In this article, we will explore how to create the Grandma’s Kitchen Block 3, step by step. We will cover fabric choices, cutting instructions, piecing techniques, and finishing tips to ensure your quilt block turns out beautifully. Let’s dive into the details and start quilting!
1. Choosing the Right Fabrics for Grandma’s Kitchen Block 3
Selecting the perfect fabric is crucial for bringing out the beauty of the Grandma’s Kitchen Block 3. The right color combinations can enhance the vintage feel of this quilt block.
- Go for vintage-inspired fabrics: Floral prints, gingham patterns, and pastel hues work exceptionally well.
- Mix light and dark shades: Contrast adds depth and character to the design.
- Consider fabric texture: Cotton is the best choice for quilting, offering durability and ease of sewing.
- Pre-wash your fabric: This helps prevent shrinkage and ensures colorfastness.
- Use high-quality fabric: Investing in premium materials will make your quilt last longer.
- Stick to a color scheme: Choosing a harmonious palette ensures a cohesive and polished look.
2. Cutting and Preparing the Fabric Pieces
Before sewing, precise cutting is essential for an accurately pieced quilt block. Follow these steps to prepare your fabric pieces correctly.
- Gather your tools: Use a rotary cutter, self-healing cutting mat, and quilting ruler.
- Measure carefully: Accuracy is key when cutting fabric squares and strips.
- Label your pieces: Keeping track of each cut piece will help during assembly.
- Use a starch spray: This stiffens the fabric and makes cutting more precise.
- Avoid stretching the fabric: Handle pieces gently to maintain their original shape.
- Double-check measurements: Even a small miscalculation can affect the final block assembly.
3. Piecing Together the Quilt Block
Now that the fabric pieces are ready, it’s time to sew them together. Proper technique ensures a perfectly aligned Grandma’s Kitchen Block 3.
- Start with the center square: This is the focal point of the block.
- Sew with a consistent seam allowance: A 1/4-inch seam is standard in quilting.
- Press seams open or to one side: This reduces bulk and keeps the block flat.
- Align edges carefully: Using pins helps prevent shifting while sewing.
- Chain piecing speeds up the process: It also keeps everything organized.
- Trim excess fabric if necessary: Keeping everything even ensures a professional look.
4. Finishing Touches and Assembling Your Quilt
Once the block is pieced together, adding finishing touches ensures a polished and cohesive quilt design.
- Check for accuracy: Make sure all seams align correctly.
- Square up the block: Trim any uneven edges to achieve a precise finish.
- Press thoroughly: Using steam helps set the seams and create a smooth block.
- Decide on quilt placement: Arrange multiple blocks for the best layout.
- Sew blocks together carefully: Maintaining a consistent seam allowance is crucial.
- Add borders if desired: This frames the block beautifully in the final quilt.
FAQ About Grandma’s Kitchen Block 3
1. What size is the finished Grandma’s Kitchen Block 3?
The finished block size typically measures 12.5 inches before being sewn into the quilt.
2. Can I use different fabrics for this quilt block?
Yes! While vintage prints work best, you can experiment with modern patterns and bold colors.
3. Is this quilt block beginner-friendly?
Yes! The Grandma’s Kitchen Block 3 is a great project for beginners who want to practice precise cutting and piecing.
4. What type of thread should I use?
A high-quality 100% cotton thread is best for durability and smooth stitching.
5. Can I make a full quilt using just this block?
Absolutely! Repeating this block creates a stunning quilt with a cohesive and nostalgic design.
6. How do I ensure my seams are straight?
Using a quarter-inch presser foot and pinning fabric pieces before sewing can help maintain straight seams.
7. Should I wash my quilt after completing it?
It is recommended to wash the finished quilt gently in cold water to prevent shrinking and fading.
The Grandma’s Kitchen Block 3 – by Pat Sloan is a timeless quilt pattern that brings warmth, tradition, and creativity into your sewing projects. Whether you’re making a single block or piecing together an entire quilt, following these steps will ensure a beautiful and well-crafted result.
Now, it’s your turn! Have you tried making this quilt block before? Share your thoughts, experiences, and any tips you have in the comments below. Your feedback helps the quilting community grow and learn together!