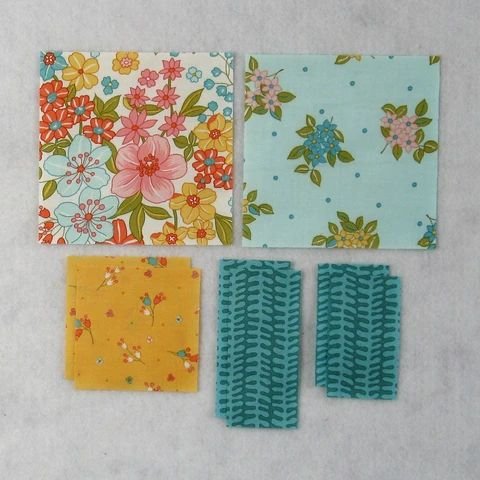
The Easy Picket Fence Quilt Block Tutorial is a fantastic project for quilters of all skill levels. Whether you’re a beginner looking for a simple yet stylish design or an experienced quilter searching for a quick and satisfying project, this quilt block offers versatility and charm. The Picket Fence Quilt Block is characterized by its clean lines and striking visual appeal, making it an excellent addition to any quilt.
This tutorial will guide you through the process of creating the Easy Picket Fence Quilt Block, including fabric choices, step-by-step instructions, and assembly tips. By following these guidelines, you’ll be able to craft a beautiful quilt block that showcases your creativity and enhances your quilting skills.
In this tutorial, we’ll cover fabric requirements, cutting instructions, piecing techniques, and helpful tips to achieve perfect results. Let’s dive into the world of quilting and create your own stunning Easy Picket Fence Quilt Block!

1. Materials and Fabric Requirements
Before starting your Easy Picket Fence Quilt Block, gather all the necessary materials to ensure a smooth sewing process.
- Fabric Selection: Choose fabrics with contrasting colors to enhance the design of the quilt block. Consider using solid fabrics or prints that complement each other.
- Fabric Cuts: You’ll need strips and squares of fabric, typically in sizes such as 2.5-inch strips for a traditional look.
- Tools Needed: Essential tools include a rotary cutter, quilting ruler, self-healing cutting mat, and sewing machine with a quarter-inch foot.
- Thread Choice: Use high-quality cotton thread that matches your fabric choices to ensure durability and a clean finish.
- Pressing Tools: An iron and pressing board will help achieve crisp seams and professional results.
- Backing and Batting: If planning to turn your quilt block into a finished project, prepare backing fabric and batting accordingly.
2. Cutting Instructions and Preparation
Accurate cutting is crucial to achieving a well-aligned Picket Fence Quilt Block. Follow these steps to prepare your fabric pieces:
- Strip Cutting: Cut fabric into 2.5-inch strips width-wise to create the fence-like effect in the block.
- Square Cutting: Prepare squares that will serve as the connectors between the strips, typically in 2.5-inch squares.
- Seam Allowance: Always account for a quarter-inch seam allowance when cutting to ensure proper fit.
- Labeling Pieces: Organize and label your fabric pieces to streamline the assembly process.
- Stacking Strips: Neatly stack strips in the order they will be sewn for easy access.
- Pre-pressing: Press all fabric pieces before sewing to remove wrinkles and achieve precise seams.
3. Step-by-Step Assembly Guide
Follow these simple steps to assemble your Easy Picket Fence Quilt Block with accuracy and ease.
- Arrange Pieces: Lay out the strips and squares in the desired pattern to visualize the final look.
- Sewing Strips: Start by sewing the fabric strips together lengthwise using a quarter-inch seam.
- Adding Squares: Sew the squares in between the strips to create the fence-like appearance.
- Pressing Seams: Press the seams towards the darker fabric to reduce bulk and achieve a flatter finish.
- Trimming Excess: Trim any uneven edges to ensure a perfect square block.
- Final Assembly: Join completed blocks together to form a larger quilt design if desired.
4. Tips for Perfecting Your Quilt Block
Achieve professional results with these expert tips for sewing the Easy Picket Fence Quilt Block.
- Consistent Seam Allowance: Always sew with a consistent quarter-inch seam to maintain block accuracy.
- Chain Piecing: Save time by sewing multiple pieces in a continuous chain without cutting the thread.
- Proper Pressing: Pressing each seam carefully will prevent distortion and ensure a neat appearance.
- Using Starch: Lightly starch fabric pieces before sewing to improve stability.
- Checking Alignment: Regularly check alignment while sewing to prevent shifting.
- Practice First: Test your block assembly on scrap fabric before working with final materials.
FAQ
Q: What size is a standard Picket Fence Quilt Block?
A: The standard size can vary, but a common finished size is 12 inches square.
Q: Can I use pre-cut fabric strips for this block?
A: Yes, pre-cut fabric strips like jelly rolls (2.5-inch strips) work perfectly for this project.
Q: How do I prevent my fabric from stretching while sewing?
A: Use a walking foot and avoid pulling the fabric while sewing.
Q: What type of fabric works best for this quilt block?
A: Cotton quilting fabric is the best choice for durability and ease of use.
Q: How many blocks do I need for a full quilt?
A: The number depends on the quilt size you desire; typically, 42 blocks make a throw-size quilt.
Q: Can I hand-sew this quilt block?
A: Yes, but using a sewing machine ensures more precise and faster results.
PATTERN HERE
The Easy Picket Fence Quilt Block Tutorial provides a simple yet stylish pattern perfect for quilters of all levels. With clear instructions and helpful tips, you can confidently create a beautiful quilt block that suits your project needs. Whether you incorporate this block into a larger quilt or use it for smaller decor projects, the results will be stunning.
We hope this tutorial has been helpful! Feel free to share your thoughts and suggestions in the comments section. Happy quilting!


