
Checkered bedspread Tutorial – Quilt Pattern projects are among the most beloved quilting designs for beginners and experienced crafters alike. The beauty of a checkered bedspread lies in its balance of simplicity and visual charm, creating a timeless pattern that can transform any bedroom into a cozy and stylish space. Quilting has been practiced for centuries, and the checkered style remains one of the most iconic designs because it is both easy to construct and incredibly versatile. In this guide, you will learn the essentials of creating a beautiful quilt using a classic Quilt Pattern based on checkered squares.
The popularity of the Checkered bedspread Tutorial concept has grown significantly as more people rediscover the joy of handmade crafts. Quilting is not only a creative hobby but also a relaxing activity that allows individuals to express their personal style through fabric combinations, colors, and textures. A well-made checkered quilt can become a cherished household item, passed down through generations as a symbol of warmth and craftsmanship. Understanding the structure behind this type of Quilt Pattern is the first step toward creating a masterpiece.
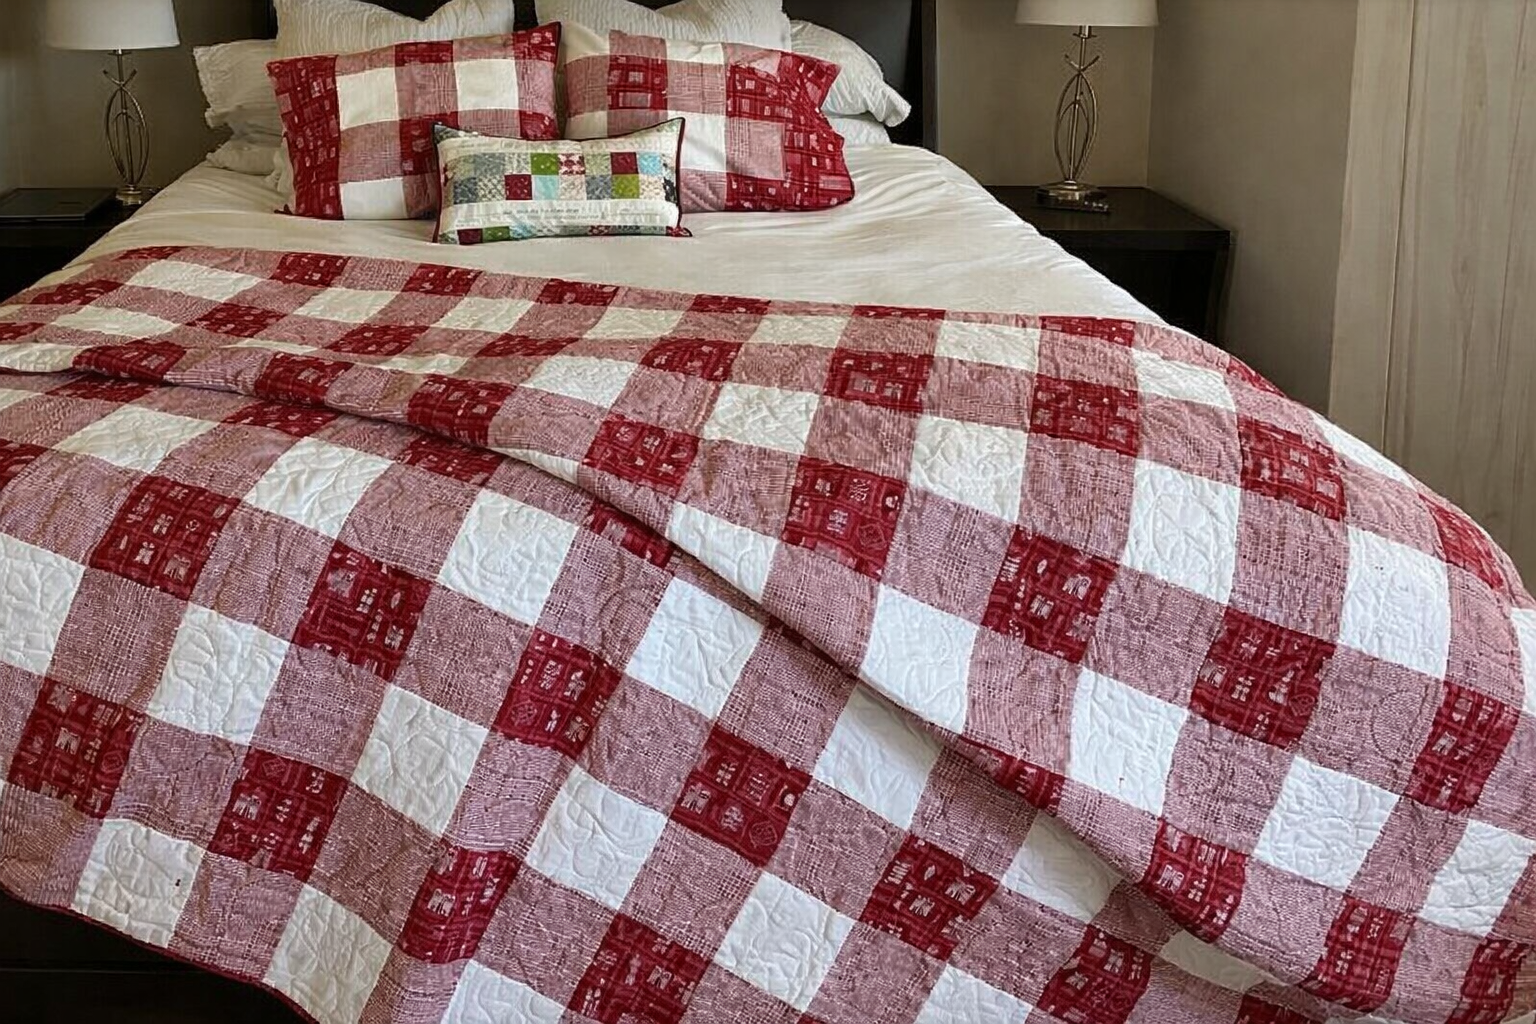
Another reason why the checkered bedspread remains so popular is its adaptability. You can design it with bold modern colors, classic neutral tones, or soft pastel palettes. The checkered layout also makes it ideal for beginners because it relies on repeating squares that are simple to cut, align, and sew. Throughout this Checkered bedspread Tutorial, we will explore essential materials, step-by-step preparation techniques, assembly tips, and finishing touches that help ensure your quilt turns out beautifully.
Understanding the Basics of a Checkered Quilt Pattern
A Quilt Pattern based on a checkered design is constructed from evenly sized squares arranged in alternating colors or fabrics. This structure creates the classic checkerboard appearance that makes the checkered bedspread instantly recognizable. Because the design relies on symmetry and repetition, it is often one of the first quilting patterns recommended for beginners.
DISCOVER MORE FREE PATTERNS HERE!
The key to a successful Checkered bedspread Tutorial project begins with selecting the right fabrics. Quilters typically choose two or more contrasting fabrics to create the checkerboard effect. High contrast colors make the pattern stand out more clearly, while softer contrasts can create a subtle and elegant look.
Another essential element is fabric preparation. Before cutting your squares, washing and ironing the fabric ensures accurate measurements and prevents future shrinking. Proper preparation is a foundational step in any Quilt Pattern project and greatly improves the final appearance of the quilt.
Measuring and cutting your squares carefully is also crucial. Most checkered quilts use squares ranging from 4 to 8 inches, though the size can vary depending on the desired finished dimensions of the bedspread. Consistency is extremely important because uneven pieces can disrupt the alignment of the pattern.
Layout planning is another step that many beginners overlook. Arranging your squares on a flat surface or design board before sewing allows you to visualize the final look of your checkered bedspread and make adjustments to color placement if needed.
Finally, understanding seam allowances is key. Most quilting projects use a quarter-inch seam allowance, which helps keep the squares aligned properly. Maintaining this measurement throughout the Checkered bedspread Tutorial process ensures a neat and professional-looking quilt.
Materials and Tools Needed for the Project
Creating a beautiful checkered bedspread requires a few essential quilting supplies. While the design itself is simple, having the right materials can significantly improve the ease and accuracy of your Checkered bedspread Tutorial project.
The most important material is fabric. Quilters typically use 100% cotton fabric because it is durable, easy to sew, and holds its shape well. Choosing complementary fabrics will help highlight the structure of the Quilt Pattern and make the checkerboard effect visually appealing.
A rotary cutter and cutting mat are also highly recommended. These tools allow you to cut fabric squares quickly and precisely, which is essential when working with a repeating Quilt Pattern such as a checkered design.
A quilting ruler is another indispensable tool. It helps maintain accurate measurements and straight edges when cutting squares for your checkered bedspread. Precision at this stage ensures that the quilt pieces fit together perfectly during assembly.
Thread quality also matters more than many beginners realize. Using strong cotton or polyester thread will help maintain the durability of your quilt and prevent seams from weakening over time.
Batting is the layer that goes between the quilt top and backing. It provides warmth and thickness to the finished bedspread. Selecting the right batting depends on whether you prefer a lightweight quilt or a thicker, more insulated checkered bedspread.
Lastly, a reliable sewing machine can make the entire Checkered bedspread Tutorial process smoother and faster. While hand sewing is possible, most quilters prefer machine stitching for consistency and efficiency.
Step-by-Step Guide to Assembling the Checkered Bedspread
The construction phase is where your Checkered bedspread Tutorial truly comes to life. Once all the squares are cut, the first step is arranging them in alternating colors to create the classic checkerboard appearance of the Quilt Pattern.
After organizing the squares, begin sewing them into rows. Sew each square to the next while maintaining a consistent quarter-inch seam allowance. Press the seams carefully after completing each row to keep the fabric flat and aligned.
Once the rows are completed, the next step is joining the rows together. Align the seams carefully so the corners of the squares meet evenly. This alignment is essential for preserving the visual symmetry of the checkered bedspread.
After the quilt top is assembled, the next step is layering. This involves placing the quilt backing fabric on the bottom, the batting in the middle, and the quilt top on top. This layered structure is fundamental to any Quilt Pattern project.
Quilting stitches are then added to hold all layers together. These stitches can follow the lines of the checkered squares or form decorative patterns that enhance the appearance of the quilt.
The final step in this part of the Checkered bedspread Tutorial is trimming the edges to ensure the quilt is square and even. This prepares the quilt for the finishing stage, which involves adding binding around the edges.
Finishing Touches and Care Tips
Once the quilting is complete, binding is added around the edges of the checkered bedspread. Binding not only provides a clean, polished look but also protects the edges of the quilt from fraying over time.
Many quilters choose a binding fabric that complements or contrasts with the main Quilt Pattern. This design choice can subtly frame the quilt and enhance the checkerboard visual effect.
After attaching the binding, the quilt should be inspected for loose threads or uneven seams. Small adjustments can make a big difference in the final quality of your Checkered bedspread Tutorial project.
Washing the quilt for the first time is another important step. Use gentle detergent and cold water to protect the fabrics and stitching. Proper washing techniques help maintain the beauty of the checkered bedspread for years.
Storage also plays a role in preserving your quilt. Keeping it in a dry, cool space prevents fabric deterioration and helps maintain its structure. Many people also enjoy displaying their Quilt Pattern creations as decorative pieces.
Finally, regular care ensures longevity. Occasional gentle washing and careful handling will allow your handmade quilt to remain a cozy and beautiful part of your home for many years.
FAQ – Frequently Asked Questions
1. What is a checkered quilt pattern?
A Quilt Pattern with a checkered design is made from alternating squares of fabric that create a checkerboard appearance across the entire quilt.
2. Is the Checkered bedspread Tutorial suitable for beginners?
Yes. The Checkered bedspread Tutorial is considered one of the easiest quilting projects because it uses simple square pieces and repetitive stitching techniques.
3. What fabric works best for a checkered bedspread?
Most quilters prefer cotton fabric because it is durable, easy to sew, and maintains its shape well in a checkered bedspread design.
4. How many fabric squares are needed for a quilt?
The number depends on the desired quilt size and the dimensions of each square. Larger quilts require more squares to maintain the checkerboard Quilt Pattern.
5. Can I customize the colors in a checkered quilt?
Absolutely. One of the benefits of a Checkered bedspread Tutorial project is the ability to experiment with different color combinations and fabric prints.
6. How long does it take to complete a checkered quilt?
The time varies depending on experience and quilt size. Beginners may take several days, while experienced quilters might complete a simple Quilt Pattern in a shorter period.
Conclusion
Creating a quilt using the Checkered bedspread Tutorial – Quilt Pattern approach is a rewarding project that combines creativity, patience, and craftsmanship. Throughout this guide, we explored the basics of checkered quilt design, the materials and tools needed, the step-by-step assembly process, and the finishing techniques that give a quilt its polished appearance. The beauty of a checkered bedspread lies in its simplicity and timeless appeal, making it an excellent project for both beginners and experienced quilters.
By following the techniques discussed in this article, anyone can successfully create a beautiful quilt that adds warmth and personality to a bedroom. Quilting is more than just sewing fabric together—it is a creative tradition that allows people to produce something meaningful and long-lasting. If you found this Checkered bedspread Tutorial helpful, consider sharing your honest opinion about the process and results. Your feedback, experiences, and suggestions can help inspire other quilting enthusiasts and contribute to an even richer crafting community.