
The Carnival Quilt Block is a vibrant and playful design that adds a festive touch to any quilt project. Whether you’re a seasoned quilter or just starting, this pattern offers an exciting opportunity to experiment with colors and shapes.
In this blog post, we will explore everything you need to know to create a beautiful Carnival Quilt Block, including fabric cuts, measurements, and a detailed step-by-step tutorial.
Let’s dive into the world of quilts and quilt patterns!
What is the Carnival Quilt Block?
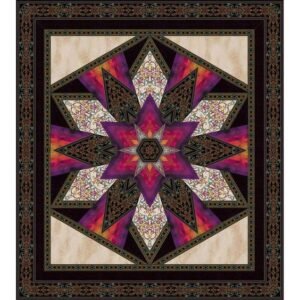
The Carnival Quilt Block is a traditional quilt pattern that features a mix of geometric shapes, typically arranged in a circular or star-like pattern. This block stands out because of its lively appearance, often using contrasting colors to create a dynamic and engaging design. The Carnival Quilt Block is perfect for quilters who enjoy working with vibrant color schemes and intricate designs.
This quilt pattern is versatile and can be used in various quilt projects, from large bed quilts to smaller throw quilts. Its symmetrical nature allows it to be easily repeated, making it an excellent choice for larger quilt designs. The Carnival Quilt Block can also be customized by altering the color palette or fabric textures to suit your specific project.
For those looking to challenge themselves with a more complex quilt pattern, the Carnival Quilt Block offers a rewarding experience. It allows quilters to practice precision cutting and piecing while producing a beautiful and festive result that stands out in any quilt.
Tools and Materials Needed
Before you begin crafting your Carnival Quilt Block, it’s essential to gather the necessary tools and materials. Like most quilt patterns, having the right equipment ensures precision and smooth execution, which is key for this complex pattern. Here’s a list of items you will need:
- Fabric in multiple contrasting colors (cotton works best for quilting)
- Rotary cutter and cutting mat
- Quilting ruler
- Sewing machine and matching thread
- Iron and ironing board
- Pins or clips to secure fabric pieces
- Basic quilting supplies like scissors and seam ripper
For the Carnival Quilt Block, using contrasting fabric colors is crucial to make the pattern pop. Bright colors work particularly well, but you can also opt for a more muted or monochromatic palette for a subtle and elegant look. Always prewash your fabrics to avoid shrinkage and color bleeding after your quilt is completed.
When it comes to thread, use a neutral color that blends well with your chosen fabrics. This ensures that your stitches are not overly visible and don’t distract from the overall design of the Carnival Quilt Block.
Fabric Cuts and Measurements
The Carnival Quilt Block is built from a combination of squares, triangles, and rectangles, making precise fabric cuts essential. Here’s a breakdown of the fabric cuts needed to make a standard 12-inch finished Carnival Quilt Block. Adjust the measurements if you wish to make the block larger or smaller:
- Center square: Cut 1 square measuring 4.5” x 4.5”
- Large half-square triangles (HSTs): Cut 2 squares measuring 5” x 5”, then cut diagonally to make 4 triangles
- Small half-square triangles (HSTs): Cut 2 squares measuring 4” x 4”, then cut diagonally to make 4 triangles
- Corner squares: Cut 4 squares measuring 2.5” x 2.5”
- Rectangles: Cut 4 rectangles measuring 2.5” x 4.5”
Ensure that your fabric pieces are accurate and crisp to avoid any inconsistencies in the final block. Using a rotary cutter and ruler helps achieve the precision needed for clean cuts and sharp edges.
Once all your pieces are cut, organize them by shape and color to streamline the assembly process.
Step-by-Step Assembly of the Carnival Quilt Block
Step 1: Create the Half-Square Triangles (HSTs)
Start by making the large and small half-square triangles (HSTs). To do this, take the 5” x 5” squares and 4” x 4” squares and cut them diagonally into two triangles each. Pair one triangle from each size with a contrasting fabric triangle, and sew along the diagonal edge using a 1/4-inch seam allowance.
Press the seams open or to the side, depending on your preference. Trim the HSTs to 4.5” x 4.5” for the large ones and 3.5” x 3.5” for the smaller ones. These HSTs will form part of the Carnival Quilt Block’s intricate pattern.
Repeat this process for all the HSTs needed. Ensure that your triangles are sewn accurately to keep your blocks uniform and symmetrical.
Step 2: Assemble the Center Square
The center square is the focal point of the Carnival Quilt Block. Take the 4.5” x 4.5” square and place it in the middle of your workspace. This square can either be a solid color or a print, depending on your design preferences.
Next, place the small HSTs around the center square. These smaller HSTs will frame the central square and create a secondary design element. Sew these HSTs to the center square, pressing seams as you go. Ensure that the points of the triangles align properly to keep the block’s symmetry intact.
Check for accuracy as you assemble the pieces, and make adjustments if necessary. Accurate seam allowances are key to ensuring that your Carnival Quilt Block turns out the correct size.
Step 3: Add the Outer Pieces
With the center square and small HSTs assembled, it’s time to move on to the outer layer of the block. Begin by positioning the large HSTs and rectangles around the central unit. The large HSTs should be placed in each corner of the block, while the rectangles will fill in the gaps between them.
Sew the rectangles to the sides of the center unit, ensuring that your seams align perfectly. After the rectangles are attached, sew the large HSTs in the corners. Press all seams neatly to avoid bulk and ensure a smooth finish.
Once the outer pieces are sewn together, the Carnival Quilt Block is complete! The bright and contrasting colors combined with the geometric shapes create a bold, eye-catching design.
Quilting and Finishing
Now that you’ve completed your Carnival Quilt Block, you can decide how to incorporate it into your larger quilt. This block works beautifully when repeated across a quilt top, or it can be combined with other quilt patterns to create a more eclectic design.
When quilting your finished quilt, choose a design that complements the geometry of the Carnival Quilt Block. Straight-line quilting works well with this block, but free-motion quilting could also add a unique texture.
Ensure that you sandwich your quilt top with batting and backing fabric, then quilt and bind it as you would for any other quilt project. The end result will be a vibrant, playful quilt that’s sure to brighten any room.
PATTERN HERE
The Carnival Quilt Block is a delightful addition to any quilt project, offering a mix of bold colors, geometric shapes, and intricate design elements. By following the step-by-step tutorial outlined above, you’ll be able to create this stunning quilt block with ease. Whether you’re making a full quilt or a smaller project, the Carnival Quilt Block adds a lively touch to your quilting repertoire. Don’t hesitate to experiment with colors and fabrics to make this quilt pattern truly your own!