
Creating a House Shaped Wall Organizer Fabric Pattern is one of the most enjoyable sewing projects for anyone who loves combining beauty with functionality. This charming fabric organizer not only adds warmth and personality to your home but also provides a practical solution for storing small everyday items such as pens, scissors, notes, sewing tools, craft supplies, or even kitchen accessories. Inspired by cozy cottage-style décor, this project is suitable for beginners willing to practice basic quilting techniques as well as experienced sewists looking for a relaxing and rewarding handmade project.
A carefully designed House Shaped Wall Organizer Fabric Pattern can easily become a decorative centerpiece in a sewing room, craft studio, child’s bedroom, kitchen, hallway, or entryway. The quilted texture, colorful fabrics, and functional pockets make this project both decorative and useful. One of its greatest advantages is the opportunity to personalize every detail, from the roof fabric to the pocket arrangement, allowing each finished organizer to become a unique handmade creation.
Besides being a practical storage solution, this project also makes a thoughtful handmade gift for family members and friends. Handmade fabric organizers are appreciated because they combine craftsmanship, durability, and creativity. Throughout this tutorial, you will learn how to select the right fabrics, prepare every component, assemble the organizer step by step, quilt the layers, sew the pockets, and finish the project professionally while maintaining the charming appearance shown in the inspiration photo.
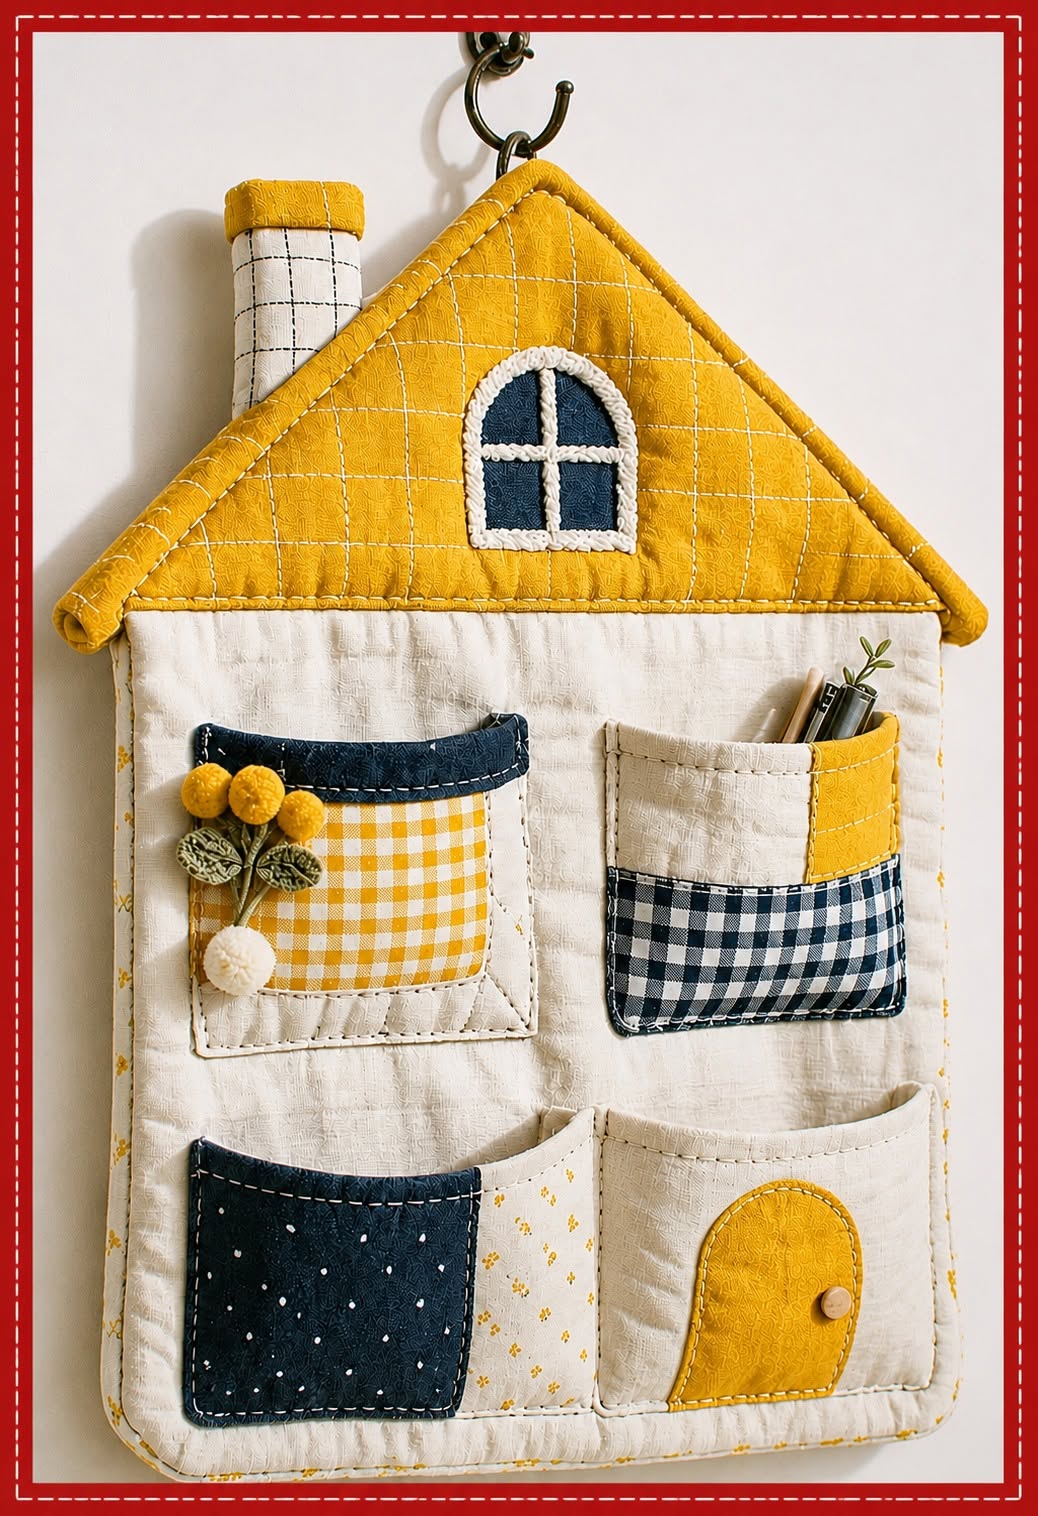
Choosing Materials for Your House Shaped Wall Organizer Fabric Pattern
The first step is selecting high-quality cotton fabrics. Quilting cotton is highly recommended because it is easy to sew, durable, and available in thousands of beautiful prints and colors.
DISCOVER MORE FREE PATTERNS HERE!
For the roof, choose a fabric with small plaid, gingham, floral, or textured prints. Rich colors such as red, burgundy, navy, or green help create a welcoming cottage appearance.
The main body looks beautiful when made with light-colored fabrics such as cream, ivory, beige, or soft gray. These neutral colors create an elegant contrast with colorful pockets.
Medium-weight batting should be placed between the fabric layers. Batting gives the organizer stability while creating the attractive quilted texture seen in the finished project.
Choose coordinating threads that blend naturally with your fabrics. Cotton or polyester sewing thread works equally well for construction and quilting.
Finally, prepare basic sewing supplies including scissors, rotary cutter, quilting ruler, fabric clips, pins, iron, sewing machine, washable fabric marker, and a sturdy hanging ring or hook for displaying the finished organizer.
Step-by-Step Construction of the House Shaped Wall Organizer Fabric Pattern
Begin by drawing the overall house shape on paper. The pattern consists of a rectangular body with a large triangular roof attached to the top.
Cut two exterior house pieces, one lining piece, one batting piece, and one optional stabilizer using the same pattern template to ensure perfect alignment.
Place the batting between the exterior fabric and the lining. Quilt the layers using straight parallel stitching or a simple grid pattern to stabilize the entire organizer.
Prepare the roof separately if you want decorative topstitching before attaching it to the main body. Quilting the roof independently creates a professional appearance.
Cut each pocket individually according to your preferred size. The inspiration design includes four pockets, but you may increase or decrease the number depending on your storage needs.
Finish the top edge of every pocket by folding it twice and sewing a clean hem before attaching each pocket to the quilted house base.
Assembling the Pockets and Decorative Details
Position the pockets on the quilted house base before sewing. Arrange them evenly, leaving enough space between each one to create a balanced design while keeping them functional for storing various items.
Pin every pocket securely and stitch around the sides and bottom using a narrow seam allowance. Reinforce the upper corners with backstitching because these areas receive the most stress during everyday use.
If desired, divide larger pockets into smaller compartments by sewing vertical lines through the pocket. These extra sections are perfect for organizing pens, rulers, crochet hooks, scissors, or small sewing tools.
Decorative appliqués can make your House Shaped Wall Organizer Fabric Pattern even more charming. Small flowers, hearts, windows, buttons, embroidery, lace, or fabric labels add personality without making the design overly complicated.
The rounded window shown in the inspiration project can be created by cutting contrasting fabric pieces and sewing them with appliqué techniques. Embroidered outlines or decorative stitching help define the window and give the organizer a handcrafted appearance.
Finish the front by adding small embellishments carefully. Avoid placing bulky decorations where the pockets will be used frequently, ensuring both beauty and practicality remain balanced.
Finishing the House Shaped Wall Organizer Fabric Pattern Like a Professional
After attaching all pockets and decorative elements, trim any excess batting and fabric around the edges to create a smooth outline that matches your original pattern.
Prepare bias binding using coordinating fabric or purchase ready-made bias tape. Carefully sew the binding around the entire perimeter of the organizer, including the roof, creating neat and durable finished edges.
Attach a sturdy fabric loop or metal hanging ring to the top center of the roof before completing the final stitching. This allows the organizer to hang securely on a wall hook or decorative hanger.
Give the finished organizer a careful press with a warm iron, using steam when appropriate for the chosen fabrics. Pressing helps flatten seams and enhances the overall professional appearance.
Inspect every seam, pocket, and decorative detail to ensure everything is firmly attached. Reinforce any areas that may experience additional strain during regular use.
Your finished House Shaped Wall Organizer Fabric Pattern is now ready to organize everyday essentials while adding warmth, charm, and handmade beauty to any room. Whether displayed in a sewing studio, craft room, kitchen, office, or child’s bedroom, this fabric organizer combines decorative appeal with practical storage in a timeless design.
Frequently Asked Questions
What fabric is best for a House Shaped Wall Organizer Fabric Pattern?
High-quality quilting cotton is the best choice because it is durable, easy to sew, easy to quilt, and available in countless coordinating prints and colors.
Do I need batting inside the organizer?
Yes. Batting provides structure, improves durability, creates beautiful quilting texture, and helps the organizer maintain its shape over time.
Can beginners make this project?
Absolutely. Beginners with basic sewing skills can successfully complete this project by following the construction process step by step and taking their time during assembly.
How many pockets should the organizer have?
There is no fixed number. Four pockets work beautifully, but you can customize the layout with additional compartments depending on your storage needs.
Can I wash the finished organizer?
Yes. If made with quality cotton fabrics and securely stitched, the organizer can usually be machine washed on a gentle cycle. Air drying helps preserve its shape and quilting.
Can I resize the pattern?
Certainly. One of the advantages of a House Shaped Wall Organizer Fabric Pattern is its flexibility. You can enlarge or reduce the template while maintaining the same construction method.
What can I store inside the organizer?
It is ideal for sewing supplies, crochet hooks, knitting needles, scissors, notebooks, pens, remote controls, children’s accessories, mail, kitchen utensils, or other small household items.
Is this project suitable for selling at craft fairs?
Yes. Handmade fabric organizers are popular because they are decorative, functional, and customizable. Using high-quality materials and careful finishing can increase their appeal to buyers.
Conclusion
Creating a House Shaped Wall Organizer Fabric Pattern is a rewarding sewing project that combines creativity, organization, and practical everyday use. Throughout this guide, you learned how to choose suitable fabrics, prepare the quilted layers, construct the house shape, sew functional pockets, add charming decorative details, and finish the organizer with professional techniques.
EASILY FIND THE PDF FOR THIS PATTERN HERE!
By taking your time with each step and paying attention to detail, you can create a beautiful handmade piece that enhances any room while providing convenient storage for daily essentials. Every finished organizer can be personalized with different colors, fabrics, appliqués, and pocket arrangements, making each project truly unique. If you enjoyed this tutorial, please leave your honest opinion in the comments and share your suggestions. Your feedback helps improve future patterns and inspires even more creative sewing projects for everyone.