
Cup/Mug Coaster with Sun Wearing Sunglasses Appliqué Fabric Pattern is a cheerful and practical sewing project that combines creativity, functionality, and decorative charm into a single handmade piece. Whether you are a beginner looking for an enjoyable appliqué project or an experienced sewist searching for a quick and satisfying pattern, this colorful coaster is an excellent choice. Throughout this guide, you will learn every essential step required to create your own Cup/Mug Coaster with Sun Wearing Sunglasses Appliqué Fabric Pattern, while also improving your sewing and appliqué skills.
Creating a Cup/Mug Coaster with Sun Wearing Sunglasses Appliqué Fabric Pattern allows you to transform simple fabric scraps into a beautiful handmade accessory that protects furniture while adding personality to your home. This sunny design brings warmth, happiness, and a playful summer atmosphere to kitchens, coffee stations, offices, and gift baskets. Because the project uses simple shapes and clean stitching, it is accessible for crafters of different experience levels and can easily be customized with different colors and fabrics.
One of the greatest advantages of the Cup/Mug Coaster with Sun Wearing Sunglasses Appliqué Fabric Pattern is its versatility. It can be made using cotton fabrics, quilting fabrics, felt, or fabric leftovers already available in your sewing room. Besides being an enjoyable personal project, this coaster also makes an excellent handmade gift or craft fair product. Following the step-by-step instructions below will help you achieve a professional-looking result while developing confidence with appliqué techniques and decorative stitching.
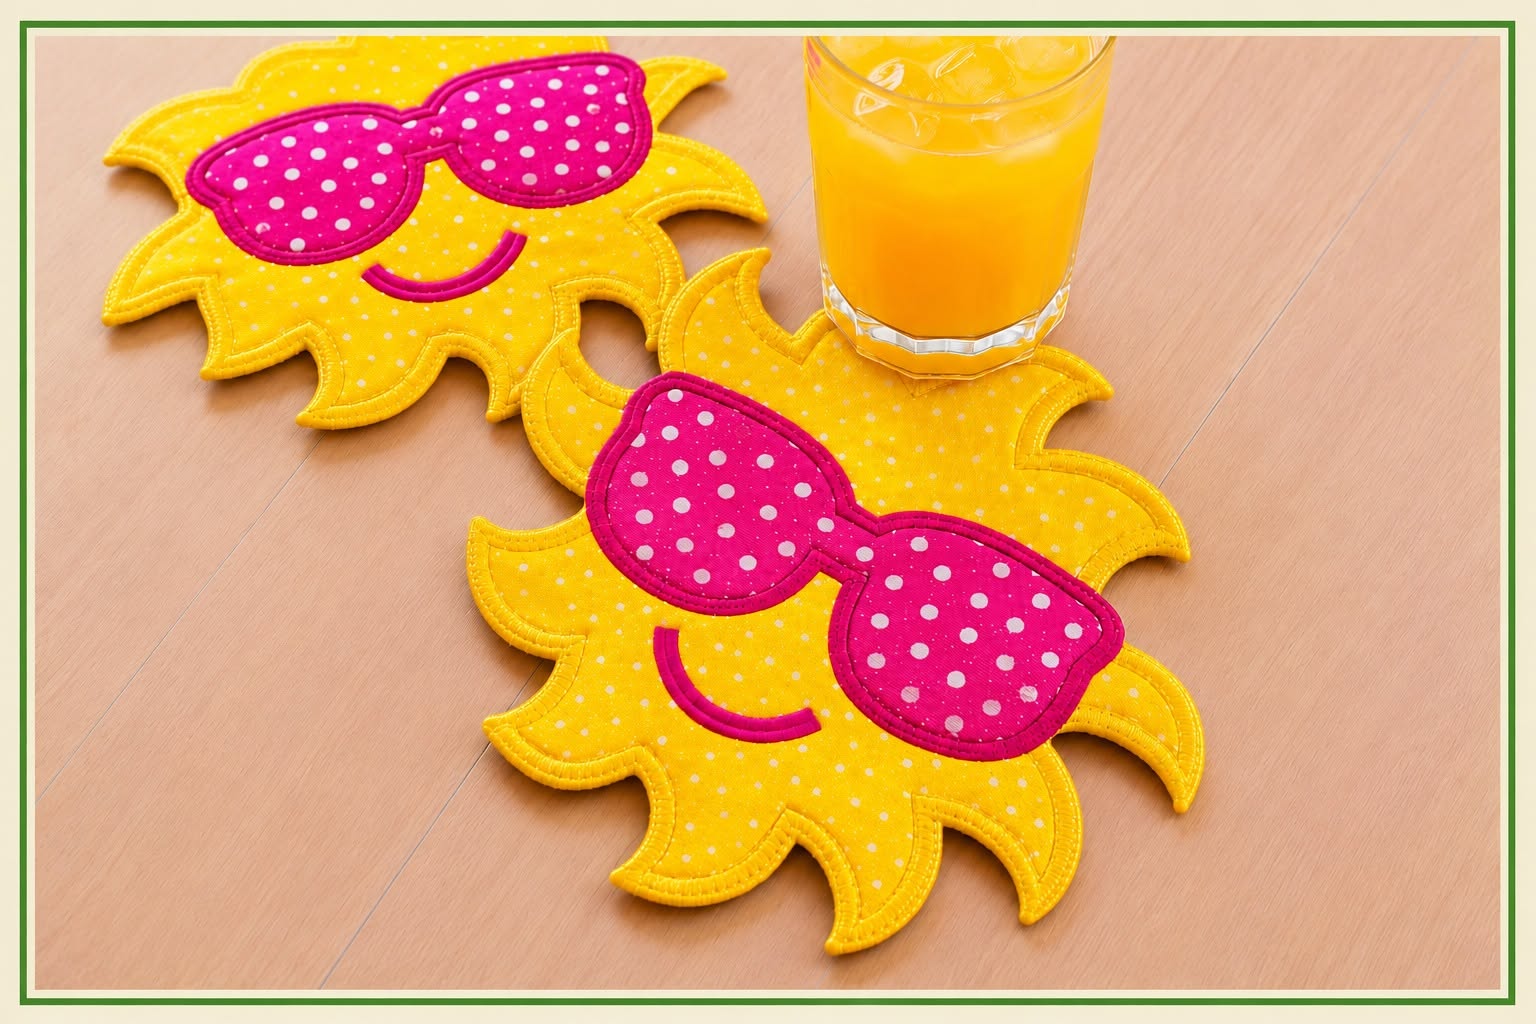
Step 1: Gather Materials and Prepare the Fabric
Before starting your Cup/Mug Coaster with Sun Wearing Sunglasses Appliqué Fabric Pattern, organize all the materials needed for the project. Preparing everything beforehand makes the sewing process smoother and more enjoyable.
DISCOVER MORE FREE PATTERNS HERE!
Choose high-quality cotton fabric for both the front and back pieces. Cotton is durable, easy to sew, and provides excellent stability for appliqué projects.
Select coordinating fabrics for the sun, sunglasses, smile, and decorative details. Bright yellow fabric works perfectly for the sun, while vibrant pink fabric creates eye-catching sunglasses.
Prepare lightweight fusible web to attach each appliqué piece before stitching. This helps maintain accurate positioning during sewing.
Use cotton batting or thermal batting between the layers if you want the coaster to provide additional insulation against hot mugs and cups.
Gather sharp fabric scissors, embroidery scissors, pins, coordinating thread, sewing machine, iron, and pressing mat to simplify every stage of the project.
Step 2: Cut the Pattern Pieces
Print the Cup/Mug Coaster with Sun Wearing Sunglasses Appliqué Fabric Pattern at full size and carefully cut every template following the pattern outlines.
Trace each template onto the paper side of the fusible web while remembering to reverse pieces whenever necessary.
Fuse the templates onto the wrong side of the selected fabrics according to the manufacturer’s instructions.
Cut each appliqué piece accurately using embroidery scissors for smooth, professional-looking edges.
Arrange all pieces on the main coaster background before permanently attaching them. This allows you to verify spacing and overall balance.
Once satisfied with the arrangement, press every appliqué piece into place using a warm iron without moving the fabric.
Step 3: Assemble the Sun Appliqué
Begin assembling the smiling sun by positioning the sunglasses first since they become the focal point of the design.
Center the sunglasses evenly across the upper portion of the sun’s face to create a balanced appearance.
Position the embroidered smile underneath the sunglasses, ensuring the curve creates a cheerful expression.
Secure every appliqué piece using a narrow satin stitch, zigzag stitch, or blanket stitch according to your preferred sewing style.
Sew slowly around curves and small details to maintain clean edges and smooth transitions.
After completing the appliqué, trim any loose threads and lightly press the finished design before continuing.
Step 4: Build the Coaster
Place the completed appliqué front on top of the batting layer, keeping all edges aligned.
Position the backing fabric underneath with the right side facing outward if creating a reversible coaster.
Secure all layers together using clips or pins placed away from the stitching path.
Sew around the coaster edge using a consistent seam allowance while leaving a small opening if turning the project.
Trim seam allowances around the curved sun rays carefully to reduce bulk and improve the final shape.
Turn the coaster right side out, gently push every curve into place, and topstitch around the entire edge for a polished finish.
Tips for Achieving Professional Results
Press every fabric piece before cutting to eliminate wrinkles that may affect accuracy.
Use matching thread colors to help decorative stitches blend naturally with each appliqué section.
Reduce sewing speed around small curves to improve stitch consistency.
Test decorative stitches on fabric scraps before sewing the actual project.
Choose high-quality quilting cotton for increased durability and better edge definition.
Store the finished coaster flat to help maintain its shape over time.
Creative Ideas for Customization
Experiment with different sunglasses colors to create multiple versions of the same Cup/Mug Coaster with Sun Wearing Sunglasses Appliqué Fabric Pattern.
Replace polka dot fabrics with floral, striped, or geometric prints for a unique appearance.
Add embroidered cheeks, eyelashes, or small decorative accents to personalize the smiling face.
Use metallic embroidery thread for the sunglasses outline to create a fun shimmering effect.
Create coordinated coaster sets using different facial expressions while keeping the same sunny theme.
Combine several finished coasters into attractive handmade gift sets suitable for birthdays, housewarming parties, or summer celebrations.
Frequently Asked Questions
Is this Cup/Mug Coaster with Sun Wearing Sunglasses Appliqué Fabric Pattern suitable for beginners?
Yes. The project uses simple appliqué shapes and straightforward sewing techniques, making it an excellent choice for beginners who want to practice appliqué and quilting basics.
What fabrics work best for this coaster?
High-quality quilting cotton is the most recommended option because it is stable, durable, easy to sew, and available in countless colors and prints.
Can I use felt instead of cotton?
Yes. Felt simplifies the appliqué process because the edges do not fray, making it especially beginner-friendly.
Should I use batting inside the coaster?
Adding batting improves insulation, provides additional thickness, and helps protect furniture from hot mugs and cups.
Which stitch is best for securing the appliqué?
Satin stitch, blanket stitch, and narrow zigzag stitch are all excellent options. The choice depends on your preferred appearance and sewing experience.
Can I wash the finished coaster?
Yes. Wash it gently using mild detergent and allow it to air dry to preserve the appliqué and fabric quality.
Can I resize the pattern?
Absolutely. You can enlarge or reduce the Cup/Mug Coaster with Sun Wearing Sunglasses Appliqué Fabric Pattern while maintaining the proportions of the individual appliqué pieces.
Is this project suitable for selling handmade products?
Yes. Handmade coasters featuring this style are popular at craft fairs, gift shops, and online handmade marketplaces, provided you respect the licensing terms of the pattern you are using.
Conclusion
The Cup/Mug Coaster with Sun Wearing Sunglasses Appliqué Fabric Pattern is a delightful sewing project that combines practical use with cheerful design. Throughout this guide, you learned how to prepare the materials, cut the fabric pieces, assemble the appliqué, construct the coaster, and add professional finishing touches.
EASILY FIND THE PDF FOR THIS PATTERN HERE!
By following these steps carefully, you can create durable, attractive coasters that brighten any table while protecting surfaces from hot beverages. This project also offers endless opportunities for creativity through different fabrics, colors, and decorative details, making every finished coaster unique. If you enjoyed this tutorial, please leave your honest opinion and share your suggestions. Your feedback helps improve future patterns and inspires even more creative sewing projects.