
If you’re passionate about handmade crafts, then making a flower granny squares crochet project is a joyful and rewarding experience. These colorful, floral-inspired motifs are a staple in many crochet patterns, offering beauty and versatility in everything from blankets to bags. Whether you’re a beginner or an experienced crafter, learning how to crochet these flower squares opens up a world of creative possibilities.
The charm of flower granny squares crochet lies in their unique ability to blend structure with artistic freedom. You can use a variety of yarn colors and textures, combine them into larger projects, or even create one-of-a-kind pieces. Because they’re made one square at a time, they’re portable and perfect for crocheting on the go. The flower design in the center gives each granny square an eye-catching look, making it a great option for personalized gifts and home décor.
In this comprehensive guide, we’ll walk you through the step-by-step instructions to create your own flower granny squares crochet motif, with precise measurements and clear explanations. We’ll also explore essential crochet patterns, helpful tips, and how to incorporate your squares into beautiful projects. Let’s dive into the world of flower-filled crochet joy!
What Are Flower Granny Squares?
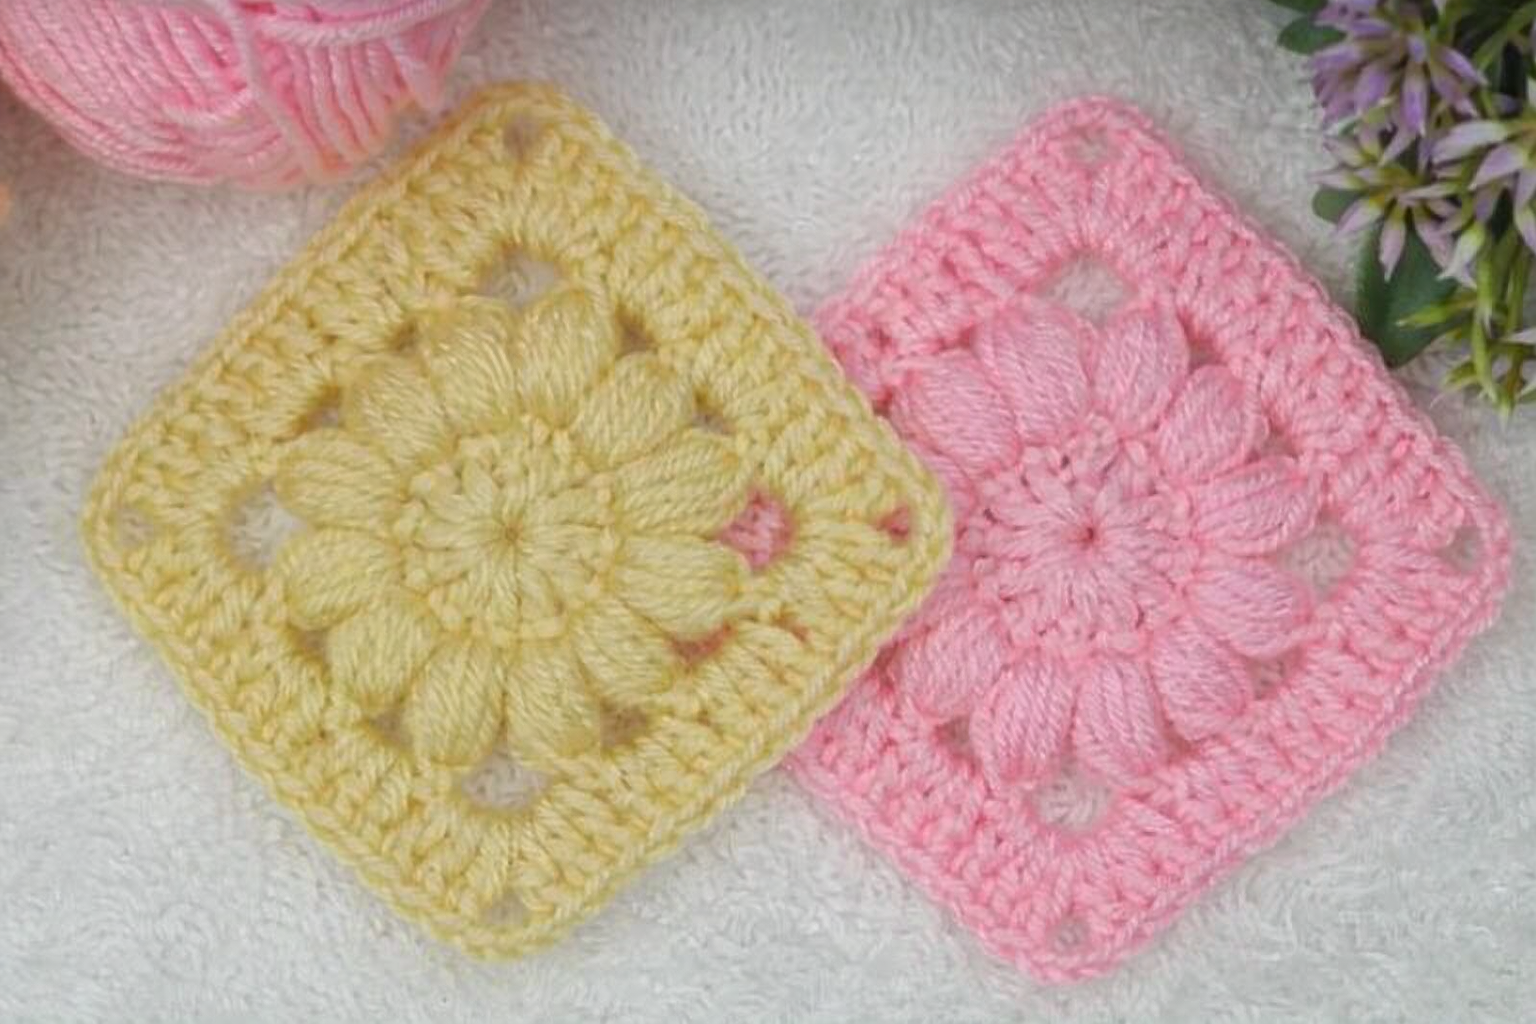
Flower granny squares crochet motifs are a decorative variation of the classic granny square. Unlike traditional squares, these feature a textured or 3D flower design at the center, surrounded by a square border. These designs are popular among crocheters who enjoy blending color, texture, and tradition in their projects.
The center flower can range from simple five-petal styles to intricate layered blooms. Each design is enclosed within a square, which makes it easy to join multiple motifs together. The combination of floral patterns and geometric borders gives these squares a delightful charm.
Granny squares with flower centers are commonly used in throws, pillow covers, bags, and even clothing. They’re often worked in rounds from the center out, making it easier to add layers of petals and borders without complex shaping. Their modular nature allows crafters to work on one piece at a time, making them ideal for beginners.
One of the key benefits of flower granny squares crochet is their adaptability. You can experiment with different stitches, yarns, and colors to create a wide variety of looks. From rustic boho to bright modern designs, the possibilities are endless.
These squares also serve as a great entry point into learning more advanced crochet patterns. Once you master one, you can build a collection of squares that showcases your growing skills. Plus, they’re excellent for using up leftover yarn from other projects.
With so much potential, it’s easy to see why flower granny squares remain a beloved motif in the crochet world. In the next section, let’s go through the materials and measurements you’ll need before starting your first square.
Materials and Measurements
Before you begin your flower granny squares crochet project, make sure you gather the right materials. Selecting the proper tools and yarn will help ensure a smooth crocheting experience and a beautiful finished square.
For each square, you’ll need worsted weight yarn in at least two colors: one for the flower center and another for the border. You can use more colors for a multicolored flower effect. Acrylic yarn is a popular choice due to its durability and vibrant hues, but cotton yarn also works well for home décor items.
Use a 5.0 mm (H/8) crochet hook, which pairs well with worsted weight yarn. This size will give you defined stitches and a comfortable grip as you work through your rounds. You’ll also need a yarn needle for weaving in ends, and scissors for trimming excess yarn.
Each completed flower granny square measures approximately 5 inches x 5 inches (12.7 cm x 12.7 cm) using the yarn and hook size above. This makes it easy to plan for larger projects like blankets—just calculate how many squares you’ll need based on your desired dimensions.
To make a throw blanket measuring 40 inches x 60 inches (101 cm x 152 cm), you’ll need 8 squares across and 12 squares down, totaling 96 squares. Adjust your square size or project dimensions as needed.
If you’re working on a bag or smaller project, fewer squares are required. For a standard tote bag, you might only need 12-16 squares. Planning your project ahead of time will help you avoid unnecessary yarn purchases and wasted effort.
Always make a gauge swatch if you’re following a specific crochet pattern. Your tension can affect the final size of each square, so adjust your hook size as necessary to match the pattern’s specifications.
Step-by-Step Pattern: Flower Granny Squares Crochet
Now that you have your materials ready, let’s walk through a simple and beautiful flower granny squares crochet pattern. This guide uses U.S. crochet terms. Follow the steps below for a vibrant square that you can replicate and customize.
Round 1: Flower Center
-
Using Color A (flower center), make a magic ring.
-
Chain 3 (counts as first double crochet), then make 11 more double crochets into the ring.
-
Pull the ring tight and join with a slip stitch to the top of the chain 3 (12 stitches total).
-
Fasten off Color A.
Round 2: Petals
-
Join Color B with a slip stitch in any stitch.
-
Chain 2, make 2 double crochets in the same stitch, chain 2, slip stitch in the next stitch – repeat this pattern around.
-
You should have 6 petals when finished.
-
Slip stitch into the first petal to close the round. Fasten off.
Round 3: Square Base
-
Join Color C in the space behind a petal with a slip stitch.
-
Chain 3 (counts as double crochet), 2 double crochets in same space, chain 1.
-
In next space, 3 double crochets, chain 1 – repeat this behind each petal.
-
Join with a slip stitch and fasten off. You now have a round of clusters behind the flower.
Round 4: Shaping the Square
-
Join Color D in any chain-1 space.
-
Work (3 double crochets, chain 2, 3 double crochets) in corner space, 3 double crochets in next space – repeat this pattern around.
-
You’ll form 4 corners and 4 sides. Join with slip stitch.
Round 5: Finishing Border
-
Continue with Color D or switch colors.
-
In each corner space, work (3 double crochets, chain 2, 3 double crochets), and in side spaces work 3 double crochets.
-
Repeat around and fasten off. Weave in all ends with a yarn needle.
Now your square is complete! Repeat the steps above to make as many squares as you need for your project. These crochet patterns are easy to memorize and addictive to make.
Tips and Ideas for Using Flower Granny Squares
Once you’ve mastered the flower granny squares crochet pattern, you’ll want to explore all the creative ways you can use your squares. These motifs are highly adaptable and can be incorporated into many DIY projects.
Try making a full-sized afghan using a mix of pastel or bold colors. Combine 96 squares for a medium throw, or create an oversized blanket for snuggling up in winter. Alternate flower colors to form rows of rainbow blossoms for a bright, cheerful look.
You can also use your squares to create stylish home décor. Sew them together to make pillow covers, wall hangings, or chair cushions. These pieces add a handmade charm to any space and make thoughtful gifts for friends and family.
If you’re into fashion accessories, transform your flower granny squares crochet into a unique bag, scarf, or even a vest. Connect the squares using slip stitches or single crochet for a seamless look. Line the inside with fabric for extra durability if you’re making a bag.
Combine flower squares with solid-colored or traditional granny squares for a stunning contrast. This mix-and-match technique helps balance the design and makes your project more visually interesting.
Store your finished squares in a flat container to prevent them from curling or losing shape. It’s best to block them—lightly mist each square with water and pin it to a blocking mat—to keep them uniform in size.
Finally, don’t be afraid to experiment with crochet patterns. Add popcorn stitches for textured petals, or change your border stitch to give each square a unique flair. With a little imagination, the sky’s the limit for your floral creations.