
The Crocheted Tulip Basket – Pattern is a charming and creative project that blends beauty and functionality into one delightful handmade piece. Whether you are a beginner exploring the world of crochet or an experienced artisan looking for a fresh idea, this pattern offers a perfect balance between simplicity and elegance. The floral inspiration behind the tulip design adds a soft, decorative touch that makes the basket stand out in any home setting.
Creating a Crocheted Tulip Basket – Pattern is more than just a crafting activity—it is an opportunity to express your creativity while producing something useful. These baskets can be used for organizing small household items, storing yarn, or even serving as decorative centerpieces. The tulip motif gives the basket a seasonal feel, making it especially popular during spring, but its timeless design ensures it can be appreciated all year round.
In addition to its aesthetic appeal, the Crocheted Tulip Basket – Pattern is also a fantastic project for improving your crochet skills. It introduces techniques such as working in the round, shaping, and color changes, all while remaining accessible. By following this pattern and understanding its structure, you can build confidence and expand your crochet repertoire with ease.
Understanding the Crocheted Tulip Basket – Pattern
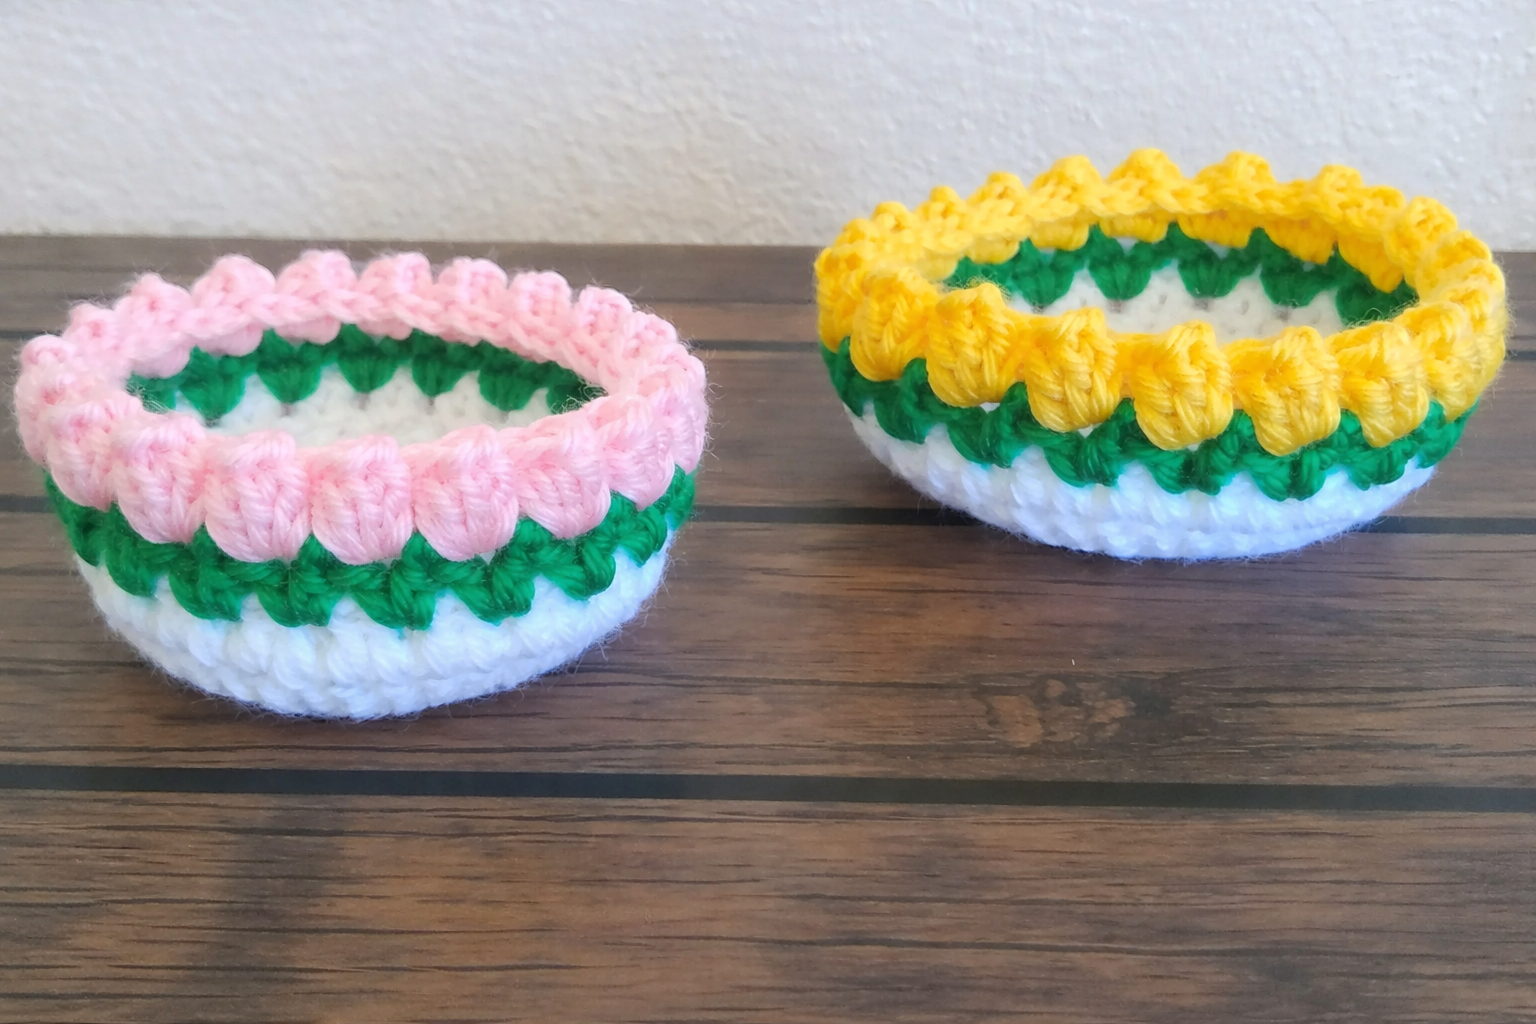
The Crocheted Tulip Basket – Pattern is designed to mimic the delicate form of tulip petals, creating a visually appealing structure that resembles a blooming flower. This is achieved by combining basic stitches in a strategic way that forms soft curves and layered textures. The result is a basket that feels both organic and structured.
DISCOVER MORE FREE PATTERNS HERE!
One of the key elements of this pattern is its versatility. The Crocheted Tulip Basket – Pattern can be adapted in size, color, and yarn type depending on your preferences. This means you can create anything from a small decorative basket to a larger, more functional storage piece without altering the core design.
Another important aspect is the stitch selection. Most Crocheted Tulip Basket – Pattern designs rely on simple stitches like single crochet, half double crochet, and slip stitches. These stitches are combined thoughtfully to create the signature tulip effect, making the pattern approachable for beginners.
Color choice plays a significant role in bringing the tulip design to life. Typically, soft pastel shades or vibrant floral colors are used to replicate the look of real tulips. However, the Crocheted Tulip Basket – Pattern allows for complete creative freedom, so you can experiment with bold or neutral tones as well.
Texture is also an essential component of this pattern. By adjusting tension and stitch placement, you can create a basket that feels sturdy while maintaining a soft, handcrafted look. This balance is what makes the Crocheted Tulip Basket – Pattern both practical and decorative.
Finally, understanding the structure of the pattern helps ensure success. The base is usually worked in the round to create a solid foundation, followed by the sides, where the tulip design is formed. This step-by-step progression makes the Crocheted Tulip Basket – Pattern easy to follow and highly rewarding.
Materials and Tools for the Crocheted Tulip Basket – Pattern
Choosing the right materials is essential when working on a Crocheted Tulip Basket – Pattern. The type of yarn you select will directly affect the shape, durability, and overall appearance of your basket. Cotton yarn is often recommended because it provides structure and holds its shape well.
The hook size you use also plays a crucial role. A slightly smaller hook than recommended for your yarn can help create tighter stitches, resulting in a sturdier basket. This is especially important for the Crocheted Tulip Basket – Pattern, as the basket needs to maintain its form.
In addition to yarn and hooks, you will need a few basic tools. Stitch markers are helpful for keeping track of rounds, especially when working in a continuous spiral. A tapestry needle is essential for weaving in ends and finishing your project neatly.
Some crafters choose to add a lining to their Crocheted Tulip Basket – Pattern for extra durability. While this is optional, it can enhance the basket’s functionality, especially if you plan to use it for storing smaller items.
You may also consider using a stiffener or doubling your yarn to give the basket more structure. This technique is particularly useful if you want your Crocheted Tulip Basket – Pattern to stand upright without collapsing.
Lastly, having a comfortable workspace and good lighting can make a big difference. Crocheting should be an enjoyable and relaxing experience, and setting up the right environment will help you fully enjoy creating your Crocheted Tulip Basket – Pattern.
Step-by-Step Process of the Crocheted Tulip Basket – Pattern
The first step in creating your Crocheted Tulip Basket – Pattern is forming the base. This is typically done by crocheting a flat circle using increases in each round. The size of the base will determine the overall size of your basket.
Once the base is complete, you will begin working on the sides. This is where the basket starts to take shape. By working without increases, the edges naturally curve upward, forming the walls of the basket in your Crocheted Tulip Basket – Pattern.
The tulip design is introduced as you build the sides. This often involves alternating colors and using specific stitch combinations to create petal-like shapes. The beauty of the Crocheted Tulip Basket – Pattern lies in these details.
Maintaining consistent tension is important throughout the process. Uneven stitches can affect the final shape of your basket, so take your time and ensure each stitch is uniform. This will help your Crocheted Tulip Basket – Pattern look polished and professional.
As you reach the top of the basket, you may add a decorative edge. This could be a simple round of slip stitches or a more intricate border. This finishing touch enhances the overall look of the Crocheted Tulip Basket – Pattern.
Finally, secure your yarn and weave in any loose ends. At this stage, you can shape your basket gently with your hands to achieve the desired form. Completing a Crocheted Tulip Basket – Pattern is a satisfying accomplishment that showcases your creativity and skill.
Tips for Customizing Your Crocheted Tulip Basket – Pattern
One of the most exciting aspects of the Crocheted Tulip Basket – Pattern is the ability to customize it. You can experiment with different color combinations to create unique designs that reflect your personal style.
Adjusting the size is another way to personalize your basket. By increasing or decreasing the number of rounds in the base and sides, you can create a variety of sizes using the same Crocheted Tulip Basket – Pattern.
You can also add handles to your basket for extra functionality. This is a simple modification that makes the Crocheted Tulip Basket – Pattern even more practical for everyday use.
Incorporating different stitch patterns can give your basket a unique texture. While the traditional tulip design is beautiful, adding your own twist can make your Crocheted Tulip Basket – Pattern truly one of a kind.
Embellishments such as buttons, bows, or embroidery can further enhance the appearance of your basket. These small details can transform a simple Crocheted Tulip Basket – Pattern into a personalized gift or decorative piece.
Lastly, don’t be afraid to experiment and make mistakes. Every project is a learning experience, and trying new ideas will help you grow as a crocheter while making your Crocheted Tulip Basket – Pattern even more special.
FAQ about Crocheted Tulip Basket – Pattern
What skill level is required for a Crocheted Tulip Basket – Pattern?
The Crocheted Tulip Basket – Pattern is suitable for beginners with basic crochet knowledge, but it also offers enough detail to keep intermediate crafters engaged.
What type of yarn is best for this pattern?
Cotton yarn is highly recommended for the Crocheted Tulip Basket – Pattern because it provides structure and durability, helping the basket maintain its shape.
How long does it take to complete the basket?
The time required depends on your experience, but most people can complete a Crocheted Tulip Basket – Pattern within a few hours to a couple of days.
Can I wash the crocheted basket?
Yes, most baskets made with cotton yarn can be gently washed. However, it’s best to follow proper care instructions to preserve your Crocheted Tulip Basket – Pattern.
Is it possible to sell baskets made from this pattern?
In most cases, you can sell finished items made from a Crocheted Tulip Basket – Pattern, but it’s always good to ensure the pattern allows for commercial use.
Can I customize the tulip design?
Absolutely. The Crocheted Tulip Basket – Pattern is highly customizable, allowing you to experiment with colors, sizes, and decorative elements.
Conclusion
The Crocheted Tulip Basket – Pattern is a beautiful and versatile project that combines creativity, functionality, and skill development. Throughout this article, you learned about the structure of the pattern, the materials needed, the step-by-step process, and ways to customize your basket. This pattern is perfect for anyone looking to create something unique and meaningful with their crochet skills.
By exploring the possibilities within the Crocheted Tulip Basket – Pattern, you can develop your technique while producing a handmade item that adds charm to any space. Whether you use it for decoration, storage, or gifting, this basket is sure to impress. Now it’s your turn to bring this project to life. Try the Crocheted Tulip Basket – Pattern, experiment with your own ideas, and enjoy the process. Don’t forget to share your honest opinion and suggestions—they can inspire even more creativity and help others on their crochet journey.