
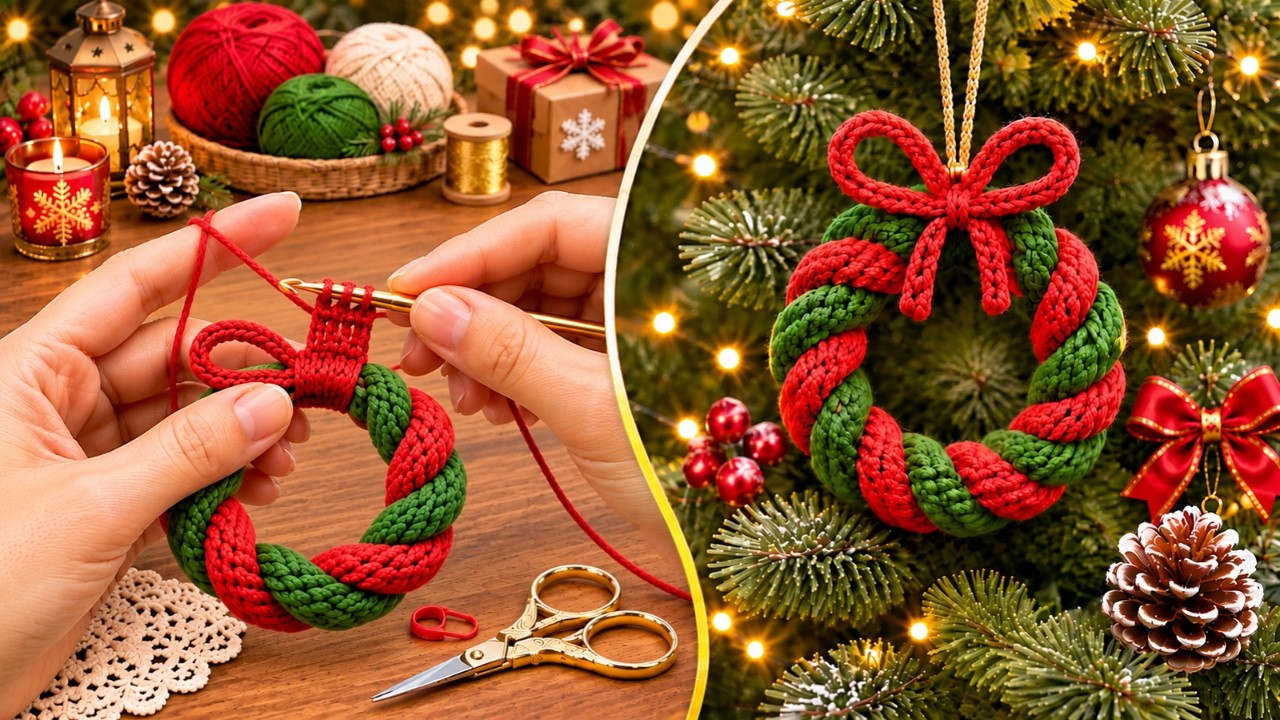
The Crochet Christmas tree ornaments Pattern below shows you how to make a cheerful red-and-green wreath inspired by the ornament in the reference photo.
Its twisted construction brings together two crocheted cords, a neat circular shape, and a decorative red bow.
The combination creates a festive ornament with plenty of texture while keeping the individual stitches approachable.
You can hang the finished wreath on a Christmas tree, attach it to a wrapped gift, or display several together.
This tutorial uses US crochet terminology, with measurements in centimeters to help you check your progress.
The instructions are an original interpretation of the photographed design; the exact stitches and dimensions cannot be confirmed from the image alone.
One lovely feature of this crochet Christmas wreath ornament is that its appearance comes mainly from simple construction.
You will crochet one red tube and one green tube, twist them together, and join their ends into a ring.
A separate crocheted cord becomes the bow, while a lightweight hanging loop finishes the ornament.
There are no complicated color changes within the tubes, which makes the project easier to organize.
Consistent tension matters more than speed, especially when you want the two colors to twist together evenly.
The instructions include adjustable measurements so you can accommodate differences in yarn, hook size, and personal tension.
This Crochet Christmas tree ornaments Pattern suits confident beginners who can work single crochet and recognize their stitches.
If crocheting in continuous rounds is new to you, a stitch marker will make the process much easier.
Read through the assembly instructions before starting so you understand how the straight cords become a circular wreath.
Choose smooth yarn that lets you see each stitch, particularly if this is your first small decorative project.
Keep your first ornament nearby as a size reference if you decide to make a matching set.
With careful finishing, these handmade Christmas ornaments can become a reusable part of your holiday decorations.
1. Gather Materials and Learn the US Crochet Abbreviations
Choose your yarn. Gather smooth worsted-weight yarn in Christmas red and evergreen, preferably from the same yarn range so both colors have a similar thickness. Approximately 15–25 g of each color should provide a useful starting allowance for one small wreath, although actual consumption varies. Cotton gives clear stitch definition, while acrylic creates a softer, lighter ornament. Reserve extra red yarn for the bow and finishing stitches.
DISCOVER MORE FREE PATTERNS HERE!
Prepare your tools. Use a 3.5 mm crochet hook as a starting point, plus scissors, a blunt yarn needle, a removable stitch marker, and a measuring tape. Have a small amount of polyester fiberfill available if your tubes need support. You will also need approximately 25–30 cm of decorative cord for the hanging loop. Adjust the hook if necessary to produce firm stitches without making them difficult to work.
Understand the abbreviations. This pattern uses ch = chain, sl st = slip stitch, sc = single crochet, st = stitch, sts = stitches, and rnd = round. A magic ring is an adjustable starting loop worked into before its center is tightened. Numbers in parentheses indicate the stitch count at the end of a round. The two main tubes use single crochet throughout, with no increases after the starting round.
Practice the main stitches. To make a single crochet, insert the hook into the indicated stitch, yarn over, and pull up a loop; yarn over again and pull through both loops. For a slip stitch, insert the hook, yarn over, and draw through the stitch and the loop already on the hook. To make a chain, yarn over and pull through the loop on the hook. Keep chains relaxed enough to accept the hook later.
Plan the finished size. Aim for a wreath approximately 10–12 cm across, depending on the thickness of your tubes and how tightly you twist them. Each tube will begin with a target length of approximately 32–36 cm, but you should check the twisted pair before fastening off. These measurements guide the construction rather than guarantee a fixed result. Twisting shortens the usable length, so the final fitting step matters.
Check your fabric. Crochet a short sample tube using the instructions in the next section. Its surface should look reasonably closed, with no large gaps between stitches. A tube approximately 1.2–1.8 cm wide when lightly rounded is a practical starting point for this ornament. If it feels stiff or hurts your hands to crochet, try a slightly larger hook. If stuffing shows through, try a smaller hook or less filling.
2. Crochet the Red and Green Wreath Tubes
Begin the red tube. With red yarn, make a magic ring, leaving a starting tail approximately 15 cm long. Rnd 1: Work 6 sc into the magic ring (6 sts). Tighten the ring carefully, then place a marker in the first stitch. Before the tube becomes too narrow to access easily, secure the starting tail through the inside stitches. Keep the closed starting end smooth without pulling it into a hard knot.
Establish continuous rounds. Rnd 2: Sc in each st around (6 sts). Do not join with a slip stitch and do not chain at the beginning of each round. Continue in a spiral, moving the marker to the first stitch of every new round. Working in continuous rounds avoids a visible joining seam. Count the stitches periodically because an accidental increase or missed stitch will change the tube’s width.
Build the length. Rnd 3 and all following rnds: Sc in each st around (6 sts). Continue until the red tube measures approximately 32 cm without stretching. Leave the working loop secured with a stitch marker so you can add more rounds after checking the assembly. Measure the tube resting naturally on a flat surface. Pulling it taut during measurement can produce an ornament that contracts or puckers later.
Add optional support. If the tube collapses completely, insert tiny wisps of fiberfill as you work, using the blunt end of a suitable tool gently. Add only enough to help the tube remain rounded. Dense stuffing makes twisting difficult and can force filling between the stitches. For a flexible, lightweight crochet wreath ornament, leaving the tubes unstuffed is also reasonable when the yarn already holds its shape.
Make the green tube. Repeat the same instructions in green: Rnd 1: 6 sc in a magic ring; all subsequent rnds: sc around (6 sts). Match the red tube’s width, length, and amount of stuffing as closely as possible. Use the same hook and similar tension. Place the two tubes beside each other to compare them before assembly. Correcting a difference now is easier than hiding uneven sections in the finished wreath.
Check both pieces together. Lay the tubes parallel, with their starting ends aligned, and temporarily secure those ends together with a loose scrap-yarn tie. Twist the tubes evenly, then curve the twisted pair into a circle. If the ring is too small, undo the twist and add equal rounds to both tubes. Once the size is satisfactory, fasten off each tube with a 25 cm sewing tail, leaving its final six stitches open.
3. Twist the Cords and Assemble the Circular Wreath
Arrange an even twist. Place the red and green tubes side by side again, keeping their aligned starting ends temporarily tied. Cross one tube over the other repeatedly in the same direction. Use a relaxed, consistent twist that shows both colors clearly. Approximately five to seven visible crossings may suit this size, but judge the appearance rather than forcing a fixed number. Stop if the tubes begin to buckle.
Shape the ring. Bring the two ends of the twisted pair toward each other to form the wreath. Rotate the ends slightly until each open red end can meet the closed red starting end, and each green end can meet its matching green starting end. Position these joins at the top, where the bow will cover them. The ornament should form a balanced circle with a visible central opening.
Join the red tube. Thread the red finishing tail onto a yarn needle. Flatten the open end slightly and stitch it securely against the closed starting end of the red tube. Catch loops around the open edge and corresponding stitches on the starting end, working around the connection. Use small stitches and avoid pulling so tightly that a deep indentation forms. The goal is a secure connection with a similar thickness to the surrounding tube.
Join the green tube. Repeat the joining process with the green yarn tail. Remove the temporary scrap-yarn tie once both color connections are secure. Gently redistribute the twist around the ring, moving any crowded crossings apart with your fingers. Check the wreath from the front before securing the remaining tails. If the circle looks uneven, adjust the twist first rather than trying to correct everything with tighter sewing.
Stabilize the top. Use a remaining yarn tail to make two or three small stitches connecting the red and green tubes near their joins. These stitches help keep the top together beneath the bow. Add a discreet tack elsewhere only if the tubes keep slipping out of position. Preserve the rounded texture by passing the needle through interior stitches instead of tightly wrapping yarn around the outside.
Finish the loose ends. Weave each tail through several stitches inside its matching tube, change direction, and pass through a few more stitches before trimming. Smooth the wreath gently with your hands. If needed, lightly dampen and reshape it according to the yarn’s care instructions, then allow it to dry completely. Avoid flattening the tubes, since their rounded texture gives this Crochet Christmas tree ornaments Pattern its distinctive appearance.
4. Crochet the Bow and Add the Hanging Loop
Make the bow cord. With red yarn, ch 65 loosely. Beginning in the second chain from the hook, sl st in each ch across (64 sl sts). Fasten off, leaving a 25 cm tail. This creates a narrow, flexible cord with a defined edge. Aim for approximately 35–40 cm of finished cord; if your gauge produces a much shorter piece, remake it with additional chains before proceeding.
Form the bow. Place the finished cord flat and shape it into a bow with two loops and two downward-pointing tails. Begin with loops approximately 3–4 cm long and tails approximately 4–5 cm long, then adjust them to suit your wreath. Cross the cord sections at the center. Pinch that crossing point and use the finishing tail to stitch through the overlapping sections several times.
Secure the bow center. Wind the remaining red tail around the pinched center four to six times to create a tidy central band. Pass the needle through the back of these wraps to secure them. Leave enough yarn to attach the bow to the wreath. Shape the loops with your fingers, keeping their sizes similar. The bow should complement the wreath without covering most of its central opening.
Attach the bow. Position it over the tube joins at the top of the wreath. Sew through the back of the bow center and through secure stitches in both tubes. Make several passes so the bow cannot rotate easily. Keep the loops free by avoiding stitches through their outer edges. Adjust the two tails so they fall neatly toward the center, resembling the festive arrangement in the reference image.
Add the hanger. Fold the decorative cord in half and pass its folded end around the top of the wreath behind the bow. Bring the two loose ends through the folded loop and pull gently to form a lark’s head attachment. Tie the loose ends together with a secure knot, creating a hanging loop approximately 8–10 cm long when folded. Turn the knot toward the back if desired.
Inspect the finished ornament. Hang the wreath briefly and check its balance, bow placement, and joins. Tug gently on the hanger to confirm that it is secure, then trim any remaining stray yarn ends. Keep the ornament away from open flames and hot bulbs, and store it dry without crushing the bow. Your completed Crochet Christmas tree ornaments Pattern project is ready for a tree branch, gift package, or seasonal display.
Frequently Asked Questions
Is this crochet Christmas wreath suitable for beginners?
Yes, confident beginners can make it using chains, single crochet, slip stitches, and basic sewing. The narrow tubes may feel fiddly at first because each round contains only six stitches. Use a marker and work slowly. Practicing one short tube before making the full ornament will help you establish comfortable tension.
Does the pattern reproduce the photographed ornament exactly?
It recreates the visible idea: a red-and-green twisted wreath with a red bow and hanging loop. A photograph cannot establish the original stitch counts, materials, or construction. This tutorial therefore provides an adjustable interpretation, and your finished texture and proportions will depend on your yarn and tension.
What yarn works best for crochet Christmas tree ornaments?
Smooth cotton or acrylic yarn works well for this design. Cotton emphasizes stitch definition, while acrylic usually produces a softer result. Use matching yarn weights for both colors so the twist looks balanced. Very fuzzy yarn makes stitches harder to count and can obscure the contrast between the two cords.
Do I need to stuff the crocheted tubes?
No. Stuffing is optional and depends on the firmness of your fabric. If the tubes retain a rounded shape naturally, leave them empty. If they flatten too much, add small amounts of fiberfill while crocheting. Overstuffing can make the wreath bulky and reduce the flexibility needed for an even twist.
Why does my wreath look oval or uneven?
Common causes include different tube lengths, unequal stuffing, inconsistent twists, or joins pulled too tightly. Lay the wreath flat and redistribute the crossings gently. Check that the hanger sits at the top center. If the shape remains distorted, reopen the affected join and adjust the assembly instead of forcing the ring flat.
Can I make a larger or smaller ornament?
Yes. Adjust both tube lengths equally and test the twisted pair before fastening off. A larger hook and thicker yarn will also increase the overall size, but the bow may need a longer cord. For a smaller version, use thinner yarn and a suitable smaller hook while keeping the same six-stitch tube construction.
How should I clean and store the ornament?
Follow the care instructions for your chosen yarn. Gentle spot cleaning is a practical option for a lightly soiled ornament. Allow it to dry completely before storing it in a shallow container. Place the bow loosely on top and avoid heavy decorations that could compress the tubes during storage.
Conclusion
This Crochet Christmas tree ornaments Pattern explains how to crochet two simple tubes, twist them into a festive wreath, sew secure joins, and finish the ornament with a red bow and hanging loop. By checking measurements during assembly and keeping your stitches consistent, you can adjust the design to suit your materials and preferred size.
EASILY FIND THE FREE VIDEO FOR THIS PATTERN HERE!
The same construction also offers room for personal color choices, from traditional red and green to cream and gold. Please leave your honest opinion about the tutorial and share your suggestions for improvements or future crochet projects. Your feedback can help make upcoming instructions clearer and more useful for fellow makers.