
The Crochet Cat House Cat Bed Step by Step Tutorial – Pattern is a delightful project for anyone who loves to crochet and wants to create something cozy and functional for their furry friend. A handmade cat bed not only provides comfort but also adds a touch of warmth and charm to your home décor. With this detailed guide, even beginner crocheters can follow along and create a stylish, sturdy, and comfortable cat bed that their pet will love curling up in.
Crocheting a cat house or bed is more than just a craft — it’s an act of love. Cats adore having their own safe space to rest, and making one by hand allows you to tailor every detail to suit your pet’s personality and needs. The Crochet Cat House Cat Bed Step by Step Tutorial – Pattern teaches you how to shape, stitch, and customize your design using simple crochet techniques that can be adapted for any yarn or size. Whether you have one cat or several, this project is sure to bring joy to both you and your pets.
In this article, we’ll walk through every stage of the process — from selecting the right materials to shaping the bed and adding decorative details. You’ll also learn tips for maintaining structure, ensuring comfort, and keeping your crochet cat house looking great for years. With the right tools and a little creativity, the Crochet Cat House Cat Bed Step by Step Tutorial – Pattern will become your new favorite project and a cozy gift your cat will never want to leave.
Getting Started with the Crochet Cat House Cat Bed Pattern
Before diving into the stitches, preparation is key. The success of your Crochet Cat House Cat Bed Step by Step Tutorial – Pattern depends on choosing the right yarn, hook, and structure for your design. This first step sets the foundation for a durable and comfortable bed.
Start by selecting a sturdy yarn. Cotton, t-shirt yarn, or thick polyester cord are excellent options because they provide the firmness needed for the cat bed to hold its shape. Avoid lightweight or fluffy yarns, as they can collapse or lose form over time. The thicker the yarn, the faster your project will work up and the more stable your cat house will be.
Next, choose the right crochet hook. A large hook — usually between 8 mm and 10 mm — is ideal for chunky yarns. Using the correct hook size ensures your stitches are tight enough to create structure while still flexible enough for shaping. Always check the label on your yarn for hook recommendations before starting.
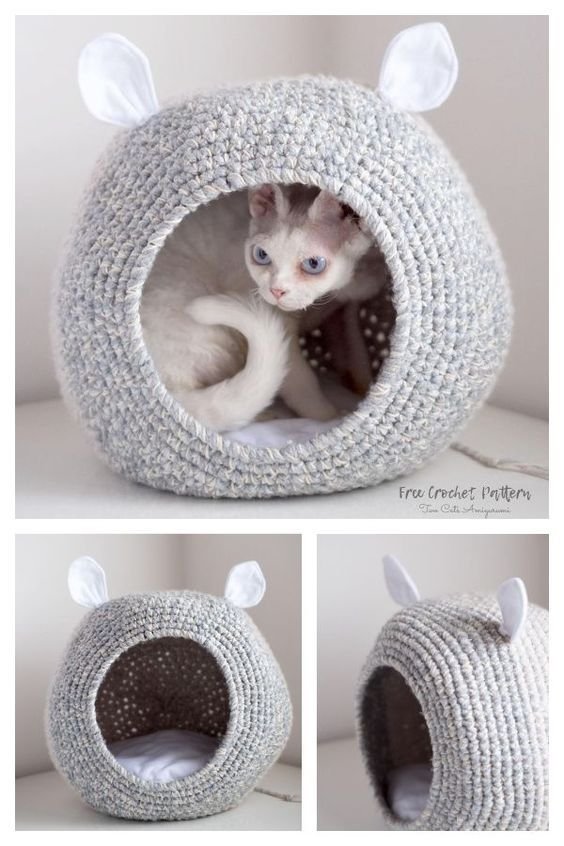
For the base of your Crochet Cat House Cat Bed Step by Step Tutorial – Pattern, you’ll need to decide on the size. A standard size of around 16–18 inches in diameter works well for most cats, but you can adjust it depending on your cat’s size. Larger breeds or multiple cats may need a wider base for comfort.
Once you have your materials ready, find a comfortable and well-lit workspace. Keeping your yarn untangled and tools within reach helps make the crocheting process smoother. Having a soft pillow or stuffed toy on hand can help you test the shape and firmness of your work as you go.
Finally, gather a few optional items for structure and decoration. Plastic canvas or thin foam can be added between crochet layers to keep the sides upright, and decorative touches like pom-poms, faux fur, or name tags can give your finished bed personality and flair.
Step-by-Step Guide to Crocheting Your Cat House
Now that you have your materials, it’s time to begin the main section of your Crochet Cat House Cat Bed Step by Step Tutorial – Pattern. This part walks you through the foundation, shaping, and assembly process.
Start with a magic ring or chain circle to create the base. Work single crochet stitches around the ring, gradually increasing each round to form a flat circle. The number of increases per round depends on your yarn and tension, but usually six increases per round help keep the circle smooth and even.
Continue working in the round until your base reaches your desired diameter. A flat, firm base is crucial for stability, so make sure your stitches are tight and even. If you notice any curling or unevenness, gently adjust your tension or add an extra round to even it out.
Once the base is complete, begin building the sides of your cat bed. To form the walls, crochet around the edge of the base without adding increases. This makes the fabric curve upward naturally. Use single crochet or half-double crochet stitches for a dense, strong wall structure.
As you continue upward, measure the height of your cat bed regularly. A typical height of 8–10 inches creates a cozy, enclosed feeling while still allowing your cat to peek out comfortably. If you’re making a full cat house with a roof, continue crocheting higher and plan an opening for your cat to enter.
To shape the roof or dome, start decreasing stitches gradually. This gives the structure a rounded top. You can leave a large opening in the front or cut out a doorway by skipping a section of stitches and rejoining your yarn afterward. The Crochet Cat House Cat Bed Step by Step Tutorial – Pattern is flexible, allowing you to adapt it into either an open bed or an enclosed cat cave.
Finally, finish off your last stitches securely and weave in all loose ends. This not only makes your work look tidy but also ensures your cat won’t accidentally snag any yarn. You now have the main structure of your crochet cat house ready for finishing touches.
Adding Comfort and Decorative Touches
Your Crochet Cat House Cat Bed Step by Step Tutorial – Pattern wouldn’t be complete without a few personal touches that make it extra cozy and stylish. This section focuses on comfort and design enhancements to elevate your handmade project.
First, add a cushion or soft insert to the base of the bed. You can crochet a matching round pillow or simply use a plush cushion covered in coordinating fabric. Fill it with polyester fiberfill or foam for a soft, supportive texture that your cat will love sinking into.
Next, line the inside of the bed for extra comfort. Fleece, faux fur, or soft cotton fabric can be sewn or glued to the interior walls. This not only makes the bed more inviting but also provides warmth during colder months.
Decorative details can turn a simple crochet project into something truly special. Consider adding stripes, contrasting borders, or embroidered designs. Using a different color yarn for the edges or doorway creates a playful, finished look.
If you want to make your cat house double as a home décor item, choose colors that match your furniture or room theme. Neutral tones like beige, gray, or cream look elegant, while bright hues like red or turquoise can add a cheerful accent to your space.
You can also personalize the bed with your cat’s name. Crochet or embroider the name on a small patch and attach it to the front. This gives the Crochet Cat House Cat Bed Step by Step Tutorial – Pattern a unique, custom-made feel that any pet owner would adore.
Lastly, safety is key. Make sure any decorations, such as buttons or ribbons, are securely attached and can’t be swallowed. Your goal is to combine comfort, beauty, and practicality in one adorable project.
Maintenance, Durability, and Long-Term Care
Once your Crochet Cat House Cat Bed Step by Step Tutorial – Pattern is finished, proper care will help keep it looking beautiful and lasting longer. Cats love their beds and tend to use them daily, so regular maintenance is essential.
Begin by spot cleaning your cat bed weekly. Use a damp cloth and mild soap to clean stains or dirt. For deeper cleaning, many crochet beds can be hand washed or gently machine washed on a delicate cycle, depending on your yarn choice. Always air dry to prevent shrinking or warping.
To maintain structure, reshape the bed while it’s still damp after washing. This helps the yarn settle back into its original shape. Adding a soft cushion that can be removed and washed separately makes cleaning easier and keeps your cat’s resting area fresh.
Over time, the base of your cat house may flatten slightly from daily use. To fix this, add a layer of foam or cardboard reinforcement between the crochet layers. This helps maintain stability and gives the bed a firm, supportive surface.
If you have multiple cats, consider making a few beds in different colors or styles. Having multiple resting spots reduces competition and gives each cat its own cozy retreat. The Crochet Cat House Cat Bed Step by Step Tutorial – Pattern can be easily modified to create variations that suit different personalities.
Lastly, check your cat bed periodically for loose threads or worn areas. Repairing them promptly prevents damage from getting worse. With regular care, your crochet cat bed can last for many seasons, providing lasting comfort and charm.
FAQ – Crochet Cat House Cat Bed Step by Step Tutorial – Pattern
1. Is this pattern suitable for beginners?
Yes! The Crochet Cat House Cat Bed Step by Step Tutorial – Pattern uses basic stitches such as single crochet and half-double crochet, making it perfect for beginners with a bit of patience and practice.
2. What type of yarn works best?
Thick cotton or t-shirt yarn works best for durability and structure. Avoid thin or stretchy yarns that may lose shape over time.
3. How long does it take to make?
Depending on your speed and size, most crocheters can complete the project in 6–10 hours over a few days.
4. Can the bed be machine washed?
Yes, if made with washable yarn. However, hand washing is safer for maintaining the shape and integrity of the stitches.
5. How can I make the bed more rigid?
Use thicker yarn, smaller hook sizes, or insert foam or cardboard between layers for added firmness.
6. Can I modify the design for small dogs or other pets?
Absolutely. The Crochet Cat House Cat Bed Step by Step Tutorial – Pattern can be easily scaled up or down depending on the pet’s size.
Conclusion
The Crochet Cat House Cat Bed Step by Step Tutorial – Pattern is a wonderful project that combines creativity, functionality, and love for your pets. By following this step-by-step guide, you can craft a beautiful handmade bed that not only makes your cat feel safe and cozy but also showcases your crochet skills. From selecting the right yarn to adding decorative touches, every step allows you to personalize your creation and express your care.
Crocheting a cat house is more than just a hobby — it’s a meaningful way to connect with your furry companion. We hope this guide inspires you to pick up your hook and start crafting a cozy haven for your cat today. If you enjoyed this tutorial, please leave your honest opinion, share your experiences, and offer any suggestions for future projects. Your feedback helps build a creative, caring community of makers and pet lovers alike. 🐾🧶