
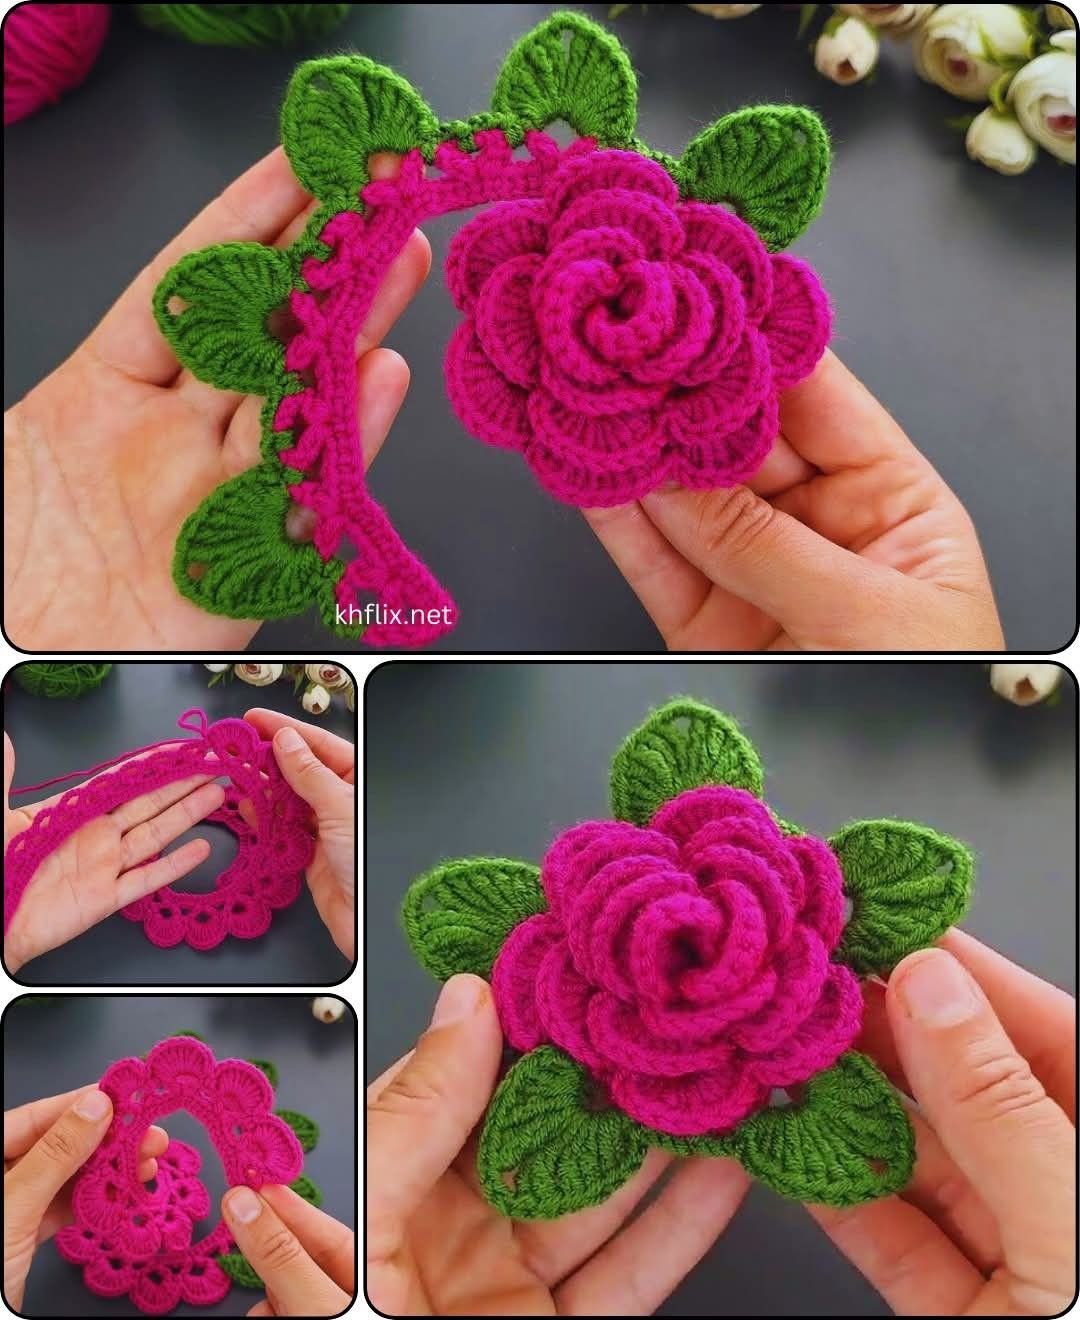
Crocheting a 3D rose flower is a delightful and rewarding project, perfect for adding a touch of elegance to various items. Whether you want to embellish a hat, scarf, or bag, a crocheted 3D rose flower adds a delicate charm.
This guide will walk you through the process of creating your own beautiful crochet rose, from selecting materials to completing the intricate petals.
We’ll also incorporate helpful crochet patterns for beginners and experts alike.
Materials You Will Need
To get started with your crochet 3D rose flower, you’ll need a few basic materials. Having the right supplies is essential for achieving the best results.
- Yarn: Choose a medium-weight yarn (worsted weight) for the best texture and appearance. Popular choices include cotton or acrylic yarn in red or pink hues to mimic a natural rose, but feel free to experiment with different colors for a unique look.
- Crochet Hook: For most crochet patterns, a 4mm (G-6) crochet hook works well. You can adjust the hook size based on the type of yarn you select, but this size typically produces neat stitches.
- Scissors and Yarn Needle: A pair of sharp scissors for trimming excess yarn and a yarn needle to weave in ends will help you finish your crochet rose with a clean look.
Foundation Chain and First Petals
Creating a 3D crochet rose starts with a foundation chain that forms the base for your petals. In this step, you’ll crochet the first set of petals to build the flower’s center.
- Chain 53 stitches to start. This foundation chain forms the spiral base around which your rose petals will curl. Ensure the tension is even, as this will influence the overall look of your 3D flower.
- Row 1: Begin by making 1 double crochet (DC) in the 4th chain from the hook. Then, chain 2 and skip the next stitch. Continue this pattern by making 1 DC in the next chain, chain 2, skip 1, and repeat across the entire row.
- Row 2: After chaining 3 and turning your work, make 3 double crochets (DC) in each chain-2 space from the previous row. This will form the base for the larger outer petals of the rose.
Building the Outer Petals
Now that you have the foundation row and first petals in place, it’s time to start working on the more pronounced, outer petals, which give the rose its 3D appearance. These outer layers require slightly more stitches and a bit of patience.
- Row 3: Chain 3, turn your work, and create 5 double crochets (DC) in each chain-2 space from the previous row. This will begin to form the rose’s signature voluminous petal look. After completing the row, you’ll see the petals start to curl naturally, creating a realistic rose shape.
- Row 4: For an extra layer of petals, you can continue with 7 double crochets (DC) in each space if you want a fuller rose. This step is optional but adds significant dimension to the flower, making it more intricate.
- Shaping the Rose: As you work through each row, your crochet rose will begin to spiral. Carefully fold the flower into a circular shape and sew the base of the petals together to secure it.
Final Touches: Adding Leaves and a Stem
To make your crochet 3D rose flower complete, consider adding a few finishing details like leaves and a stem. These small additions can turn your flower into a charming embellishment or even a stand-alone decoration.
- Crocheting Leaves: To create simple leaves, start with a foundation chain of 8 stitches. In the second chain from the hook, work 1 single crochet (SC), followed by 1 half double crochet (HDC) in the next stitch, 1 double crochet (DC) in the next three stitches, and a half double crochet (HDC) in the next. Finish with 1 single crochet (SC) in the last stitch.
- Attaching the Leaves: After finishing the leaf, fasten off and leave a long tail for sewing. Attach the leaves to the base of your 3D crochet rose flower using a yarn needle. Secure it tightly so the leaves stay in place.
- Creating a Stem: If you want to add a stem, chain 40 and work single crochet (SC) stitches back across the chain to form a sturdy stem. This makes the rose perfect for bouquets or floral arrangements.
Versatility of 3D Crochet Rose Flowers
The beauty of crocheting a 3D rose flower lies in its versatility. You can use these flowers in various projects, from fashion accessories to home decor, giving your items a personalized, handmade touch.
- Home Decor: Add a few crochet rose flowers to throw pillows, blankets, or curtains to brighten up any room. The 3D design creates an eye-catching detail that complements different interior styles.
- Fashion Accessories: Attach your crocheted rose to headbands, hats, or scarves for a unique and charming accent. The flowers also work beautifully as brooches or bag decorations.
- Gift Ideas: Crochet rose flowers make thoughtful, handmade gifts. Use them to adorn gift boxes, or create a bouquet of crochet roses for a special occasion like Valentine’s Day, weddings, or Mother’s Day.
Crochet Patterns for Different Skill Levels
Whether you are a beginner or an advanced crocheter, this project is accessible with the right crochet patterns. The instructions can be adapted depending on your skill level and the complexity you want to achieve.
- Beginners: For those new to crocheting, you can simplify the pattern by making fewer rows of petals or using larger hooks and thicker yarn to create larger stitches. This results in a less intricate, but equally charming, flower.
- Intermediate: If you have some crochet experience, experiment with various stitch techniques such as half double crochet (HDC) or treble crochet (TRC) to add more texture to your petals. These stitches add layers of complexity and make your rose look more detailed.
- Advanced: Experienced crocheters can challenge themselves by creating multi-colored roses, alternating between different shades of yarn to give a gradient effect. Advanced patterns may also incorporate more leaves, vines, or even beads for an elaborate design.
Tips for Perfecting Your Crochet Rose Flower
Even though crocheting a rose flower is straightforward, there are some helpful tips to ensure your finished product looks flawless. A few small adjustments can make a big difference in your results.
- Tension Control: Pay close attention to your yarn tension as you crochet. If the stitches are too tight, the flower may not curl properly, and if they’re too loose, it may look floppy. Try to maintain a consistent tension for even and well-formed petals.
- Blocking Your Flower: After you complete the rose, lightly block it to shape the petals. This involves pinning the petals down and spraying them with water or steam to help them hold their shape.
- Experiment with Yarn: Don’t be afraid to experiment with different types of yarn for unique effects. A fuzzy or variegated yarn can add texture and dimension, while a metallic thread can give your rose a subtle sparkle.
By following this guide and using the right crochet patterns, you can create stunning 3D rose flowers that are perfect for any project.
Crocheting is not only relaxing but also an incredibly creative outlet, and this project is a wonderful way to hone your skills. Whether you make a single rose or an entire bouquet, your handmade flowers will add beauty and charm to whatever you choose to adorn.