
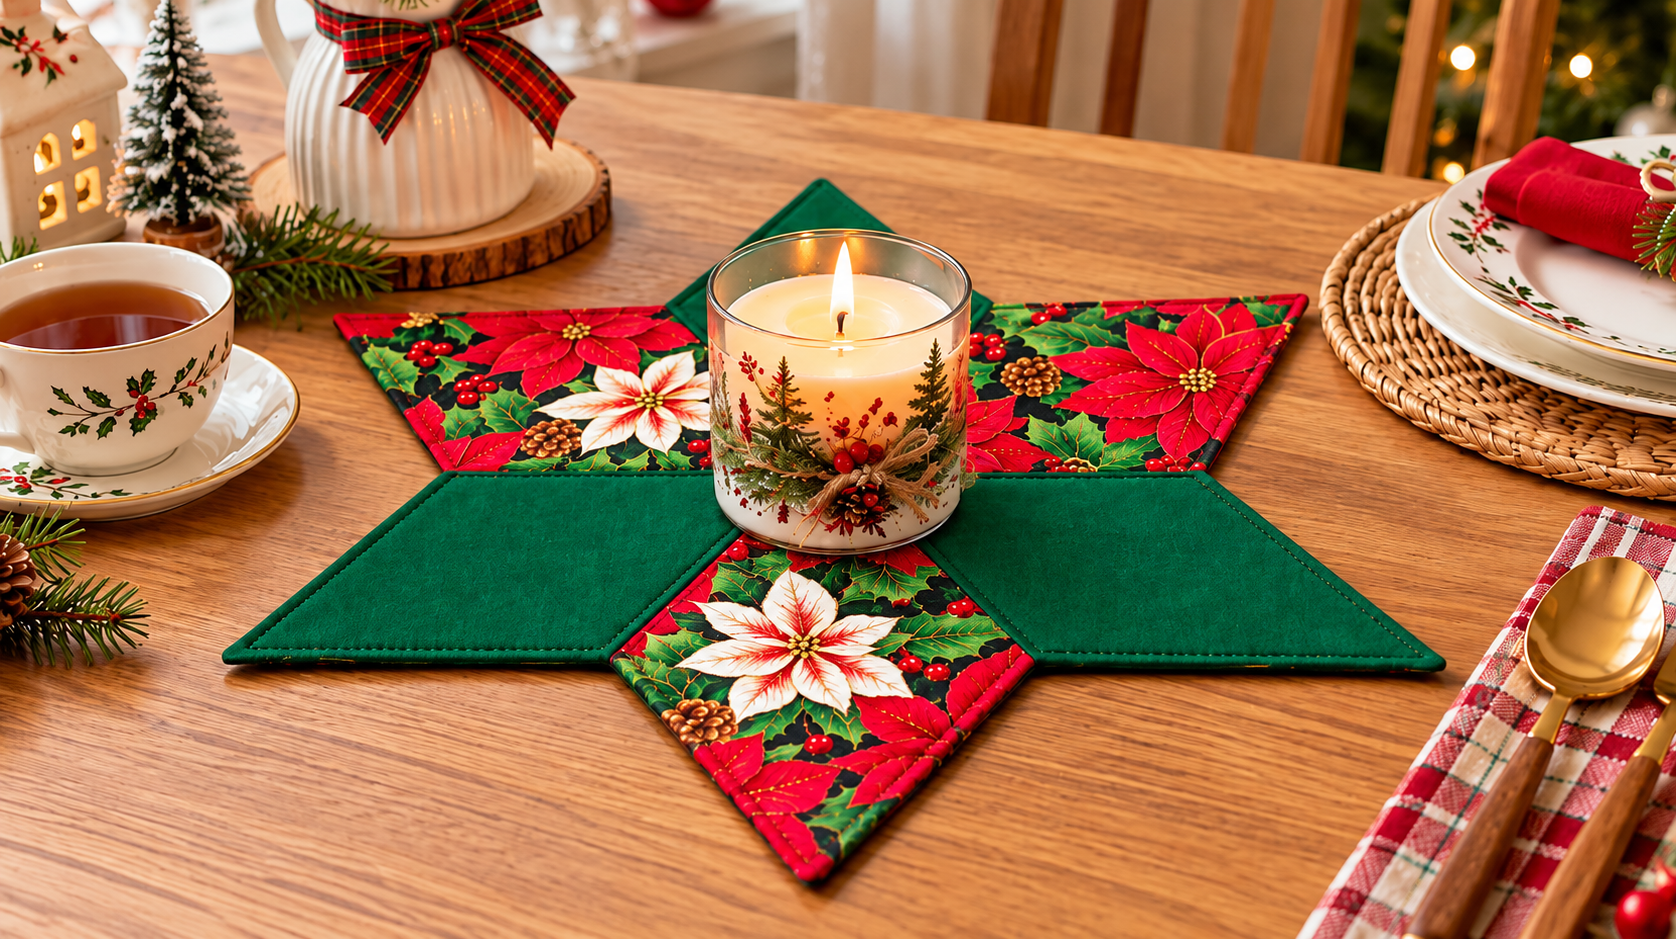
The Star-shaped Christmas placemat Pattern is a festive sewing project that combines traditional patchwork techniques with the warmth and color of Christmas fabrics. Inspired by the star-shaped pieces shown in the reference image, this project is ideal for decorating a holiday dining table, sideboard, coffee table, or kitchen counter. The design uses individual fabric sections arranged around a central point to create a dimensional-looking star without requiring complicated construction. By mixing Christmas cotton fabrics, such as snowflakes, poinsettias, holly, Christmas trees, reindeer, and metallic-style prints, every finished placemat can have its own personality while still coordinating beautifully with the rest of your seasonal décor.
One of the most appealing things about this Christmas sewing pattern is its flexibility. You can create a traditional version with red, green, cream, and gold fabrics, or experiment with winter combinations such as navy blue, light blue, silver, and white. The photograph demonstrates how dramatically the appearance of the star changes depending on fabric placement. Some stars feature strong contrasting sections, while others use coordinated prints that create a softer visual transition. For beginners, this is also a useful project for practicing accurate cutting, patchwork piecing, pressing, topstitching, and seam matching without committing to a full-size quilt.
The finished size can be customized, but a practical starting point is a star approximately 38 to 45 cm (15 to 18 inches) across, measured from one outer point to the opposite point. Because handmade projects can vary according to seam allowance and template proportions, it is helpful to make a paper test layout before cutting your favorite fabric. Throughout this tutorial, the Star-shaped Christmas placemat Pattern will be approached as a layered fabric project made with a decorative patchwork top, a thin batting or interfacing layer, and backing fabric. This construction gives the placemat enough structure to lie neatly on a table while preserving the soft handmade character that makes quilted Christmas decorations so inviting.
Materials and Fabric Selection for the Star-shaped Christmas Placemat Pattern
Begin by choosing 100% cotton quilting fabric whenever possible. Quilting cotton is easy to cut, press, and sew, and it is available in countless seasonal prints. For a classic Christmas star, select four to six coordinating fabrics rather than using only one print. Red snowflakes, dark green foliage, cream holly, gold stars, and small Christmas tree prints work particularly well because they provide both contrast and visual continuity.
DISCOVER MORE FREE PATTERNS HERE!
For one medium-size placemat, small fabric pieces or fat-quarter cuts will usually provide more than enough material. The exact quantity depends on the dimensions of your template. If you plan to make a matching set for the entire table, purchasing approximately 0.5 meter of several coordinating fabrics can make color distribution easier. Always allow additional material for cutting errors, directional prints, and pattern matching.
You will also need a piece of backing fabric slightly larger than the completed star. Choose cotton that complements the front because the reverse can be visible when the placemat is handled or stored. A solid red, green, cream, or subtle holiday print makes an attractive backing. Pre-washing is optional for decorative projects, but all fabrics should ideally receive the same preparation to reduce differences in future shrinkage.
The middle layer can be made from thin cotton batting, low-loft quilt batting, or lightweight fusible fleece. Avoid extremely thick batting because the many intersecting seams near the center can become bulky. A thin layer provides enough padding to emphasize the quilted appearance while allowing the star points to remain crisp and flat.
Basic sewing supplies include a sewing machine, coordinating thread, fabric scissors or a rotary cutter, cutting mat, quilting ruler, pins or sewing clips, an iron, ironing surface, fabric marking tool, and paper or cardstock for the template. A rotary cutter and quilting ruler are particularly helpful because clean, straight edges significantly improve alignment during assembly.
Before cutting fabric, create a full-size paper version of your star. Divide it into the same repeating geometric sections you intend to sew. Arrange the paper pieces on a flat surface and check that all points meet correctly. Label each section before separating the templates. This simple preparation step helps prevent confusion later and gives you an opportunity to adjust the overall dimensions of your Star-shaped Christmas placemat Pattern before fabric is used.
Cutting and Arranging the Christmas Star Pieces
Press every fabric before cutting. Wrinkles can subtly distort measurements and produce sections that no longer align accurately. Place the fabric on a cutting mat and position your template according to the grain whenever possible. If the fabric contains Christmas trees, reindeer, lettering, or another directional design, pay close attention to orientation so the motifs appear upright when the star is assembled.
Transfer the template shape onto the wrong side of the fabric. Your template can either include the seam allowance or represent the finished shape. For a straightforward method, create templates that already include a 0.6 cm (¼-inch) seam allowance around the necessary sewing edges. Whichever method you choose, remain consistent for every section.
Cut enough pieces to complete the entire star before beginning assembly. Place each cut piece directly over its corresponding paper template. This prevents similar-looking shapes from becoming mixed up. Precision matters particularly around the central intersection because small differences can accumulate as additional sections are joined.
Now arrange the fabric pieces on your work surface without sewing them. Think of this stage as designing a miniature quilt. Alternate light and dark prints so each star point remains visually recognizable. For example, a red center section can be surrounded by cream holly, dark green snowflakes, and additional red pieces. A blue winter version might combine navy snowflakes, pale blue fabric, cream Christmas trees, and silver-inspired prints.
Take a photograph of your preferred layout before moving anything. This is a surprisingly useful sewing habit because pieces can easily become reversed or exchanged while traveling between the cutting table, ironing board, and sewing machine. The photograph becomes a quick visual reference throughout assembly.
Finally, inspect the star from several angles. The strongest Christmas patchwork designs usually balance color rather than concentrating every dark print or bold motif on one side. However, perfect symmetry is not mandatory. Handmade patchwork gains much of its charm from thoughtful variation, and using different fabrics in neighboring points can make the completed project look more dynamic.
Sewing, Pressing, and Building the Star Shape
Begin construction with the smaller groups of pieces that form each repeated star unit. Place two fabric sections right sides together, carefully matching the raw edges. Pin or clip them in place and sew using the same seam allowance established when creating the templates. Maintaining an accurate seam allowance is more important than sewing quickly.
After stitching the first seam, open the pieces and press carefully. Instead of aggressively sliding the iron across the fabric, lower and lift it. This reduces stretching along angled or bias edges. Depending on your layout, seams can be pressed toward the darker fabric or pressed open where several seam allowances will eventually intersect.
Continue joining pieces into manageable units rather than attempting to construct the entire star sequentially around the center. For example, create matching pairs or individual star-point units first. Compare these units before proceeding. Their corresponding edges should be approximately equal in length, and their seam intersections should occur in similar positions.
When joining two patchwork units, pay particular attention to matching seam intersections. Place the pieces right sides together and align the existing seams. Pin directly beside the intersection before sewing. After stitching, open the unit and inspect the meeting point. Minor differences are normal in handmade sewing, but correcting a noticeably displaced intersection at this stage is easier than after the entire placemat has been assembled.
The center is generally the most challenging area of a Star-shaped Christmas placemat Pattern because several seams converge there. Avoid pulling the fabric while sewing. If the center becomes bulky, pressing some seam allowances open can distribute the thickness more evenly. You can also trim tiny excess seam ends where appropriate, taking care never to cut into the stitching itself.
Once all star sections have been connected, press the completed patchwork top from both sides. Lay it flat and inspect the outer points. Each point should extend naturally without twisting. If a section appears distorted, check whether a seam allowance has folded incorrectly underneath. Correcting these details before adding batting and backing will produce a cleaner and more professional-looking finished placemat.
Layering, Quilting, Finishing, and Decorating the Placemat
Place the backing fabric on your workspace and position the batting over it. Add the completed patchwork star on top. Depending on your preferred finishing technique, the layers may be temporarily cut slightly larger than the star and trimmed later. Smooth everything carefully from the center toward the outside to remove wrinkles.
Secure the layers with quilting pins, safety pins, temporary basting, or clips where appropriate. For this relatively small project, extensive basting is unnecessary, but the layers should not shift during sewing. Work especially carefully around the narrow star points because movement there can affect the final outline.
Quilting can be simple. Stitching approximately 0.3 to 0.6 cm from major patchwork seams emphasizes the geometric structure while holding the three layers together. This technique is sometimes described as echo quilting or stitching beside the seam. You can also sew through selected existing seam lines for a subtle finish.
For additional decoration, quilt small lines within the larger fabric sections, but avoid overwhelming the printed motifs. Metallic-looking thread can provide a festive effect, while neutral cotton or polyester thread keeps the quilting understated. If this is your first quilted placemat, straightforward topstitching is often easier to control than dense decorative quilting.
The outside edge can be completed using several sewing methods. One approachable option is to sew the front and backing right sides together around the star, leaving an opening for turning. Carefully clip seam allowances near inward corners and trim excess bulk from outer points before turning the project right side out. Press the star thoroughly and close the opening with neat hand stitching or machine topstitching.
Finish by sewing around the entire perimeter approximately 0.3 cm from the edge. This final line of stitching sharpens the star outline, secures the turning opening, and helps the placemat remain flat. Give the project one final press using a temperature appropriate for your fabrics and batting. Your Star-shaped Christmas placemat Pattern is now ready for a holiday table, handmade gift, or coordinated Christmas decorating collection.
FAQ About the Star-shaped Christmas Placemat Pattern
What is the best fabric for a Star-shaped Christmas placemat Pattern?
Quilting-weight 100% cotton fabric is one of the easiest choices. It cuts cleanly, presses well, and is available in a huge variety of Christmas prints. Using fabrics of similar weight also helps all patchwork sections behave consistently while sewing.
How large should a Christmas star placemat be?
A star measuring approximately 38 to 45 cm across works well as a decorative placemat or table accent. You can make it smaller for mug mats and centerpiece decorations or larger for use beneath serving dishes. Always create a paper mock-up if exact finished dimensions are important.
Can beginners make this Christmas sewing project?
Yes. A confident beginner can complete the project, although accurately joining the center requires patience. Practice consistent seam allowances and assemble the design in smaller units. Careful cutting and pressing often have a greater impact on the result than advanced sewing skills.
Do I need batting inside the placemat?
Batting is recommended but not absolutely necessary. Low-loft batting adds body and gives the quilting more definition. Lightweight interfacing is another possibility if you prefer a flatter result. Avoid very thick padding because it can make the center and points difficult to finish neatly.
Can I use fabric scraps?
Absolutely. This is an excellent Christmas fabric scrap project because individual sections do not require large amounts of material. Scraps from previous holiday quilts, stockings, table runners, ornaments, and other sewing projects can be coordinated to create a unique star.
How do I make the star points look sharper?
Accurate cutting is the first requirement. When using a turned construction method, carefully trim excess fabric near the outer tips before turning the star right side out. Use a blunt turning tool to gently shape each point without pushing hard enough to damage the seam.
Why does the center of my star become bulky?
Several seam allowances converge at the center, naturally creating additional thickness. Use thin batting, accurate seam allowances, and careful pressing. Pressing selected seams open can sometimes distribute the bulk more evenly.
Should all of the Christmas stars use the same fabrics?
Not at all. A coordinated set can use the same fabric collection while changing the placement of each print. One placemat might emphasize red and green, another cream and gold, and another blue and white. Repeating at least one or two fabrics throughout the set helps connect the designs visually.
Can the Star-shaped Christmas placemat Pattern be made reversible?
Yes. Use an attractive backing fabric and keep the quilting tidy on both sides. For an even more decorative reversible design, the back can feature a coordinating solid color or simple Christmas print that complements the patchwork front.
Can I wash a handmade Christmas placemat?
That depends on the materials used. Cotton fabric and washable batting generally make a washable project, but always follow the care recommendations for the specific fabric, thread, batting, and embellishments you choose. Pre-washing fabric can also help reduce unexpected shrinkage.
What colors work best for Christmas patchwork stars?
Traditional combinations include red, forest green, cream, white, and gold. Winter palettes using navy, pale blue, white, and silver are equally attractive. Burgundy, natural linen tones, sage green, and muted gold can create a more rustic appearance.
Can I make matching decorations with the same pattern?
Yes. Once you understand the construction, the star concept can inspire smaller table decorations, mug mats, wall pieces, or coordinated seasonal accessories. Scaling should be done carefully because extremely small pieces become more difficult to sew accurately.
How can I keep the placemat flat after quilting?
Begin with properly pressed fabric, avoid stretching bias edges, distribute quilting evenly, and press the finished project carefully. Excessively dense quilting in only one area may cause distortion, so try to maintain relatively balanced stitching across the star.
Is a rotary cutter necessary for this project?
No, although it can improve speed and accuracy. Sharp fabric scissors can produce excellent results when used with carefully traced templates. A rotary cutter becomes especially useful when making several identical Christmas star placemats because repeated shapes can be cut more efficiently.
How many Star-shaped Christmas placemats should I make for a set?
That depends entirely on how you intend to use them. Four, six, or eight stars can form a coordinated dining set, while a single star works beautifully as a centerpiece or decorative table accent. Making several stars also gives you an opportunity to experiment with different fabric combinations.
Conclusion
Completing Your Handmade Christmas Star
The Star-shaped Christmas placemat Pattern turns simple pieces of seasonal cotton into a distinctive piece of handmade holiday décor. The process begins with selecting coordinated Christmas quilting fabrics, preparing accurate templates, and carefully cutting the geometric sections that form the star. Taking time during these early stages makes the later construction much easier.
The most important sewing skills involved are maintaining a consistent seam allowance, pressing each seam carefully, matching patchwork intersections, and controlling the bulk where multiple pieces meet. None of these techniques requires highly specialized equipment, making the project accessible to sewists who are developing their patchwork skills.
Adding thin batting and backing transforms the patchwork star from a simple fabric top into a practical quilted Christmas placemat. Straightforward quilting beside the seams highlights the geometry, while perimeter topstitching provides a crisp finishing detail. These subtle techniques can make a handmade project look polished without making the construction unnecessarily complicated.
Fabric selection also gives you plenty of creative freedom. Traditional red and green Christmas fabric, sophisticated cream and gold, or wintry blue and white can all be used with the same basic pattern. You can even make every star different while maintaining a coordinated appearance through repeated colors or prints.
Most importantly, treat the Star-shaped Christmas placemat Pattern as a creative framework rather than a rigid formula. Test the design with paper, adjust the dimensions for your table, arrange the prints until the balance feels right, and enjoy the process of transforming individual pieces into one complete Christmas star. If you make your own version, leave your sincere opinion about the project and share any suggestions you have for different colors, fabrics, sizes, or finishing techniques. Your ideas can inspire new variations and help other sewing enthusiasts discover creative ways to personalize this festive Christmas patchwork pattern.