
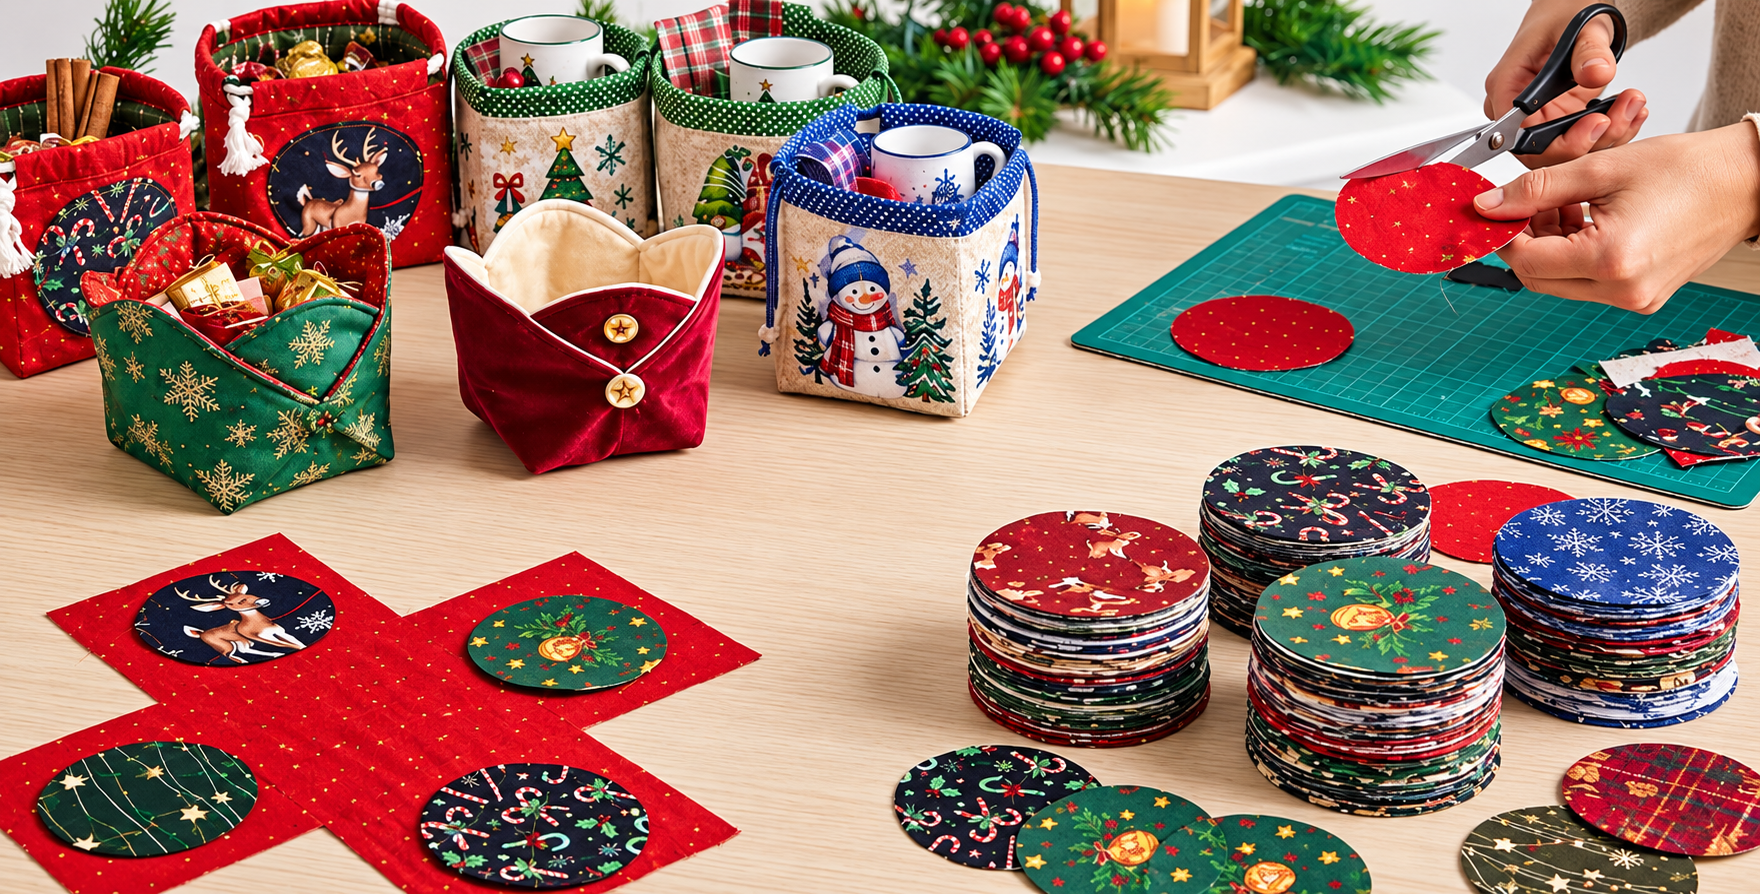
The Small square pouch with drawstring closure Pattern is a charming sewing project that combines practical storage with the warm, handmade appearance that makes fabric crafts so appealing. Inspired by the small structured fabric containers shown in the project image, this design can be adapted for Christmas prints, floral fabrics, patchwork scraps, or simple everyday cottons. The finished pouch has a compact square base, softly structured sides, a neat lining, and a drawstring closure that helps keep small items safely inside. It is an approachable project for anyone who enjoys sewing useful accessories while experimenting with fabric combinations, quilting details, and decorative finishes. Because the pouch is relatively small, it is also an excellent way to use pieces left over from larger quilting projects. With careful cutting and accurate seams, even a beginner can create a polished result that looks attractive enough to display or give as a handmade gift.
One of the most enjoyable aspects of the Small square pouch with drawstring closure Pattern is the opportunity to personalize every layer of the project. The exterior can feature Christmas fabric, traditional patchwork cotton, geometric prints, florals, novelty fabrics, or coordinated scraps from your collection. A contrasting lining makes the inside just as attractive as the outside, while lightweight batting or interfacing gives the pouch enough body to maintain its square shape. The drawstring casing can also become a decorative feature by using a contrasting fabric that coordinates with the exterior. Although the photograph provides visual inspiration, you do not need exactly the same materials or prints to achieve a similar result. The construction method is flexible, which means the project can easily be adjusted for different seasons, color palettes, and purposes. That versatility makes this small fabric pouch a useful pattern to learn and repeat.
Before beginning, prepare a clean cutting area and gather your quilting cotton, lining fabric, lightweight batting or fusible interfacing, coordinating thread, fabric scissors or a rotary cutter, ruler, marking tool, pins or sewing clips, safety pin, sewing machine, and cotton cord or ribbon for the drawstring. For a practical small pouch, you can begin with exterior and lining pieces approximately 30 cm x 30 cm, although the dimensions can be adjusted depending on the finished size you want. Pre-washing cotton fabric is optional, but it can be helpful when the pouch is likely to be washed later because it reduces unexpected shrinkage. Press every piece before measuring and cutting, since wrinkles can affect accuracy. Keep the seam allowance consistent throughout construction, ideally around 0.7 cm to 1 cm. Accurate preparation at this stage makes every following step easier and contributes significantly to a professional-looking finished pouch.
Materials, Fabric Selection, and Cutting the Pattern
Start by choosing the main fabric for your Small square pouch with drawstring closure Pattern. Medium-weight 100% cotton quilting fabric is especially convenient because it is easy to cut, press, sew, and coordinate with other prints. Seasonal designs such as snowflakes, reindeer, stars, holly, or plaid can create a festive pouch similar to the visual inspiration, while floral and geometric fabrics make the same pattern suitable for year-round use. Avoid extremely heavy fabric for your first version because bulky layers can make the corners and drawstring casing more difficult to sew.
DISCOVER MORE FREE PATTERNS HERE!
Next, select a lining that complements the exterior without necessarily matching it exactly. A lighter coordinating print can create an attractive surprise when the pouch is opened. You will generally need one main exterior piece and one lining piece of equal size, along with additional strips for the drawstring casing, depending on the construction method. For an approximately small-to-medium finished pouch, starting with 30 cm square pieces provides enough fabric to form the base and sides while remaining manageable for beginners.
To give the pouch structure, add lightweight fusible interfacing or thin batting behind the exterior fabric. Interfacing produces a crisp result, while batting gives the pouch a softer quilted appearance. If using batting, you can quilt the exterior before assembling the pouch. Simple straight lines, diagonal stitching, or a basic grid are enough to secure the layers. Keep decorative quilting relatively simple so the printed fabric remains the visual focus.
The square base can be formed by shaping the lower corners during construction. Instead of requiring a complicated separate base panel, a beginner-friendly method uses boxed corners. After the side seams are sewn, each lower corner is flattened so the side seam aligns with the bottom fold or seam. Marking approximately 4 cm to 5 cm across each corner creates depth. Sewing across those marks transforms a flat fabric piece into a three-dimensional container.
Prepare the casing pieces before assembly as well. Two fabric strips approximately 5 cm to 6 cm high can work well, with their length adjusted to the width of the pouch. Fold the short ends inward and press them to hide the raw edges. Then fold each strip lengthwise and press again. These channels will eventually hold the cord and create the characteristic gathered drawstring closure at the top.
Finally, cut two lengths of cord or ribbon long enough to travel through both casing channels with extra length for tying or pulling. Using two cords threaded in opposite directions creates a practical closure: pulling both ends simultaneously gathers the pouch evenly. Cotton cord is durable and comfortable to handle, but narrow fabric ties can also be made from coordinating cotton. Once everything is cut, organize the exterior, lining, interfacing, casing pieces, and cords before beginning assembly.
Step-by-Step Sewing and Creating the Square Shape
Begin the Small square pouch with drawstring closure Pattern by attaching the interfacing to the wrong side of the exterior fabric according to the material you selected. If you are using fusible interfacing, apply it carefully with the iron and avoid stretching the cotton. If you prefer batting, temporarily secure the layers with pins or basting spray and add your quilting stitches. Press the completed exterior gently before moving to construction.
Fold the exterior piece with the right sides together, carefully aligning the edges. Sew the required side and bottom seams using your chosen seam allowance. Backstitch at the beginning and end of each seam to prevent unraveling. Maintaining the same seam allowance is important because uneven seams can distort the final square shape. After stitching, press the seams carefully so the fabric lies flat and is easier to manipulate.
Now create the boxed corners that give the pouch its recognizable shape. Open one lower corner and flatten it into a triangle, aligning the side seam with the bottom seam or center fold. Measure the same distance across the triangle on both corners—approximately 4 cm to 5 cm is a useful starting point. Mark a straight line, sew directly across it, and repeat on the opposite side. Check that both corners match before trimming away excess fabric.
Repeat a similar process with the lining, but leave an opening of approximately 6 cm to 8 cm in one seam. This opening will later allow you to turn the entire pouch right side out. Create boxed corners in the lining using exactly the same measurement used for the exterior. Matching these dimensions is essential because the lining must sit smoothly inside the outer pouch without excess fabric gathering at the bottom.
Turn the exterior right side out and gently shape its corners. Keep the lining wrong side out at this stage. Insert the exterior inside the lining so their right sides face each other. Align the upper raw edges and match the side seams. Pin or clip carefully around the opening, making sure the layers remain smooth. Sew around the top edge, maintaining an even seam allowance.
Pull the pouch through the opening left in the lining. Work slowly around the boxed corners so you do not strain the stitches. Once everything is turned correctly, push the lining inside and press the upper edge. Close the lining opening with a narrow machine stitch or an invisible hand stitch. At this point, the project should already resemble a small structured fabric basket, and the remaining steps will transform it into a functional drawstring pouch.
Adding the Drawstring Closure and Finishing Details
The drawstring closure is what distinguishes this project from a standard fabric basket. Position the prepared casing strips near the upper edge of the pouch, keeping them centered on opposite sides. The finished ends should stop slightly before the side seams, leaving small gaps where the cords can enter and exit. This detail allows the two-direction drawstring system to work smoothly.
Pin or clip each casing securely before stitching. Sew close to the lower folded edge while keeping the channel wide enough for your chosen cord. A straight stitch with a moderate stitch length works well. Sew slowly near the casing ends so the folded edges remain neat. For extra durability, backstitch at the beginning and end, especially because these areas experience repeated movement when the pouch is opened and closed.
Threading becomes easier with a safety pin or bodkin. Attach one cord to the safety pin and guide it through the first casing, around the pouch, and through the opposite casing until both ends emerge from the same side. Take the second cord and repeat the process from the opposite direction. When both cords are installed correctly, pulling outward on the two sets of ends should gather the top evenly.
Tie the cord ends together with secure knots. If using synthetic cord, follow the manufacturer’s handling recommendations for finishing the ends rather than experimenting with heat. Cotton cord can simply be knotted securely. You can also add fabric tabs or handmade fabric ties if you prefer an entirely textile-based finish. Test the closure several times before considering the pouch complete.
Give the entire small square pouch a final pressing, taking care not to flatten batting excessively. Shape the boxed corners with your fingers and check the lining for wrinkles. Look closely at the casing and make sure no accidental stitches cross the channel and obstruct the cord. Small finishing corrections at this stage can greatly improve the appearance and function of the completed piece.
Decorative details are optional. A small fabric appliqué, button, label, embroidered motif, or contrasting topstitching can add personality without overwhelming the design. If the pouch is intended for a child, avoid loose embellishments that could present a hazard. The fabric itself can provide plenty of visual interest, especially when using detailed holiday or patchwork prints. A clean, carefully sewn finish is often more effective than adding numerous decorations.
Creative Uses, Size Adjustments, FAQ, and Final Tips
Once you understand the construction of the Small square pouch with drawstring closure Pattern, you can easily create a coordinated collection. Small versions can organize sewing notions, clips, fabric scraps, small craft supplies, or lightweight accessories. Larger versions can hold yarn, reusable cloths, or other household items. Seasonal versions can also serve as reusable gift packaging, reducing the need for disposable wrapping while adding a handmade touch.
Changing the size is straightforward, but remember that the boxed-corner measurement affects both height and base width. A deeper boxed corner produces a wider base and slightly shorter pouch. A smaller boxed corner creates a narrower base and taller appearance. When experimenting with dimensions, make a simple test version from inexpensive cotton first. Record successful measurements so you can reproduce your favorite proportions later.
Color coordination can dramatically change the personality of this fabric pouch pattern. Red, green, cream, navy, and gold create a traditional holiday mood. Pastel combinations feel softer, while denim-inspired blues can make the design suitable for everyday storage. Patchwork lovers can even piece the exterior from scraps before adding interfacing. This turns small leftover pieces into a purposeful and visually interesting surface.
For a cleaner professional finish, pay attention to pressing throughout the project rather than waiting until the end. Pressing sets stitches, flattens seam allowances, and improves alignment. It is particularly useful around the upper edge and boxed corners. Use an iron temperature appropriate for the fabric and interfacing, and always test unfamiliar materials on a scrap first.
Another important technique is controlling bulk. The intersections around boxed corners and casing areas can become thick, especially when using batting. Trim seam allowances carefully where appropriate without cutting too close to the stitching. Grading bulky seams can help the layers lie flatter. A slightly longer machine stitch may also work better when sewing through multiple layers, depending on your fabric and sewing machine.
Most importantly, treat the first Small square pouch with drawstring closure Pattern as an opportunity to learn the construction sequence. Handmade sewing does not require every stitch to look factory-produced. Accurate measuring, secure seams, careful pressing, and functional construction matter far more than tiny cosmetic variations. Once you have completed one pouch, the process becomes much faster, making this an enjoyable pattern for creating matching sets.
FAQ About the Small Square Pouch with Drawstring Closure Pattern
What is the best fabric for a Small square pouch with drawstring closure Pattern?
Quilting cotton is one of the easiest choices, especially for beginners. It is widely available, stable under the sewing machine, easy to press, and offered in countless prints. Medium-weight cotton also works well with interfacing or thin batting when additional structure is required.
Do I need batting for this pouch?
Not necessarily. Fusible interfacing can provide enough structure for a lightweight pouch. Batting is useful when you want a softer, slightly padded appearance. If you want visible quilting stitches on the exterior, thin batting is usually the more appropriate choice.
How do I make boxed corners?
After sewing the main seams, flatten each lower corner so the side seam aligns with the bottom seam or fold. Measure a straight line across the triangular point, sew along the marked line, and trim the excess. Repeat the same measurement on every relevant corner so the pouch and lining match.
How large should the boxed corners be?
For a small pouch, a measurement around 4 cm to 5 cm across the flattened corner is a practical starting point. However, there is no single mandatory measurement. Larger corner measurements create a broader base, while smaller measurements produce a narrower pouch.
Can beginners make this project?
Yes. The Small square pouch with drawstring closure Pattern uses fundamental sewing skills such as straight stitching, pressing, creating boxed corners, making a lining, and threading a casing. Beginners may want to practice boxed corners on scrap fabric before sewing the final project.
How does a double drawstring work?
One cord travels through both channels and exits on one side, while the second travels in the opposite direction and exits on the other. Pulling both sets of ends causes the fabric casing to gather toward the center. This creates an easy-to-use closure without requiring a zipper.
Can I make the pouch without a lining?
It is possible, but a lining gives the project a cleaner interior and hides raw seams. It can also add stability and durability. For a polished handmade result, including a lining is generally worth the additional sewing time.
Can I use fabric scraps?
Absolutely. This project is particularly suitable for fabric scraps. You can piece several smaller fabrics together to create the exterior panel before cutting it to the required dimensions. Press the patchwork seams thoroughly and add interfacing or batting afterward.
How can I make the pouch stand upright?
Use lightweight or medium-weight interfacing and make accurate boxed corners. A sufficiently wide base helps the pouch remain upright. If the fabric is very lightweight, adding interfacing to both the exterior and selected lining areas can provide additional support without making the pouch excessively stiff.
Can the finished pouch be washed?
That depends on the fabrics, interfacing, cord, and embellishments used. If washable materials are selected throughout the project, gentle washing may be possible. Pre-washing cotton before construction can help minimize later shrinkage. Always follow the care recommendations for the specific materials you use.
What can I put inside a small drawstring pouch?
It works well for sewing notions, quilting clips, small yarn supplies, craft accessories, reusable gift items, lightweight personal accessories, and other small household objects. When giving one as a gift, you can fill it with fabric scraps, sewing supplies, or another appropriate small surprise.
How can I make several pouches look like a coordinated set?
Choose fabrics from the same collection or repeat one color throughout each design. For example, every pouch might have a different printed exterior while sharing the same lining, casing, or drawstring color. This creates visual consistency while allowing every pouch to remain unique.
Conclusion
The Small square pouch with drawstring closure Pattern is a versatile sewing project that transforms a few pieces of fabric into a practical, reusable, and attractive organizer. Throughout this tutorial, you learned how to select quilting cotton, prepare the exterior and lining, add interfacing or batting, construct boxed corners, assemble the layers, create a casing, and install a functional double drawstring closure.
The most important elements are accurate cutting, consistent seam allowances, careful pressing, and matching the boxed corners of the exterior and lining. Once those basic techniques are understood, the pattern becomes highly adaptable. You can change the dimensions, combine different fabrics, add patchwork panels, experiment with seasonal prints, or create coordinated sets for organizing craft supplies and small household items.
This project is also a useful way to develop transferable sewing skills. Lining construction, boxed corners, fabric stabilization, topstitching, and drawstring casings appear in many other handmade bags and organizers. Practicing them on a small project gives you experience without requiring a large amount of fabric or an overly complicated pattern.
Now that you know how to create your own Small square pouch with drawstring closure Pattern, choose a favorite fabric combination and give the project your personal style. If you make one, leave your sincere opinion about the pattern and share your suggestions. Your ideas about colors, fabrics, sizes, and creative variations can inspire even more ways to turn this simple pouch into a beautiful handmade sewing project.