
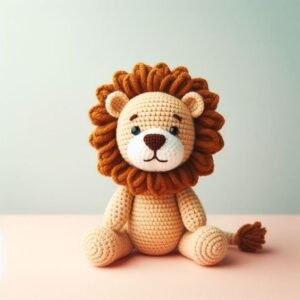
Creating a LION Amigurumi is an exciting and rewarding project for crochet lovers. This adorable lion can be a fun gift for children or a charming decoration for your home.
In this tutorial, we will guide you step by step through the process of making a lion using detailed instructions, along with the exact stitch counts needed for each part of the pattern.
If you’re looking for crochet patterns that capture the essence of creativity and fun, this lion amigurumi is perfect for you.
1. Materials Needed for Your LION Amigurumi
Before you start crocheting, gathering the right materials is essential to ensure your lion turns out exactly as planned. Here’s what you’ll need:
You’ll need yarn in at least two colors—yellow or brown for the body and mane, and a contrasting color for the face. Choose a yarn suitable for amigurumi, such as cotton or acrylic, for a soft but sturdy finish. A crochet hook size 2.5mm to 3.5mm will be ideal for this project, along with safety eyes, stuffing, and a yarn needle for sewing the parts together.
In addition to yarn, make sure to have stitch markers, which are especially helpful for keeping track of rounds in amigurumi. Some optional items include blush for the cheeks and felt for additional face details. Having everything ready ensures a smooth and enjoyable crocheting experience.
2. Step-by-Step Instructions: Head and Body
Start with the lion’s head and body, which will be made as a single piece. This is a common practice in crochet patterns for amigurumi, ensuring the parts are securely attached and the lion looks cohesive.
Head and Body:
- Round 1: Start with a magic ring. Crochet 6 single crochets (sc) into the ring. (6 sts)
- Round 2: Increase by 2 sc in each stitch around. (12 sts)
- Round 3: 1 sc in the next stitch, 2 sc in the next, repeat around. (18 sts)
- Round 4: 1 sc in each of the next 2 sts, 2 sc in the next, repeat around. (24 sts)
- Rounds 5-12: Continue increasing by adding one more sc between each increase until you have 48 stitches.
- Rounds 13-20: Crochet 1 sc in each stitch around. This builds the lion’s head and body to the desired size.
Finish off by stuffing the head and body firmly. This part forms the core structure of your amigurumi lion, and using high-quality stuffing will help it maintain its shape over time.
3. Making the Ears and Tail
The ears and tail are essential features that give your lion its characteristic look. These details are quick to crochet but add a lot of personality to the finished amigurumi.
Ears:
- Round 1: Start with a magic ring, 6 sc into the ring. (6 sts)
- Round 2: 1 sc in the next stitch, 2 sc in the next, repeat around. (9 sts)
- Round 3: 1 sc in each of the next 2 sts, 2 sc in the next, repeat around. (12 sts)
- Round 4-5: Crochet 1 sc in each stitch around.
- Fasten off and leave a long tail for sewing.
Tail:
- Chain 10.
- Slip stitch into the second chain from the hook and down the chain.
- Fasten off and leave a long tail for sewing.
Both the ears and tail can be stuffed lightly or left flat, depending on your preference. Attach them securely to the body, positioning the ears near the top of the head and the tail at the back of the body.
4. Creating the Lion’s Mane
One of the most distinctive features of a lion amigurumi is its mane, which can be styled to your liking. A full, fluffy mane can bring your lion to life.
Mane:
- For the mane, attach yarn around the base of the lion’s head.
- Chain 4, slip stitch into the next stitch around the head.
- Repeat this pattern of chain 4, slip stitch around the base of the head, until the entire head is surrounded by a fringe.
- Fasten off and trim the yarn to give the mane a uniform look.
You can vary the length of the mane by making the chains longer or shorter. For an even fuller look, you can double the rows of fringe around the head, making your lion look extra majestic.
5. Sewing the Features: Eyes, Nose, and Mouth
Now that the main parts of your lion amigurumi are done, it’s time to give it a face! This step is all about details and brings out the personality of your crochet lion.
Use safety eyes or embroider the eyes using black thread, positioning them evenly on the face. If you’re using safety eyes, insert them between rounds 10 and 12 of the head. For the nose, use black yarn to embroider a small triangle shape just below the eyes. The mouth can be embroidered with the same black yarn, forming a simple “Y” shape extending from the bottom of the nose.
Take your time with these features, as they will determine the expression and cuteness of your finished amigurumi. Make sure everything is securely attached, especially if the lion is intended as a toy.
6. Final Touches: Assembling the Lion
With all the parts crocheted, it’s time to assemble your lion amigurumi. This is the final stage where your project really comes together.
Start by sewing the ears onto the head, making sure they are evenly placed on each side. Then, attach the mane around the face. Sew the tail to the back of the body and double-check that all parts are securely fastened. Make sure to weave in any loose ends to ensure your lion looks neat and finished.
Lastly, consider adding a personal touch to your lion. You could use blush to give it a rosy-cheeked look or felt to create additional details like eyebrows or even a tiny crown. These little embellishments will make your lion amigurumi unique and memorable.
Mastering Crochet Patterns with Amigurumi
Making a LION Amigurumi is an enjoyable and fulfilling project, perfect for those who love crochet patterns and want to try their hand at amigurumi. By following this detailed step-by-step tutorial, you’ll create a charming lion that can be cherished for years. Whether you’re making it as a gift or for your own collection, this lion amigurumi is sure to be a hit.
In addition to being a fun craft, crocheting amigurumi also sharpens your skills in reading patterns, counting stitches, and perfecting your technique. Once you’ve mastered this lion, you’ll be ready to take on more complex crochet patterns and amigurumi designs. Happy crocheting!