
Creating a bear amigurumi pattern is one of the most rewarding projects for crochet lovers. This craft allows you to produce an adorable, handmade toy that showcases your skills and creativity.
Whether you’re a beginner or an experienced crocheter, this detailed guide will walk you through all the steps required to make a cute bear amigurumi.
Using the keywords “crochet patterns” and “amigurumi,” this article is SEO-optimized to help you find everything you need for your next crochet adventure.
Materials Needed for Your Bear Amigurumi Pattern
Before you begin working on your bear amigurumi pattern, it’s important to gather all the necessary materials. You’ll need yarn in various colors, typically brown for the bear, and a smaller amount of white or light beige for the bear’s muzzle. Additionally, you will need safety eyes, a crochet hook, stuffing, and a tapestry needle.
- Yarn: Choose a soft, durable yarn that’s easy to work with. Worsted-weight cotton yarn is a great option, but feel free to experiment with other textures.
- Safety Eyes: These plastic eyes can be easily attached to your bear, making it look more realistic. Typically, 8mm to 12mm size eyes are ideal for most bear amigurumi patterns.
- Crochet Hook: A 3.5mm or 4mm hook works well for most yarns used in amigurumi, but it’s always good to check your pattern for specific hook size recommendations.
Essential Crochet Stitches for Amigurumi
When creating a bear amigurumi pattern, there are a few key stitches that form the basis of most amigurumi designs. The most common stitches used include the single crochet, the increase, and the invisible decrease. Mastering these simple stitches will allow you to complete most amigurumi patterns.
- Single Crochet (sc): This is the stitch you will use most frequently in your amigurumi project. It creates a dense and durable fabric, perfect for stuffed animals.
- Increase (inc): An increase is made by crocheting two single crochet stitches into one stitch, allowing you to create the necessary shape for your bear’s body, head, and limbs.
- Invisible Decrease (dec): Decreasing helps shape the amigurumi by reducing the number of stitches in a round. The invisible decrease method ensures your stitches are tight and seamless, preventing holes in the fabric.
Step-by-Step Bear Amigurumi Pattern Instructions
1. Crochet the Head
To start your bear amigurumi, begin with the head. This part of the bear should be round and smooth, ensuring an adorable, friendly expression.
- Round 1: Make a magic ring and crochet 6 single crochets into it. (6 stitches)
- Round 2: Increase in each stitch around. (12 stitches)
- Round 3: (1 sc, inc) repeat around. (18 stitches)
- Rounds 4-7: Continue increasing as needed to form a round head. (Adjust based on size preference.)
- After reaching your desired head size, maintain a consistent stitch count for several rounds to shape the head. Then begin decreasing until the head is fully closed.
2. Crochet the Body
The body of your bear should complement the size of the head, making the proportions cute and balanced.
- Round 1: Start with a magic ring and crochet 6 single crochets. (6 stitches)
- Round 2: Increase in every stitch around. (12 stitches)
- Round 3: (1 sc, inc) repeat around. (18 stitches)
- Rounds 4-10: Continue increasing in a similar manner to create a rounded body, adjusting for the desired size.
- Once you have the basic shape, crochet several rounds without increasing, and then begin decreasing as you move towards the bottom of the body. Stuff the body with polyfill before closing.
3. Crochet the Arms and Legs
For the limbs, you will use a similar pattern as the head and body but on a smaller scale.
- Arms: Start with a magic ring and 6 sc, then increase in the next round. Keep crocheting until you achieve the desired arm length. Stuff lightly to maintain flexibility.
- Legs: Begin with a magic ring and crochet in rounds, increasing and maintaining the shape until the legs are the appropriate size for your bear.
- Be sure to attach the limbs securely to the body using a tapestry needle, ensuring that they are evenly positioned on both sides.
Attaching the Safety Eyes and Details
Before you close the head of your bear amigurumi, insert the safety eyes between the rounds. It’s important to place them symmetrically to give your bear a friendly, cute expression.
- Placement: Usually, placing the eyes between rounds 7 and 8 works well for a small bear. If you’re making a larger bear, adjust the eye placement accordingly.
- Muzzle and Nose: Use beige yarn to crochet a small oval muzzle. Attach it to the center of the face and embroider a black nose using a simple stitch.
- Ears: Crochet small, semi-circular ears and sew them on top of the bear’s head.
These details are what bring your bear to life, so take your time ensuring the features are positioned just right.
Stuffing and Assembling Your Bear
Once all the body parts are crocheted, the next step is assembling the bear. Stuff each body part with polyfill, making sure they are firm but still soft to the touch.
- Head and Body: Sew the head to the body using a tapestry needle. Make sure the head is centered properly on the body to avoid a lopsided bear.
- Limbs: Attach the arms and legs securely, using long pieces of yarn to sew them onto the body. This helps ensure the bear will hold up over time, even with frequent use or play.
Proper stuffing is key to a professional-looking amigurumi. Be careful not to overstuff, as this can cause the stitches to stretch and create gaps in the fabric.
Finishing Touches: Adding Personality to Your Bear
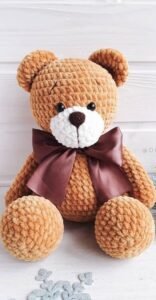
Once your bear amigurumi is fully assembled, you can add finishing touches to give it more personality. Some crafters like to add a small scarf, a bow, or even a tiny backpack to their bears.
- Accessories: Crocheting small accessories can make your bear unique. For example, a simple chain stitch scarf can be wrapped around the neck to give your bear extra charm.
- Expressions: You can adjust the expression of your bear by slightly altering the position of the eyes or mouth. Small changes can dramatically change the character of your amigurumi.
- Don’t be afraid to get creative. Every bear amigurumi can have its own personality, making each one unique and special.
Creating a bear amigurumi pattern is a fulfilling project for crocheters of all skill levels. With the right materials, an understanding of basic crochet stitches, and careful attention to detail, you can create an adorable bear that makes a perfect gift or keepsake.
By following this step-by-step guide, you’ll have a delightful bear amigurumi in no time, showcasing your talent with crochet patterns and amigurumi crafting.