
Ladybug Quilt Block Tutorial – Pattern is a wonderful way to bring color, creativity, and a playful touch to your quilting projects. Whether you are just beginning your quilting journey or already have years of experience, learning how to create a charming ladybug quilt block can inspire countless beautiful handmade creations. This delightful design combines simple geometric shapes with cheerful colors, making it suitable for quilts, pillows, wall hangings, table runners, baby blankets, and seasonal decorations. Throughout this guide, you will discover practical techniques, useful tips, and creative ideas to help you confidently complete your own Ladybug Quilt Block Tutorial – Pattern.
Quilting has always been more than simply sewing pieces of fabric together. It is a creative tradition that allows people to express their personalities while producing practical and meaningful handmade items. The Ladybug Quilt Block Tutorial introduces an adorable nature-inspired design that symbolizes happiness, luck, and the beauty of gardens. Because of its friendly appearance, the ladybug motif has become a favorite among quilters looking to add warmth and personality to their patchwork collections.
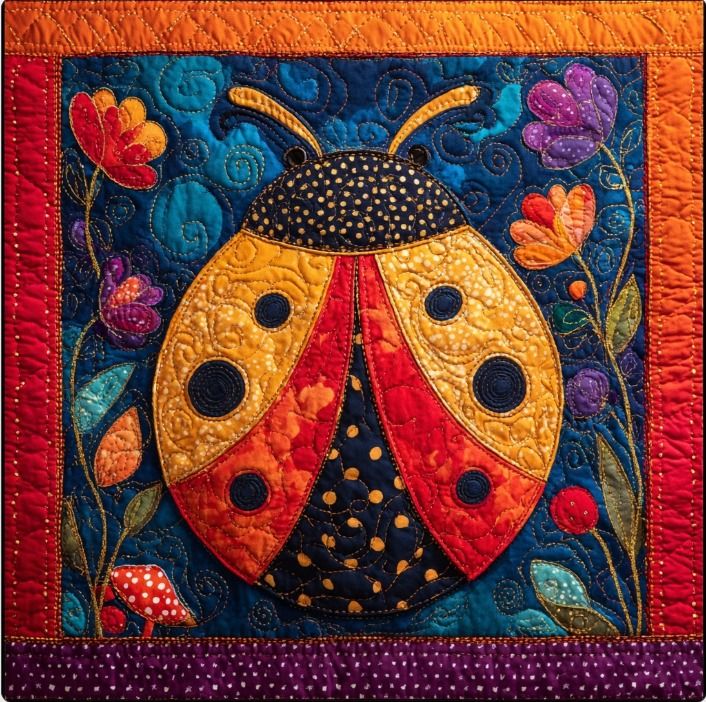
One of the greatest advantages of following a Ladybug Quilt Block Tutorial – Pattern is its versatility. The block can easily be customized by choosing different fabric prints, adjusting the size, or experimenting with unique color combinations. Traditional red and black fabrics remain popular, but modern interpretations often include pink, blue, yellow, or even floral prints. Regardless of your personal style, this timeless quilt block offers endless opportunities to create something unique while improving your quilting skills and enjoying every step of the creative process.
Understanding the Ladybug Quilt Block Pattern
The Ladybug Quilt Block Pattern is inspired by one of nature’s most recognizable insects. Its simple yet eye-catching design makes it an excellent project for beginners while still offering creative possibilities for experienced quilters. The combination of curved and straight shapes creates an appealing balance that looks beautiful in quilts of every size.
DISCOVER MORE FREE PATTERNS HERE!
Many quilters appreciate this block because it teaches important piecing techniques without becoming overly complicated. It helps improve cutting accuracy, seam consistency, and fabric placement while producing a fun finished design. These basic skills can later be applied to many other quilting projects.
Choosing quality quilting cotton is highly recommended for this project. High-quality fabrics are easier to cut, sew, and press, resulting in cleaner seams and more precise finished blocks. Coordinating fabrics also enhance the overall appearance of the ladybug design.
Color selection plays an important role in making your quilt block stand out. Traditional red bodies with black spots remain classic, but adding patterned fabrics or textured solids can create a fresh and modern interpretation while maintaining the recognizable ladybug appearance.
Accurate cutting is one of the keys to successful quilting. Measuring carefully before cutting each piece helps reduce waste and ensures that every section fits together correctly. Taking a little extra time during preparation often saves much more time during assembly.
Before sewing the complete block, many quilters like to arrange the pieces on a design board or flat surface. This simple habit allows adjustments to be made before stitching begins and helps visualize the final layout with confidence.
Materials and Preparation for Success
Preparing your workspace before starting any quilting project creates a more enjoyable sewing experience. A clean cutting area, proper lighting, and organized tools allow you to focus entirely on creativity rather than searching for supplies throughout the process.
Essential materials for a Ladybug Quilt Block Tutorial – Pattern include quilting cotton fabrics, rotary cutter, cutting mat, quilting ruler, sewing machine, coordinating thread, pins or clips, and an iron for pressing seams. These basic tools help produce accurate and professional-looking results.
Fabric preparation is equally important. Washing and pressing fabrics before cutting helps reduce shrinkage and removes wrinkles that may affect cutting precision. Some quilters prefer prewashed fabric, while others work directly with new quilting cotton depending on personal preference.
Thread selection should complement your fabric colors. Neutral thread often works well for piecing because it blends with multiple fabrics, while decorative quilting thread can later enhance the finished project during quilting.
Maintaining an accurate quarter-inch seam allowance is one of the most valuable skills in quilting. Consistent seam allowances ensure that all pieces fit together correctly and that the completed block reaches the intended dimensions without distortion.
Finally, remember that quilting is a creative hobby rather than a race. Taking your time, checking measurements, and enjoying each step leads to better results and makes the entire Ladybug Quilt Block Tutorial far more satisfying from beginning to end.
Step-by-Step Tips for Sewing the Ladybug Quilt Block
Every successful quilt begins with careful planning. Before sewing, lay out all fabric pieces according to the pattern. This allows you to verify placement and identify any adjustments before stitching permanently.
Begin assembling smaller sections first instead of trying to sew the entire block together immediately. Building the design gradually improves accuracy and makes it easier to maintain proper alignment throughout the construction process.
Press seams carefully after each step. Rather than ironing back and forth, gently press the seams to avoid stretching the fabric. Proper pressing helps the block remain square and creates flatter intersections for easier quilting later.
When sewing curved sections, work slowly and avoid pulling the fabric through the machine. Let the feed dogs guide the fabric naturally while keeping your hands relaxed. This approach produces smoother curves and reduces puckering.
As the sections come together, periodically measure the block to ensure it remains the correct size. Small adjustments made early are much easier than trying to correct major size differences after the entire block has been assembled.
After completing the block, take a moment to admire your work before adding it to a larger project. Each finished Ladybug Quilt Block Pattern represents both creativity and growing quilting experience, making every completed block a rewarding achievement.
Creative Ideas and Finishing Your Quilt Project
One beautiful way to use a Ladybug Quilt Block Tutorial – Pattern is by creating a cheerful baby quilt. The playful design naturally appeals to children while offering a handmade keepsake that families often treasure for many years.
Table runners featuring alternating ladybug blocks and floral designs create charming seasonal decorations. They bring warmth and personality to dining rooms, kitchens, or outdoor garden gatherings during spring and summer.
Decorative throw pillows are another excellent project. A single Ladybug Quilt Block can become the centerpiece of a cushion that brightens living rooms, sewing studios, or children’s bedrooms with a welcoming handmade touch.
Many quilters enjoy combining several ladybug blocks with leaves, flowers, butterflies, or garden-themed quilt blocks to create a complete nature-inspired quilt. This combination offers endless possibilities for color coordination and creative storytelling through fabric.
Quilting the finished project provides another opportunity for creativity. Simple straight-line quilting creates a clean modern look, while free-motion quilting can add texture that enhances the playful appearance of the ladybug motif.
Most importantly, remember that every handmade quilt reflects the time, care, and imagination invested by its creator. Each completed Ladybug Quilt Block Tutorial – Pattern becomes more than fabric—it becomes a lasting expression of creativity that can be enjoyed, displayed, or shared with loved ones for generations.
FAQ
What skill level is required for a Ladybug Quilt Block Tutorial – Pattern?
Most beginners can successfully complete this project with patience and careful attention to cutting and seam allowances. Experienced quilters can also enjoy customizing the design with advanced techniques.
What fabrics work best for a ladybug quilt block?
High-quality quilting cotton is generally the preferred choice because it is stable, easy to sew, and available in a wide variety of colors and prints.
Can I change the traditional red and black colors?
Absolutely. Many quilters create unique versions using pink, blue, yellow, green, floral prints, batiks, or modern color palettes while keeping the recognizable ladybug shape.
What can I make with Ladybug Quilt Blocks?
These blocks can be used for quilts, baby blankets, pillows, table runners, tote bags, wall hangings, placemats, and many other patchwork projects.
How do I make my quilt block more accurate?
Careful measuring, precise cutting, maintaining a consistent quarter-inch seam allowance, and pressing after every sewing step all contribute to improved accuracy.
Why is pressing important during quilting?
Pressing helps flatten seams, reduces bulk, improves accuracy, and allows the finished quilt block to fit together properly with other blocks.
Can I make larger or smaller versions of the pattern?
Yes. By adjusting the measurements proportionally, you can create miniature quilt blocks or oversized statement blocks for different quilting projects.
How should I care for a finished quilt?
Wash gently using mild detergent when needed, avoid harsh chemicals, and store the quilt in a cool, dry place away from direct sunlight to help preserve the fabrics for many years.
Conclusion
The Ladybug Quilt Block Tutorial – Pattern offers an enjoyable opportunity to develop quilting skills while creating a cheerful and timeless design inspired by nature. Throughout this guide, you learned how to prepare your materials, improve cutting accuracy, assemble the quilt block step by step, and explore creative ways to use your finished blocks in a variety of handmade projects.
By practicing these techniques and experimenting with different fabrics and color combinations, you can continue expanding your quilting experience with confidence. If you found this tutorial helpful, please leave your honest opinion, share your quilting experience, and send your suggestions. Your feedback can inspire future quilting enthusiasts and help make every new project even more enjoyable.