
The 3D crocheted coaster with pumpkin stitch – pattern is a delightful and creative way to bring texture, warmth, and seasonal charm into your home décor. Whether you are a beginner looking to explore textured stitches or an experienced crocheter seeking a fresh project, this pattern offers the perfect balance between simplicity and visual impact. With its raised, pumpkin-like design, this coaster is not only functional but also a decorative piece that stands out on any table.
Creating a 3D crocheted coaster with pumpkin stitch – pattern allows you to experiment with dimension in crochet, something that flat patterns cannot fully provide. The pumpkin stitch adds depth and character, making each coaster look almost sculpted. This makes it ideal for autumn-themed settings, cozy gatherings, or even as a thoughtful handmade gift. Plus, the repetitive nature of the stitch can be both relaxing and rewarding.
Another advantage of working with the 3D crocheted coaster with pumpkin stitch – pattern is its versatility. You can customize colors, yarn types, and sizes to suit your personal style or match your home aesthetic. This project is also a great way to use leftover yarn, making it both eco-friendly and budget-conscious. As you progress, you’ll not only improve your crochet skills but also create something beautiful and practical.
Understanding the Pumpkin Stitch Technique
The pumpkin stitch is the heart of the 3D crocheted coaster with pumpkin stitch – pattern, and mastering it is key to achieving that signature textured look. This stitch typically involves working around the post of stitches, creating a raised effect that resembles the ridges of a pumpkin. It may look complex at first glance, but with practice, it becomes intuitive.
DISCOVER MORE FREE PATTERNS HERE!
One of the most important aspects of the pumpkin stitch is tension control. Keeping your stitches even ensures that the coaster maintains a consistent shape. If the tension is too tight, the fabric may curl; if too loose, the 3D effect may not stand out as intended. Practicing on a small swatch before starting your coaster can help.
Another factor to consider is yarn choice. Medium-weight yarns often work best for this type of pattern because they provide enough structure to highlight the stitch definition. However, experimenting with different yarns can lead to unique results, allowing you to personalize your 3D crocheted coaster with pumpkin stitch – pattern.
The hook size also plays a role in the final appearance. A slightly smaller hook than recommended for your yarn can enhance the texture, making the pumpkin stitch more pronounced. This small adjustment can significantly improve the overall look of your coaster.
As you work through the pattern, you’ll notice that the pumpkin stitch creates a rhythmic flow. This repetition not only speeds up the process but also makes it easier to remember the steps. Over time, your hands will naturally follow the sequence without much thought.
Finally, patience is essential when learning any new stitch. The 3D crocheted coaster with pumpkin stitch – pattern rewards persistence, and once you master it, you can apply the technique to other projects like blankets, scarves, or even garments.
Materials and Preparation for Your Coaster
Before starting your 3D crocheted coaster with pumpkin stitch – pattern, gathering the right materials is crucial. You’ll need yarn, a crochet hook, scissors, and a yarn needle for finishing. Choosing high-quality materials ensures durability and a polished final result.
Cotton yarn is often recommended for coasters because it is absorbent and heat-resistant. This makes your coaster not only decorative but also functional. However, acrylic yarn can also be used if you’re focusing more on aesthetics rather than practicality.
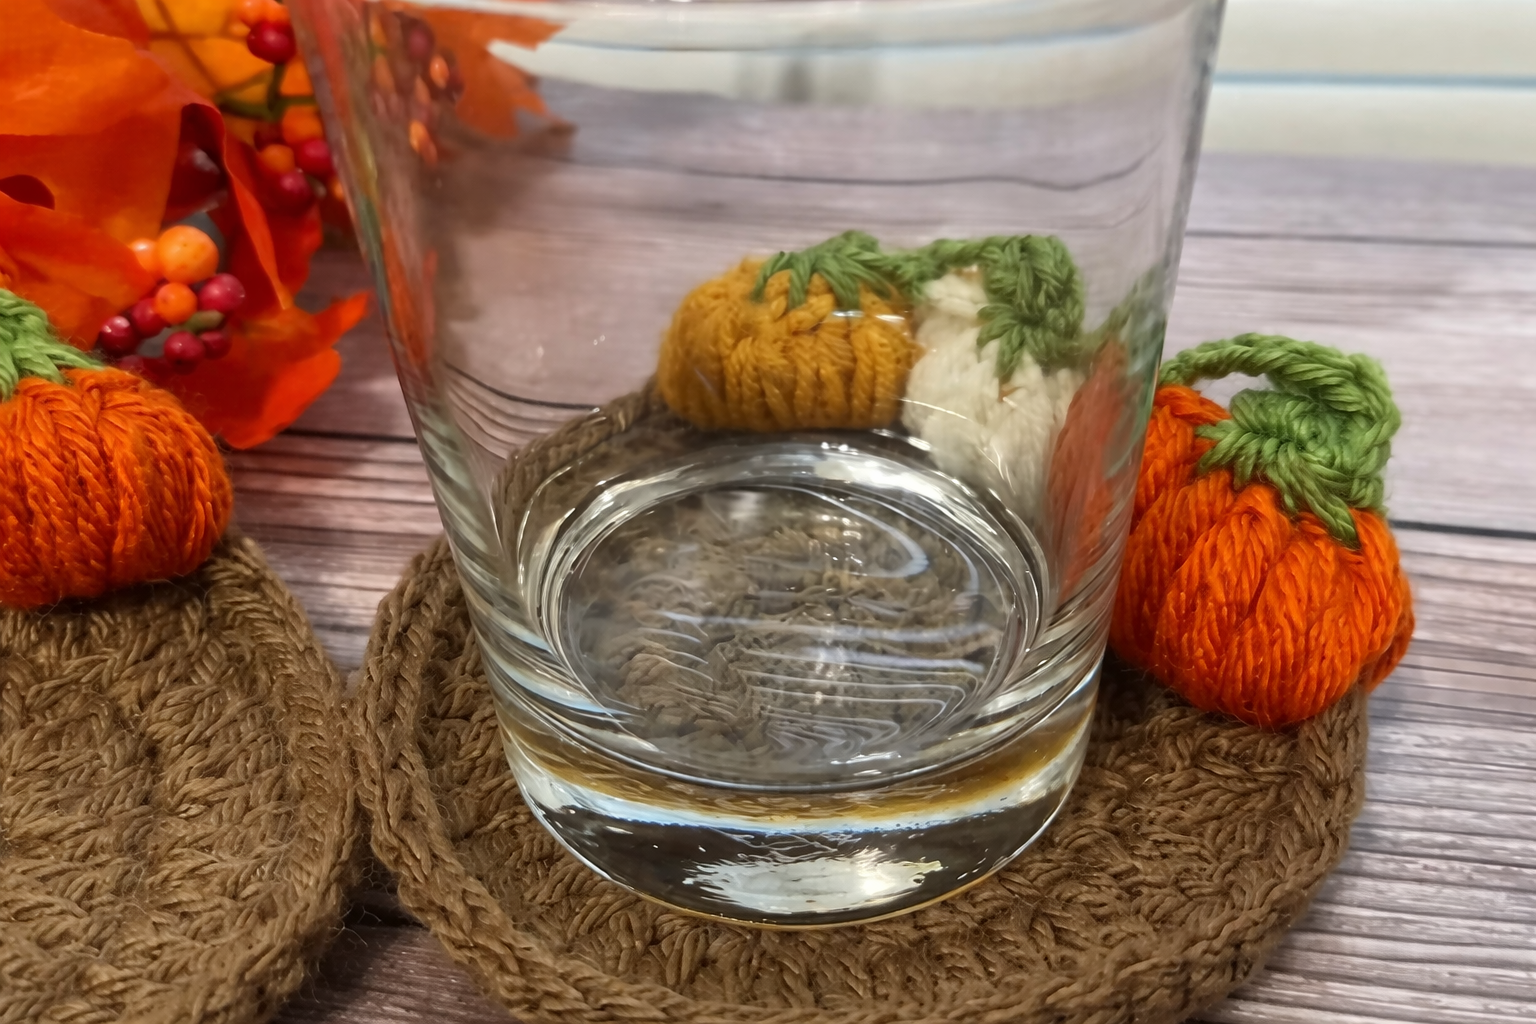
Color selection plays a significant role in enhancing the pumpkin stitch effect. Warm tones like orange, brown, and mustard highlight the 3D texture beautifully, especially if you’re aiming for a seasonal theme. Neutral colors, on the other hand, offer a modern and minimalist look.
Preparing your workspace is another important step. A well-lit, comfortable area can make the crocheting process more enjoyable and reduce strain on your eyes and hands. Keeping your tools organized will also help you stay focused.
It’s also helpful to review the pattern instructions before starting. Understanding the sequence of steps allows you to anticipate what comes next, making the process smoother and more efficient. This is especially useful for beginners tackling the 3D crocheted coaster with pumpkin stitch – pattern for the first time.
Lastly, consider making a gauge swatch. While not always necessary for small projects like coasters, it can help ensure that your finished piece matches the intended size and texture.
Step-by-Step Construction of the Pattern
Starting your 3D crocheted coaster with pumpkin stitch – pattern usually begins with a magic ring or a chain loop. This forms the center of your coaster and sets the foundation for the rounds that follow. Working in the round helps maintain a symmetrical shape.
As you progress, you’ll increase stitches evenly to create a flat base. This step is crucial because an uneven base can affect the overall structure. Paying attention to stitch count at each round ensures accuracy.
Once the base is established, the pumpkin stitch is introduced. This is where the coaster begins to take on its distinctive 3D appearance. Following the pattern carefully during this stage is essential to maintain consistency.
Continuing with the pumpkin stitch, you’ll notice the texture becoming more defined with each round. This gradual build-up creates the visual appeal that makes the 3D crocheted coaster with pumpkin stitch – pattern so unique.
Finishing the coaster involves securing the last stitch and weaving in loose ends. This step may seem minor, but it greatly affects the final look. Neatly finished edges give your coaster a professional appearance.
Blocking the coaster can further enhance its shape and texture. By gently shaping and setting the piece, you ensure that the stitches sit correctly, highlighting the 3D effect even more.
Creative Variations and Practical Uses
One of the best aspects of the 3D crocheted coaster with pumpkin stitch – pattern is its adaptability. You can easily modify the size by adding or reducing rounds, making it suitable for different types of cups and mugs.
Adding embellishments is another way to personalize your coaster. Small details like embroidered stems or contrasting borders can enhance the pumpkin theme and make each piece unique.
This pattern can also be used as a base for larger projects. By repeating the design, you can create table runners, placemats, or even decorative panels. The possibilities are endless once you master the technique.
Gifting handmade coasters is a thoughtful gesture. The effort and creativity involved in making a 3D crocheted coaster with pumpkin stitch – pattern make it a meaningful present for friends and family.
In addition to home décor, these coasters can be used for seasonal events. Whether it’s a fall gathering or a cozy dinner, they add a warm and inviting touch to any setting.
Finally, selling handmade items like these can be a great way to turn your hobby into a small business. Unique patterns and high-quality craftsmanship can attract customers looking for one-of-a-kind products.
FAQ About 3D Crocheted Coaster with Pumpkin Stitch – Pattern
1. Is the pumpkin stitch suitable for beginners?
Yes, beginners can learn the pumpkin stitch with practice. It may seem challenging at first, but following clear instructions and practicing regularly will make it easier.
2. What type of yarn is best for this pattern?
Cotton yarn is highly recommended due to its durability and absorbency, especially for functional coasters.
3. How long does it take to complete one coaster?
Depending on your skill level, it can take anywhere from 30 minutes to a couple of hours to complete one 3D crocheted coaster with pumpkin stitch – pattern.
4. Can I wash these coasters?
Yes, most coasters made with cotton or acrylic yarn can be gently washed. Always check the yarn label for care instructions.
5. How do I make the coaster more rigid?
Using a smaller hook size or tighter stitches can help create a firmer structure. Blocking can also improve rigidity.
6. Can I sell items made from this pattern?
In most cases, yes. Handmade items are popular, but it’s always good to ensure your pattern usage aligns with any specific guidelines if applicable.
Conclusion
The 3D crocheted coaster with pumpkin stitch – pattern is a rewarding project that combines creativity, functionality, and skill-building. Throughout this article, you’ve learned about the technique behind the pumpkin stitch, the materials needed, and the step-by-step process to create your own unique coaster. You’ve also discovered ways to customize and expand the pattern into other creative uses.
By mastering this pattern, you not only enhance your crochet abilities but also open the door to countless design possibilities. Whether you’re making coasters for personal use, gifts, or even to sell, this pattern offers both beauty and practicality. Now it’s your turn to try the 3D crocheted coaster with pumpkin stitch – pattern and bring your ideas to life. Feel free to share your honest opinion about this guide and leave suggestions for future patterns or improvements. Your feedback is always welcome and helps inspire even more creative projects!