
Catherine’s Wheel Stitch Tutorial – Pattern is one of the most visually captivating techniques in crochet, combining texture, color, and symmetry in a way that instantly elevates any handmade project. Whether you are a beginner looking to expand your skills or an experienced crocheter searching for a decorative motif, mastering the Catherine’s Wheel Stitch Tutorial – Pattern can open the door to endless creative possibilities. This stitch is known for its circular, wheel-like design that creates a layered, almost floral texture across the fabric.
The beauty of the Catherine’s Wheel Stitch Tutorial – Pattern lies in its structured repetition and dramatic visual effect. Although it may look complex at first glance, the stitch is based on a logical combination of basic crochet techniques such as double crochet, single crochet, and strategic decreases. When broken down step by step, the pattern becomes approachable and surprisingly enjoyable to work on. With the right guidance and patience, anyone can confidently add this stunning stitch to their repertoire.
In this comprehensive guide, you will learn everything you need to know about the Catherine’s Wheel Stitch Tutorial – Pattern, from understanding its structure to following a clear step-by-step method. We will also explore practical applications, helpful tips, and common mistakes to avoid. By the end of this article, you will feel equipped to create beautiful blankets, scarves, pillow covers, and more using this elegant and timeless crochet pattern.
What Is the Catherine’s Wheel Stitch?
The Catherine’s Wheel Stitch Tutorial – Pattern refers to a decorative crochet technique that forms circular motifs resembling small wheels aligned in rows. Each “wheel” is created by working clusters of stitches into a single stitch, then anchoring them with decreases to maintain structure and symmetry.
This stitch is highly popular in textured crochet projects because it adds depth and dimension without requiring advanced tools. While it may appear intricate, it is essentially a combination of repeated grouped stitches and decreases arranged in alternating rows.
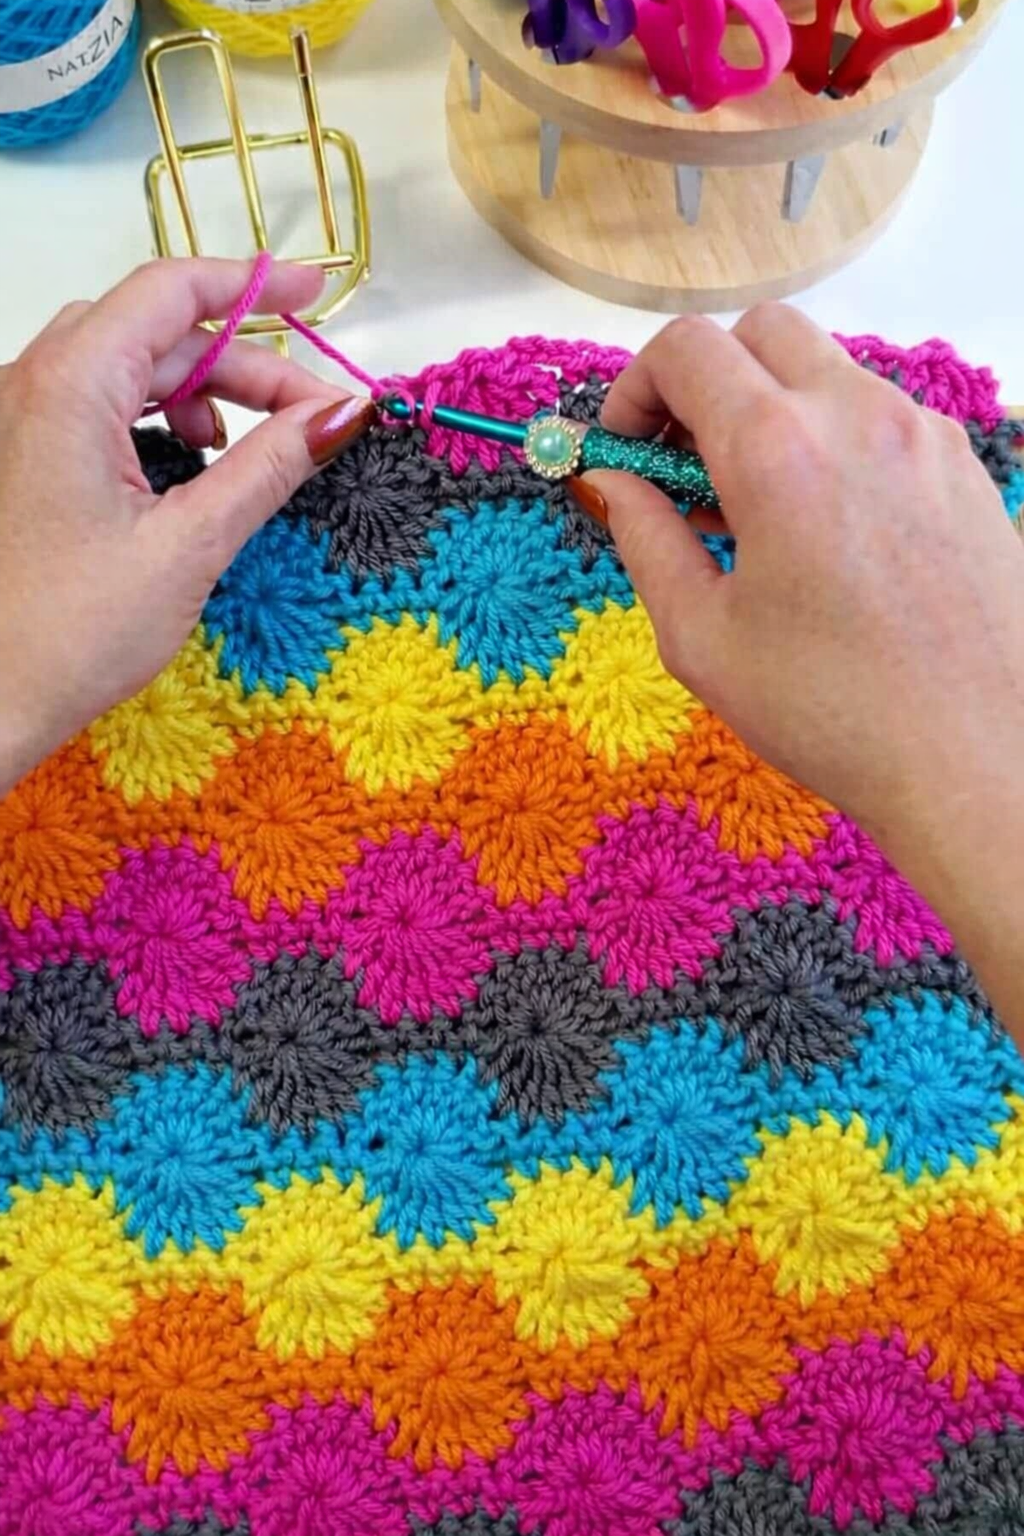
Traditionally, the stitch uses multiple colors to enhance the wheel effect. Changing colors between rows makes each circular shape stand out more prominently. However, it can also be worked in a single color for a subtle, embossed texture.
The pattern typically requires a multiple of stitches in the foundation chain, often in multiples of 10 plus additional stitches for turning. This structure ensures that each wheel forms evenly across the row.
One of the defining characteristics of the Catherine’s Wheel Stitch Tutorial – Pattern is the balance between expansion and contraction. The grouped stitches create fullness, while decrease stitches pull the fabric inward, maintaining alignment.
Because of its repeating structure, once you understand the sequence, the stitch becomes rhythmic and relaxing to crochet. Many crafters find it meditative after mastering the first few rows.
Materials and Preparation for the Pattern
Before starting the Catherine’s Wheel Stitch Tutorial – Pattern, it is essential to gather the right materials. You will need yarn, a crochet hook suitable for your yarn weight, scissors, and a tapestry needle for weaving in ends.
Medium-weight yarn is often recommended for beginners because it clearly shows stitch definition. Cotton and acrylic yarns both work well, depending on the intended project.
Choosing contrasting colors can dramatically enhance the visual impact of the pattern. If you are aiming for bold wheels, select two or more complementary shades that highlight each row’s structure.
A proper foundation chain is crucial. Since the stitch typically works in multiples of 10 plus extra stitches, counting carefully at the beginning prevents frustration later in the process.
Maintaining consistent tension throughout the project is also key. Because the pattern alternates between clusters and decreases, uneven tension can distort the wheel shapes.
Before beginning a large project, consider practicing a small swatch. This allows you to understand the flow of the Catherine’s Wheel Stitch Tutorial – Pattern and adjust your hook size if necessary.
Step-by-Step Guide to Catherine’s Wheel Stitch
To begin the Catherine’s Wheel Stitch Tutorial – Pattern, create a foundation chain in a multiple of 10 plus an additional number of stitches required for turning. This ensures the wheels align properly across the row.
The first row usually consists of single crochet stitches across the chain. This base row creates a stable foundation for the wheel clusters that follow.
In the next row, you will work a series of decreases, often double crochet decreases, over several stitches. These decreases bring the fabric inward and prepare space for the wheel formation.
The following row is where the magic happens. Multiple double crochets are worked into a single stitch, forming a fan or shell shape. This fan expands outward, creating the rounded “wheel” effect.
After completing a wheel, you anchor it with single crochet stitches before moving on to the next cluster. This alternation between expansion and anchoring gives the pattern its signature look.
The sequence repeats across rows, alternating between decrease rows and wheel-forming rows. As you continue, the circular motifs stack neatly, creating a consistent and eye-catching texture.
Tips, Variations, and Common Mistakes
When working on the Catherine’s Wheel Stitch Tutorial – Pattern, counting stitches carefully is one of the most important habits to develop. Missing a stitch can throw off the alignment of the entire row.
Another helpful tip is to mark the beginning of each row, especially when using multiple colors. Stitch markers can help maintain consistency and reduce confusion during complex sections.
If your wheels appear uneven, check your tension. Overly tight decreases can compress the fabric, while loose clusters may look floppy and undefined.
Color changes can be done at the end of a row to create distinct wheel layers. For a seamless look, complete the final yarn-over of the last stitch in the new color.
The Catherine’s Wheel Stitch Tutorial – Pattern can be adapted to various project sizes. From baby blankets to full-sized throws, simply adjust the foundation chain to match your desired width.
Avoid rushing through the decrease rows. These rows are essential for maintaining the pattern’s structure. Taking your time ensures that each wheel sits properly above the previous one.
Frequently Asked Questions (FAQ)
What skill level is required for the Catherine’s Wheel Stitch Tutorial – Pattern?
The pattern is generally considered intermediate, but determined beginners can master it with practice. Familiarity with double crochet and decrease stitches is helpful.
How many stitches do I need to start?
Most versions require a multiple of 10 stitches plus extra for turning. Always check your specific pattern instructions to confirm the exact count.
Can I use this stitch for garments?
Yes, but keep in mind that the texture is quite dense. It works well for cardigans, ponchos, and structured tops, but may feel heavy for lightweight garments.
Why do my wheels look uneven?
Uneven wheels are often caused by inconsistent tension or incorrect stitch counts. Double-check your decreases and cluster placements.
Is it necessary to change colors?
No, color changes are optional. Using a single color still produces a beautiful textured effect, while multiple colors enhance visual contrast.
Does the stitch consume more yarn?
Yes, due to the clustered stitches, this pattern typically uses more yarn than basic stitches. Plan your yarn quantity accordingly.
Can I adjust the size of the wheels?
The size of the wheels depends on the height of the stitches used. Taller stitches create larger wheels, while shorter stitches result in smaller motifs.
Is blocking necessary?
Blocking can help even out the fabric and define the wheels more clearly, especially for blankets and decorative pieces.
Conclusion
In this detailed guide to the Catherine’s Wheel Stitch Tutorial – Pattern, we explored the structure, materials, step-by-step process, and practical tips needed to successfully master this stunning crochet technique. From understanding how the alternating rows of decreases and clusters form the iconic wheel design to learning how to maintain consistent tension and choose complementary colors, you now have the knowledge required to create beautiful textured projects.
The Catherine’s Wheel Stitch Tutorial – Pattern is more than just a decorative stitch; it is a versatile design element that can transform ordinary crochet pieces into extraordinary handmade works of art. With patience and practice, this pattern becomes intuitive and enjoyable, allowing you to experiment with different yarns, color combinations, and project sizes.
If you found this tutorial helpful, feel free to share your honest opinion and suggestions. Your feedback is valuable and helps inspire even more creative and informative crochet content in the future. Happy crocheting!