
Strawberry Stitch Crochet Pattern: A Step-by-Step Guide – Pattern is the perfect starting point for anyone who wants to create a charming, textured design inspired by sweet, delicate strawberries. Whether you are new to crochet or already experienced with different stitch techniques, this beautiful pattern offers a fun and creative way to enhance your skills. The combination of texture and color makes it ideal for blankets, bags, baby clothes, and decorative accessories. Throughout this guide, you will learn everything you need to master this delightful stitch with confidence.
The beauty of the Strawberry Stitch Crochet Pattern lies in its versatility and eye-catching appearance. The raised stitches resemble tiny strawberries, giving your crochet project a playful and elegant texture at the same time. With the right yarn choice and careful attention to stitch placement, you can create a realistic and dimensional effect that truly stands out. This step-by-step approach ensures that even beginners can follow along comfortably and achieve satisfying results.
In this comprehensive Step-by-Step Guide, we will explore the essential materials, stitch techniques, and practical tips that make this pattern easy to understand and enjoyable to complete. You will also discover how to customize your work, adjust sizing, and maintain consistent tension. By the end of this article, you will feel confident using the Strawberry Stitch Crochet Pattern – Pattern in a variety of creative projects while improving your overall crochet technique.
Understanding the Strawberry Stitch Crochet Pattern
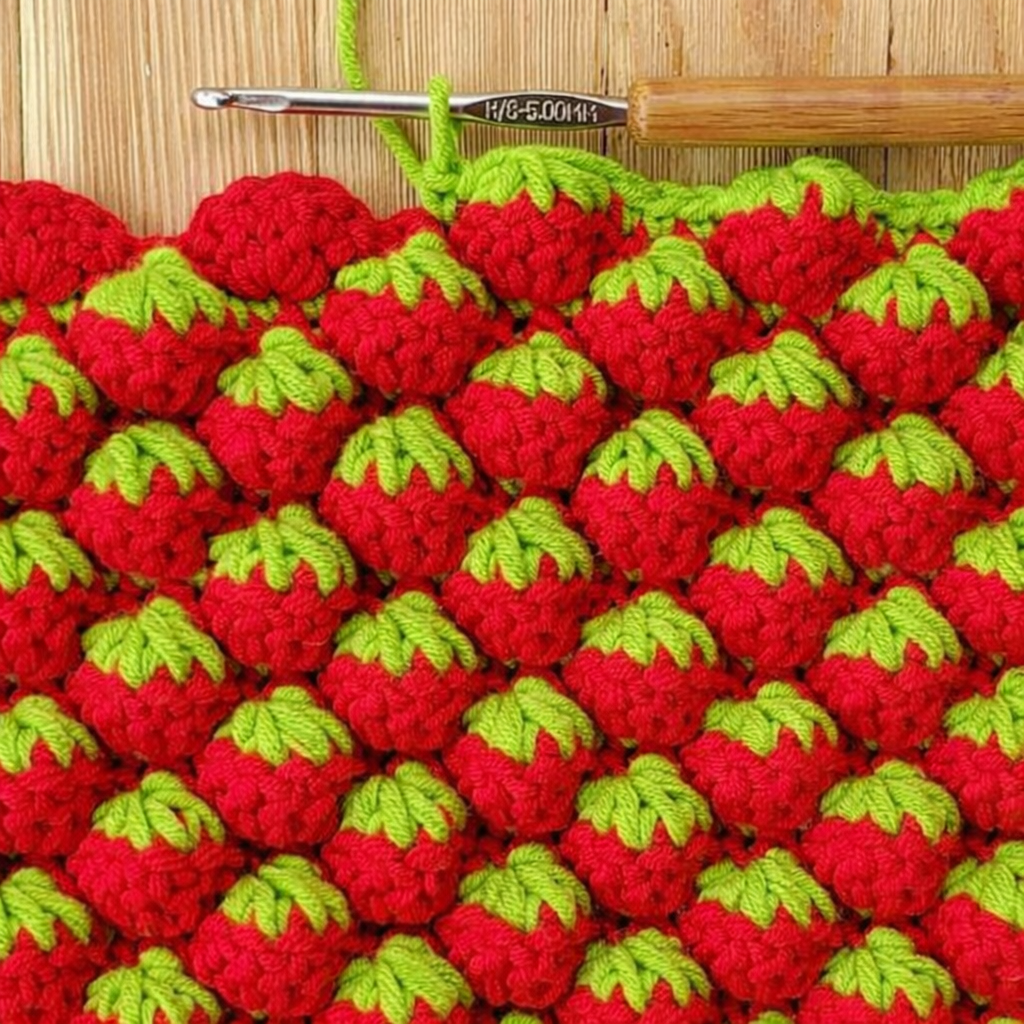
The Strawberry Stitch Crochet Pattern is a textured crochet technique designed to resemble small strawberries embedded within your fabric. It typically involves a combination of double crochet stitches and cluster stitches that create a raised, rounded effect. The contrast between background stitches and the “strawberry” clusters is what makes the design visually appealing and dynamic.
To begin working with this pattern, it’s important to understand the structure behind it. Most versions of the Strawberry Stitch Crochet Pattern: A Step-by-Step Guide follow a repeat sequence. This means once you learn the stitch combination for one strawberry, you can easily replicate it across rows. Repetition helps build rhythm and consistency in your crochet process.
Color selection plays a major role in highlighting the strawberry effect. Traditionally, crocheters use red or pink yarn for the strawberries and green for small decorative tops, while the background may be white or cream. However, you can experiment with pastel shades or bold contrasts depending on your project’s purpose and personal style.
The pattern works beautifully in rows, making it suitable for blankets, scarves, and dishcloths. It can also be adapted to rounds for hats or decorative panels. Understanding how to adjust the stitch count is essential if you want to customize the width or shape of your final piece.
Tension control is another critical factor when working on the Strawberry Stitch Crochet Pattern – Pattern. Since cluster stitches use multiple yarn overs, maintaining even tension ensures the strawberries look uniform. Practicing on a small swatch before starting your main project is highly recommended.
Finally, reading and understanding crochet abbreviations will make your experience smoother. Common terms like DC (double crochet), YO (yarn over), and CH (chain) appear frequently in strawberry stitch instructions. Familiarity with these abbreviations helps you follow the pattern confidently and efficiently.
Materials and Preparation for the Pattern
Choosing the right materials is the first step toward success with the Strawberry Stitch Crochet Pattern: A Step-by-Step Guide. Medium-weight cotton or acrylic yarn is often recommended because it provides good stitch definition. Clear stitch definition allows the strawberry clusters to stand out prominently against the background.
Your crochet hook size should match the yarn weight specified on the label. Most patterns work well with a 4.0 mm to 5.5 mm hook, but always create a gauge swatch to confirm. Achieving the correct gauge ensures your finished project will have the intended size and texture.
Scissors and a yarn needle are essential tools for finishing your project neatly. The yarn needle helps weave in loose ends securely, preserving the professional appearance of your crochet work. Proper finishing techniques are part of what makes a handmade piece look polished.
Before starting the actual pattern, create a foundation chain that is a multiple of the required stitch count. The Strawberry Stitch Crochet Pattern – Pattern usually requires a specific number of stitches to maintain proper alignment. Double-check the pattern instructions to avoid miscounts.
Preparation also includes organizing your workspace. Good lighting and a comfortable chair make a significant difference during longer crochet sessions. Staying relaxed helps maintain consistent tension and prevents hand fatigue.
Lastly, consider blocking your finished piece. Blocking enhances stitch definition and evens out the fabric. Especially with textured designs like the Strawberry Stitch Crochet Pattern, blocking helps emphasize the raised strawberry details beautifully.
Step-by-Step Instructions for the Strawberry Stitch
To start the Strawberry Stitch Crochet Pattern: A Step-by-Step Guide, begin with a foundation chain in multiples specified by your pattern. Add a few extra chains for turning. This ensures your rows remain even and aligned as you build the strawberry texture.
Work the first row using basic stitches such as single crochet or double crochet to create a stable base. This foundation row supports the cluster stitches that form the strawberries. A solid base is essential for maintaining structure.
In the next row, you will begin forming the strawberry clusters. Typically, this involves making several unfinished double crochets in the same stitch, then pulling through all loops at once. This creates a rounded, raised cluster that mimics the shape of a strawberry.
After completing a cluster, you usually skip a stitch or work a few background stitches before creating the next cluster. This spacing allows each strawberry to stand out clearly. Following the repeat pattern carefully ensures consistent spacing throughout your project.
The following row often includes background stitches only. This helps secure the clusters in place and prepares the fabric for the next set of strawberries. Alternating between cluster rows and background rows creates the signature textured appearance.
Continue repeating these steps until you reach your desired length. Consistency is key in the Strawberry Stitch Crochet Pattern – Pattern. Counting stitches regularly prevents mistakes and ensures your strawberries align perfectly from top to bottom.
Tips, Variations, and Creative Project Ideas
One helpful tip when working on the Strawberry Stitch Crochet Pattern: A Step-by-Step Guide is to use stitch markers. Marking the beginning of cluster sections can prevent errors, especially in larger projects like blankets.
Experimenting with yarn textures can dramatically change the final look. Soft cotton gives a crisp, defined texture, while fluffy acrylic creates a softer, more whimsical appearance. Both options can highlight the strawberry design beautifully.
You can also modify the size of the strawberries by adjusting the number of unfinished double crochets in each cluster. Larger clusters create bold, prominent strawberries, while smaller clusters offer a subtle texture.
The Strawberry Stitch Crochet Pattern – Pattern is ideal for baby blankets due to its playful and gentle design. It also works wonderfully for kitchen accessories like dishcloths or decorative pot holders.
Adding embroidered seeds with small yellow stitches can enhance realism. This extra detail transforms a simple textured stitch into a charming, eye-catching piece.
Finally, consider combining this pattern with other textured stitches in a larger project. Mixing patterns can create a unique handmade item that reflects your creativity and personal style.
FAQ – Frequently Asked Questions
What skill level is required for the Strawberry Stitch Crochet Pattern?
The pattern is generally considered beginner to intermediate. If you are comfortable with double crochet and basic cluster stitches, you can successfully complete it.
Why do my strawberries look uneven?
Uneven tension is usually the cause. Practice maintaining consistent yarn tension and ensure you are pulling through loops evenly when forming clusters.
Can I use any type of yarn?
Yes, but medium-weight yarn is recommended for best stitch definition. Thinner yarn may reduce texture visibility, while very thick yarn can make clusters bulky.
How do I adjust the width of my project?
Increase or decrease the foundation chain in multiples required by the pattern repeat. Always maintain the correct stitch count to preserve alignment.
Is blocking necessary?
Blocking is optional but highly recommended. It enhances stitch definition and improves the overall appearance of textured patterns.
Can I crochet the Strawberry Stitch in the round?
Yes, with slight modifications. You will need to adjust turning rows and stitch placement to maintain proper cluster alignment.
How long does it take to complete a project?
The time depends on the size and your skill level. Small items like dishcloths can be completed in a few hours, while blankets may take several days.
Conclusion
In this detailed Strawberry Stitch Crochet Pattern: A Step-by-Step Guide – Pattern, we explored the structure of the stitch, necessary materials, clear instructions, and creative variations. You learned how to build a solid foundation, form textured strawberry clusters, and maintain consistent tension throughout your work.
By applying these techniques, you can confidently create beautiful crochet pieces that showcase this charming design. If you found this guide helpful, please leave your honest opinion and share your suggestions. Your feedback helps improve future patterns and tutorials while inspiring others in the crochet community.