
Patchwork Letters Tutorial – Quilt Pattern is a creative and inspiring way to combine personalization with traditional quilting techniques. Whether you are an experienced quilter or just beginning your journey into fabric art, learning how to create letter-based quilt blocks opens the door to countless design possibilities. From baby names and inspirational quotes to monograms and decorative wall hangings, this technique allows you to stitch meaningful words directly into your projects.
In today’s world of handmade crafts, personalized items have become more valuable than ever. A well-designed quilt pattern featuring patchwork letters transforms a simple quilt into a cherished keepsake. With the right fabric selection, thoughtful layout, and clear step-by-step guidance, anyone can master the art of fabric lettering. This tutorial will guide you through the essential concepts, materials, and techniques needed to achieve clean, balanced, and visually appealing letter blocks.
Throughout this comprehensive guide, we will explore the core elements of a successful Patchwork Letters Tutorial, including fabric preparation, cutting precision, letter construction, layout planning, and finishing touches. By understanding each stage in detail, you will gain confidence in creating your own custom quilt projects while maintaining professional quality results. Let’s dive into the world of patchwork lettering and discover how to transform fabric pieces into meaningful quilted art.
Understanding the Basics of Patchwork Letters in a Quilt Pattern
The foundation of any successful Patchwork Letters Tutorial lies in understanding how letters are structured within a quilt pattern. Each letter is essentially a geometric composition made from squares, rectangles, and sometimes triangles. Breaking letters down into basic shapes simplifies the construction process and ensures clean lines.
Choosing the right scale is one of the first decisions you will make. Larger letters are easier for beginners because they allow more room for seam allowances and minor adjustments. Smaller letters can look elegant but require greater precision when cutting and sewing.
Grid-based designs are highly recommended when working with patchwork letters. By sketching your letter on graph paper, each square can represent a fabric unit. This method helps you visualize the final layout and avoid proportion issues within your quilt pattern.
Contrast plays a key role in readability. To ensure your letters stand out, select fabrics with clear color differences between the background and the letter shapes. Solid fabrics or subtle prints often work best for the letters themselves.
Seam allowance consistency is essential. Maintaining a standard quarter-inch seam allowance ensures that your letter blocks align correctly when assembled into the larger quilt top. Even small inconsistencies can distort the appearance of your lettering.
Finally, remember that balance matters. When incorporating words or multiple letters, spacing between characters should be even. This creates a professional and polished look that enhances the overall aesthetic of your quilt.
Essential Materials and Preparation for Your Patchwork Letters Tutorial
Before beginning your Patchwork Letters Tutorial, gathering the right tools and materials will streamline the process. High-quality cotton fabric is a popular choice for most quilt patterns due to its durability and ease of handling.
You will need a rotary cutter, self-healing cutting mat, and quilting ruler to achieve precise cuts. Accuracy during the cutting phase significantly impacts the final appearance of your patchwork letters. Clean edges result in sharper letter shapes.
Thread selection should complement your fabric choices. Neutral thread colors are typically safe, but in some cases, coordinating thread can enhance the visual appeal of the quilt pattern. Choose high-quality thread to prevent breakage during sewing.
Prewashing your fabric is highly recommended. This step removes excess dye and prevents future shrinkage, ensuring that your finished quilt maintains its shape and color integrity after washing.
Starch or fabric stabilizer can improve cutting precision. Slightly stiffened fabric is easier to measure and sew accurately, particularly when constructing angular or narrow sections of letters.
Preparation also includes planning your layout in advance. Arrange your letter blocks on a design wall or flat surface before sewing them together. This allows you to evaluate spacing, color balance, and overall composition within your quilt pattern.
Step-by-Step Construction of Patchwork Letter Blocks
Constructing letter blocks is the heart of this Patchwork Letters Tutorial – Quilt Pattern process. Begin by cutting all fabric pieces according to your grid design. Labeling each piece can help prevent confusion during assembly.
Start sewing smaller units together first. For example, assemble individual rows that form segments of the letter. Press seams carefully after each step to maintain crisp edges and reduce bulk.
Chain piecing can improve efficiency if you are making multiple letters. This technique allows you to sew similar units consecutively without cutting the thread between pieces, saving time and maintaining consistent seam allowances.
Pressing technique is crucial. Press seams to one side or open, depending on your preference and pattern requirements. Proper pressing ensures that intersections align neatly when rows are joined.
After assembling all rows, sew them together to complete the full letter block. Take extra care when matching seam intersections, as this step greatly influences the clarity of the final letter shape.
Once completed, square up your block using a quilting ruler. Trimming excess fabric ensures that each letter block matches the intended dimensions and fits seamlessly into your overall quilt pattern layout.
Creative Design Ideas and Layout Inspiration for Quilt Patterns
One of the most exciting aspects of a Patchwork Letters Tutorial is exploring creative design possibilities. You can spell out names, dates, inspirational words, or even entire phrases depending on your project size.
Baby quilts often feature a child’s name in large patchwork letters across the center. This personal touch transforms a functional quilt into a treasured keepsake for years to come.
Wall hangings provide another opportunity to experiment with typography and color. By combining bold fabrics with simple backgrounds, your quilt pattern can serve as decorative art for any room.
Monogram designs are ideal for gifts. A single oversized letter framed by complementary blocks creates a striking and elegant quilt design that feels both classic and modern.
Consider alternating background colors behind each letter to add visual interest. This technique maintains consistency while introducing subtle variety into the quilt pattern.
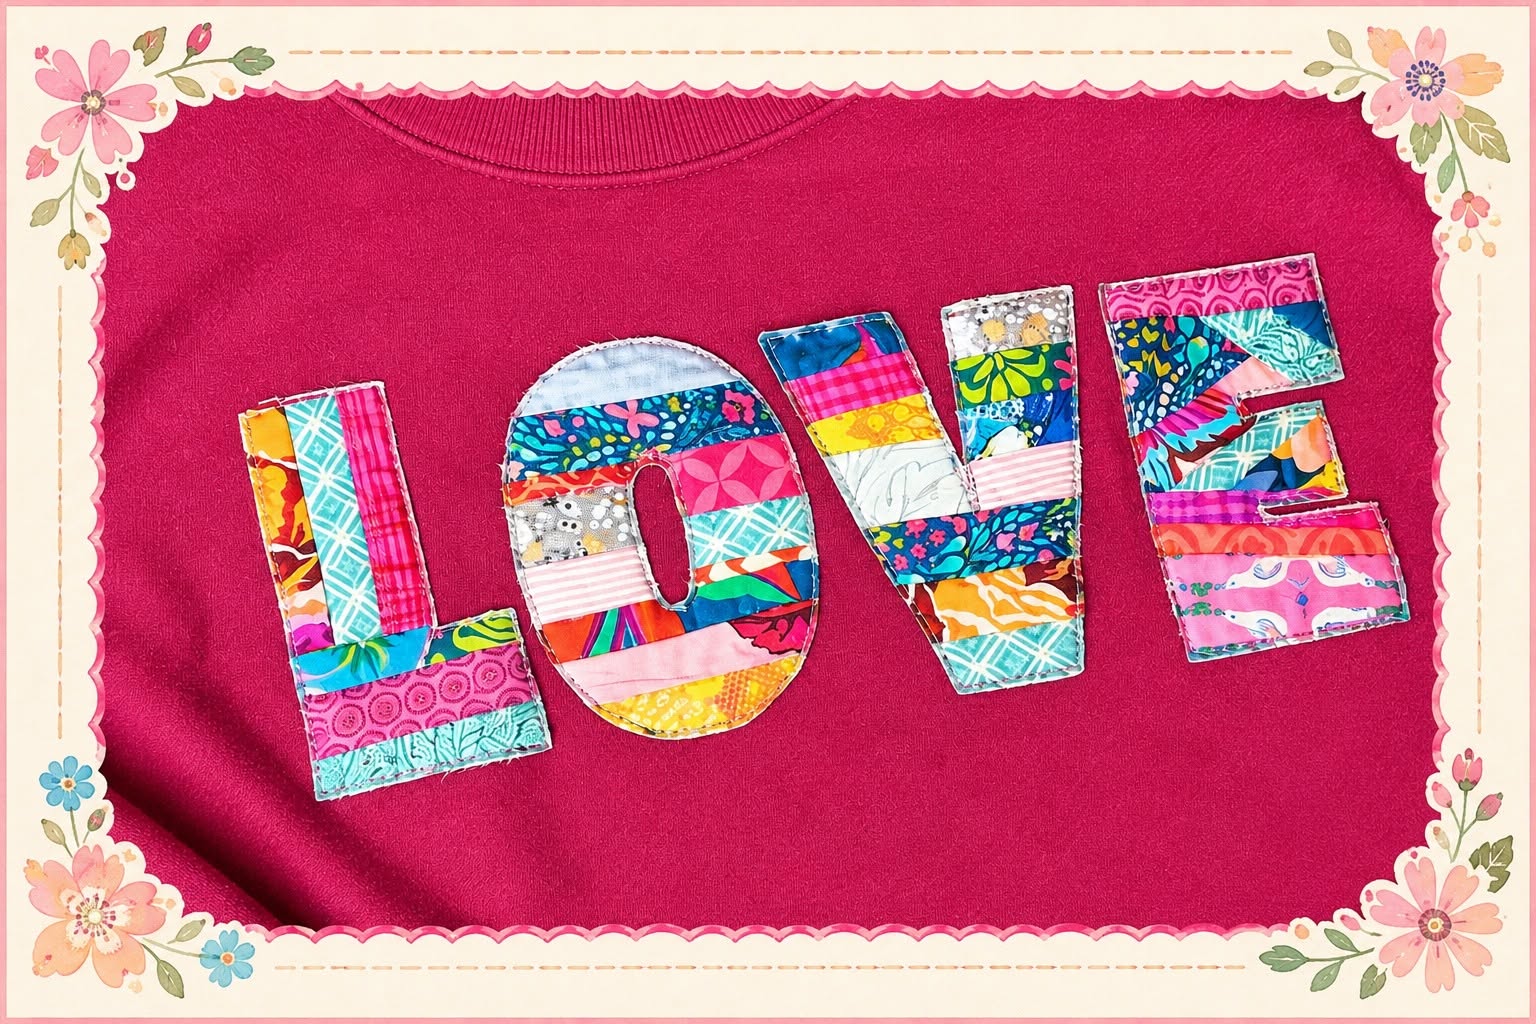
Seasonal themes also work beautifully. Words like “LOVE,” “HOME,” or holiday greetings can be adapted to different fabric collections, making your patchwork letters suitable for year-round décor.
Frequently Asked Questions (FAQ)
What is the best fabric for a Patchwork Letters Tutorial?
High-quality quilting cotton is generally the best option. It is durable, easy to cut, and holds its shape well within a quilt pattern.
Are patchwork letters suitable for beginners?
Yes, especially when using larger grid-based designs. Beginners should start with simple block-style letters before attempting more intricate fonts.
How do I ensure my letters look straight?
Accurate cutting, consistent seam allowances, and careful pressing are key. Using a quilting ruler to square up blocks also helps maintain straight lines.
Can I create curved letters in a quilt pattern?
While traditional patchwork focuses on straight lines, curved effects can be achieved using smaller grid units or applique techniques.
How do I calculate fabric requirements?
Estimate the size of each letter block and multiply by the number of letters in your design. Always purchase a little extra fabric to account for cutting errors.
Should I use sashing between letter blocks?
Sashing can enhance readability and create separation between letters. It is particularly useful when working with busy fabric prints.
Can I wash a quilt with patchwork letters?
Yes, as long as it is constructed with proper quilting techniques and prewashed fabric. Always follow standard quilt care instructions.
What size should each letter block be?
This depends on your project. Common sizes range from 8 to 12 inches square, but larger blocks are easier for beginners.
How do I make my quilt pattern more visually appealing?
Focus on color contrast, balanced spacing, and consistent design elements. A cohesive fabric palette enhances the overall presentation.
Is this technique suitable for gifts?
Absolutely. Personalized patchwork letter quilts make meaningful gifts for birthdays, weddings, and special occasions.
Conclusion
In this detailed Patchwork Letters Tutorial – Quilt Pattern guide, we explored the fundamentals of creating letter-based quilt designs, from understanding grid structures and fabric selection to step-by-step construction and creative layout ideas. By focusing on precision, contrast, and thoughtful planning, you can transform simple fabric pieces into personalized works of art. Patchwork letters offer endless possibilities for customization, making every quilt unique and meaningful.
Now that you have learned the essential techniques behind a successful Patchwork Letters Tutorial, it’s time to start designing your own quilt pattern. Experiment with colors, try different letter sizes, and most importantly, enjoy the creative process. If you found this guide helpful, please leave your honest opinion and share your suggestions. Your feedback helps improve future tutorials and inspires more creative quilting projects.