
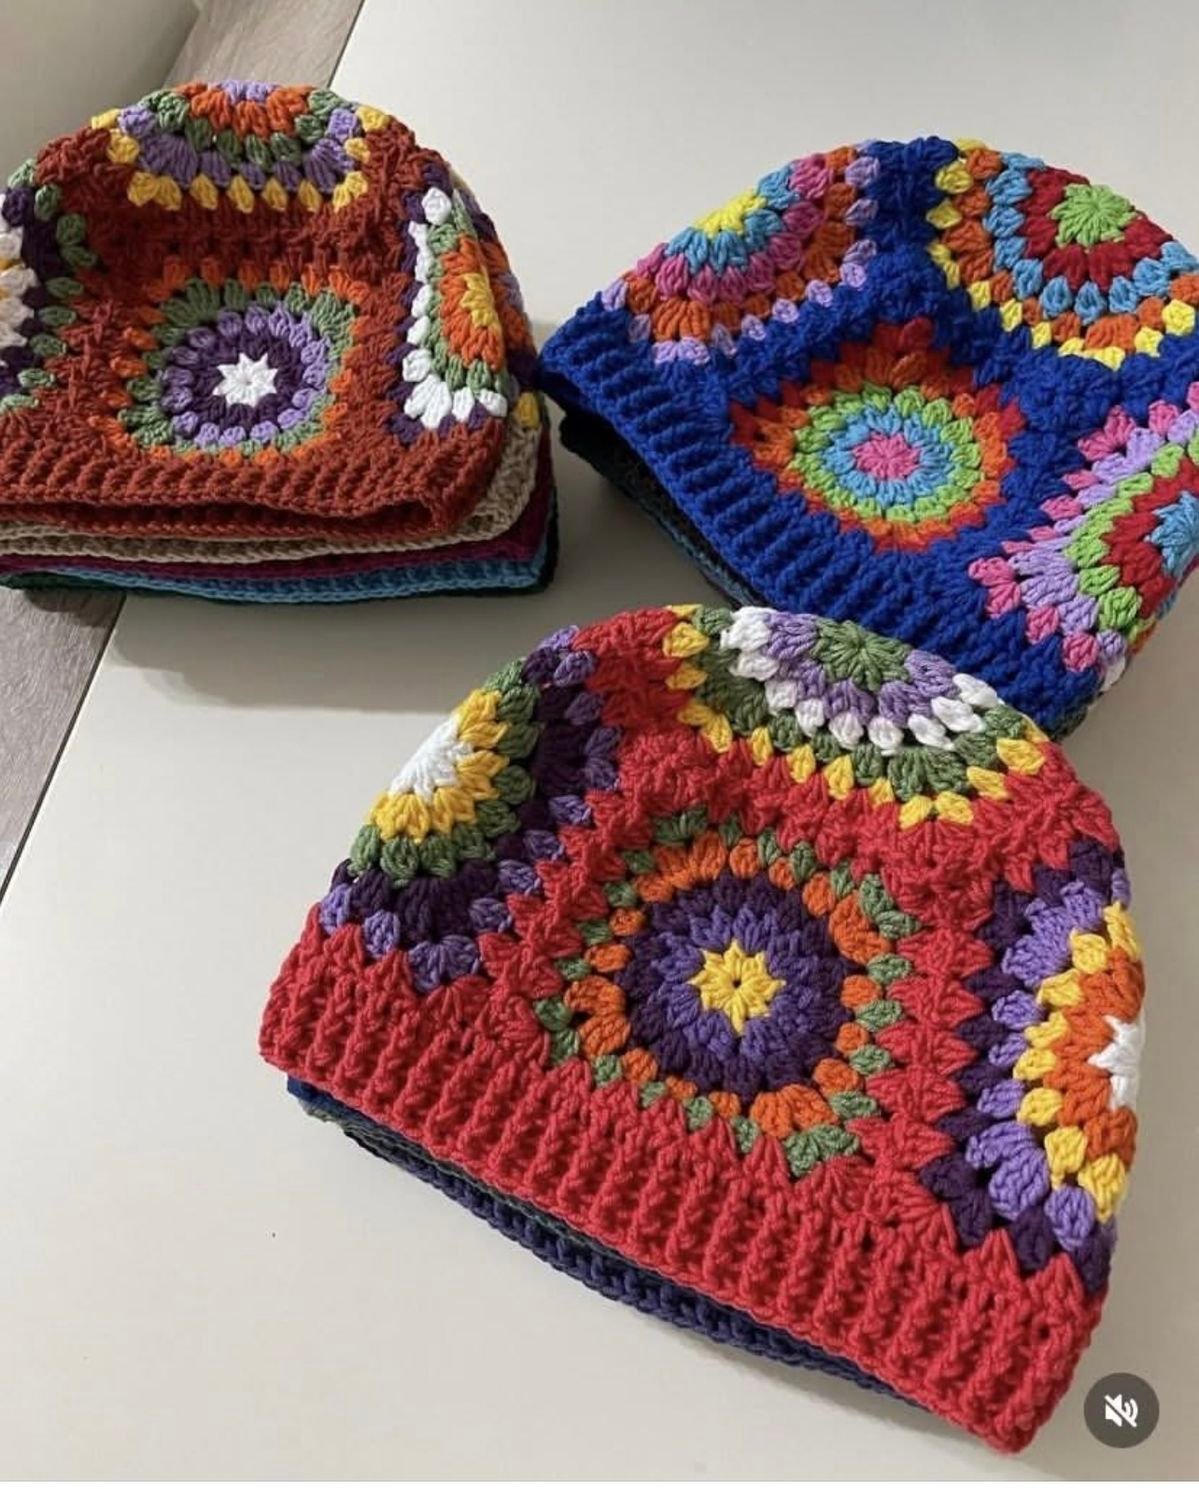
Crochet lovers are always on the lookout for fresh, stylish projects that showcase their skills and creativity. One timeless accessory that never goes out of style is the beret — and when crafted from hexagon motifs, it becomes an eye-catching, trendy piece. This Hexagon Beret Crochet Tutorial is perfect for both beginner and advanced crocheters who want to explore unique crochet patterns while making a fashionable item.
In this detailed tutorial, we will walk through everything you need to know to create your own Hexagon Beret. We’ll cover the materials, stitches, and exact counts required, ensuring your project turns out beautifully. With simple instructions and a touch of patience, you can master this project and even customize it with your favorite colors or yarns.
Learning how to make a Hexagon Beret can open up new avenues for exploring crochet patterns. Whether you’re making it for yourself, as a gift, or even to sell, this versatile accessory adds charm to any outfit and serves as a fantastic introduction to geometric crochet design.
Materials Needed for the Hexagon Beret
To start your Hexagon Beret, gather all necessary materials to make the process smooth and enjoyable. You will need a medium-weight yarn (category 4) in your desired color, although lighter shades help highlight the hexagon pattern beautifully. A 4.0 mm (G-6) crochet hook is ideal to maintain a soft but structured fabric.
In addition to yarn and hook, keep a yarn needle for weaving in ends and scissors on hand. You may also find stitch markers useful, especially when connecting the hexagons together. Having all your supplies ready before you begin helps maintain a steady crafting flow and minimizes interruptions.
Choosing quality materials enhances the final look and feel of your beret. Acrylic yarns work well for everyday wear, while a wool blend adds warmth and a premium touch. Regardless of your choice, your Hexagon Beret will beautifully showcase intricate crochet patterns and your personal style.
Essential Stitches and Abbreviations
Before diving into the step-by-step process, it’s important to understand the stitches and abbreviations used in this tutorial. All stitches are standard and commonly found in most crochet patterns. Here’s a quick reference guide:
-
ch = chain
-
sl st = slip stitch
-
sc = single crochet
-
dc = double crochet
-
tr = treble crochet
-
hdc = half double crochet
-
st(s) = stitch(es)
If you’re familiar with these stitches, you’re already well-prepared for the project. If not, practicing each one beforehand can build confidence and ensure a smoother crocheting experience. Mastering basic stitches is the key to unlocking countless crochet patterns in the future.
Reading through the entire tutorial once before beginning is highly recommended. This overview allows you to visualize the steps and understand how the individual hexagons come together to form the beret shape.
Step 1: Creating the Basic Hexagon
The foundation of the Hexagon Beret begins with making a simple crochet hexagon. You’ll need to crochet a total of 6 hexagons for this beret.
-
Magic Ring, ch 3 (counts as first dc), 11 dc into the ring. (12 dc total). Sl st to the top of the ch-3 to join.
-
Round 2: Ch 3, dc in the same st, dc in next st, 2 dc in next st repeat around. (18 dc). Sl st to join.
-
Round 3: Ch 3, (dc, ch 1, dc) in the same st, dc in next 2 sts, (dc, ch 1, dc) in next st repeat around. (6 corners formed). Sl st to join.
Each hexagon should be about 3 inches wide. Adjust your tension or hook size slightly if necessary. Accurate sizing is important for the hexagons to fit together well without gaps or puckering.
You will repeat the hexagon-making process until you have 6 hexagons in total. Feel free to vary your colors or keep them uniform for a classic look that lets the shape and texture stand out.
Step 2: Joining the Hexagons
Once you have six completed hexagons, it’s time to join them together to shape the beret. This step transforms your flat motifs into a 3D accessory full of character.
Lay out the hexagons flat first, arranging them in a circular shape like a flower with one hexagon in the center and five surrounding it. You want their sides to line up as evenly as possible. Visualizing the final product helps guide your joining process smoothly.
Using a whip stitch or single crochet join, sew the sides of the hexagons together, connecting each edge to its neighboring edge. Work carefully to keep your tension even so the joins are secure but not overly tight. This creates the rounded crown of your Hexagon Beret.
Step 3: Shaping the Crown
Now that the basic structure is complete, you will work around the joined hexagons to shape the crown and form the headband edge.
-
Attach yarn to any stitch along the outer edge.
-
Round 1: Ch 1, sc evenly around the beret opening, placing 1 sc in each st and 2 sc in each corner ch-1 space. Sl st to the first sc to join.
-
Round 2-4: Ch 1, sc around. Sl st to join.
These rounds of single crochet help tighten the shape slightly, ensuring the beret sits nicely on the head without being floppy. Adjust the number of rounds if you want a snugger or looser fit depending on your preference.
Each round naturally shapes the Hexagon Beret while keeping the charming geometry of the original crochet patterns intact. Take your time and enjoy watching the transformation!
Step 4: Adding the Ribbed Band
The ribbed band is both stylish and functional, giving the beret a professional, polished finish. It also helps the beret grip your head comfortably without slipping off.
-
Round 5: Switch to a smaller hook (3.5 mm). Ch 2 (counts as first hdc), hdc around the beret opening. Sl st to join.
-
Round 6-10: Ch 2, hdc in each st around. Sl st to join each round.
Optional: For a deeper band, add more rounds of half double crochet. Customize the width of the band to your liking — a wider band gives a more structured appearance, while a narrower one feels lighter and more casual.
At the end of the final round, fasten off and weave in all ends securely. The ribbed band ties the whole look together, complementing the elegant simplicity of the hexagon crochet patterns.
Styling and Personalization Ideas
The beauty of making a Hexagon Beret is the endless opportunity to personalize it. You can easily adapt the basic crochet patterns to suit any style, season, or wardrobe.
For a playful, bohemian vibe, use multiple colors and alternate the hues for each hexagon. This adds a burst of vibrancy to your beret, making it a standout piece. Alternatively, using a soft neutral shade can create a sophisticated, Parisian look.
You can also embellish your beret with appliqués, embroidery, or even small crochet flowers. Adding personal touches transforms the Hexagon Beret into a unique statement accessory that truly reflects your creativity and spirit.
Care Instructions for Your Crochet Beret
Taking good care of your handmade beret ensures it remains beautiful and functional for years to come. Crochet accessories, especially those using intricate crochet patterns, deserve a little extra love when cleaning.
Always hand wash your beret gently in cold water using a mild detergent. Avoid wringing or twisting the fabric; instead, press out excess water by rolling the beret inside a towel. Lay flat to dry, reshaping as needed.
If necessary, lightly steam-block the beret to bring back its original shape and crispness. Proper care highlights the beauty of your handmade Hexagon Beret and preserves the artistry behind the chosen crochet patterns.
Final Thoughts: Master the Hexagon Beret and Elevate Your Crochet Skills
Crocheting a Hexagon Beret is a rewarding project that merges classic techniques with creative design. With just a few stitches and strategic joining, you can create a chic accessory that showcases beautiful crochet patterns and your own unique flair.
This project is perfect for anyone wanting to move beyond basic scarves or blankets and explore three-dimensional crochet work. Plus, the finished beret makes a delightful gift that’s sure to impress friends and family.
Now that you have a complete Hexagon Beret Crochet Tutorial, grab your favorite yarn, and start crocheting your new favorite accessory today! Happy hooking!