
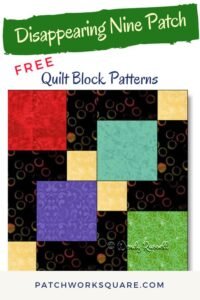
The Disappearing Nine Patch quilt block pattern is a favorite among quilters, offering a simple yet visually dynamic design. This technique starts with a classic nine-patch block, which is then sliced and reassembled to create a new look.
In this tutorial, we’ll walk through the step-by-step process of creating your very own Disappearing Nine Patch quilt block. Along the way, we’ll include tips to make sure your cuts and sewing are precise for the best results.
Creating your own quilt using the Disappearing Nine Patch technique is not only a fun project but also a great way to expand your knowledge of quilt patterns. Whether you’re a seasoned quilter or just starting, this pattern is approachable and yields impressive results. Read on to discover how to make this eye-catching quilt block and use it in your projects!
1. What is a Disappearing Nine Patch Quilt Block Pattern?
The Disappearing Nine Patch quilt block begins with a traditional nine-patch block made of nine square fabric pieces. Once the block is completed, it is cut into four equal sections, and these sections are rearranged to create a new design. The outcome is an intricate-looking quilt that is deceptively simple to make.
This quilt pattern is ideal for quilters of all skill levels. For beginners, it’s an excellent way to practice basic sewing and cutting techniques. For more advanced quilters, the Disappearing Nine Patch offers creative opportunities to experiment with color placement and fabric patterns.
One of the main advantages of this pattern is its versatility. You can achieve different looks depending on the fabric and color choices, as well as how you rearrange the pieces after the cut. The possibilities are endless, making it a fun and customizable project for any quilter.
2. Materials You’ll Need
Before starting your Disappearing Nine Patch quilt block, gather all the necessary materials. Having everything prepared beforehand will ensure your process is smooth and enjoyable. Here’s what you’ll need for this project:
- Fabric: Select a variety of fabrics in complementary colors and prints. You’ll need 9 fabric squares for each block. A 5-inch square (commonly known as a charm square) is a great starting point for this pattern.
- Cutting Tools: A rotary cutter, cutting mat, and quilting ruler are essential for precise cuts.
- Sewing Machine & Thread: Any reliable sewing machine and matching thread will work. Choose a neutral color thread that complements your fabric selection.
Make sure you choose high-quality cotton fabric, as it’s easier to work with and holds up well in quilts. When picking fabrics, consider using a mix of solid colors and prints for added visual interest. Using pre-cut charm packs can also save time if you’re looking for convenience.
3. Cutting the Fabric
Cutting your fabric pieces accurately is crucial to achieving a clean and polished quilt block. For a standard-sized Disappearing Nine Patch quilt block, we’ll use 5-inch squares, but you can adjust the size to your preference. Here’s a simple guide to cutting the pieces:
- Cut nine 5-inch fabric squares (this will create a 14-inch unfinished block).
- Arrange these squares in three rows of three, ensuring that your fabrics are well-balanced in terms of color and pattern.
- After arranging your squares, double-check your layout to make sure you’re happy with how the colors and prints are distributed.
If you prefer a larger or smaller block, you can scale the size of the squares accordingly. Just keep in mind that changes to the block size will affect the overall quilt size. Remember to be precise with your cuts, as even slight variations can affect the accuracy of your finished quilt.
4. Sewing the Nine-Patch Block
Now that your squares are cut and arranged, it’s time to sew them together to create the nine-patch block. Follow these steps to assemble your block:
- Sew the squares together row by row, using a ¼-inch seam allowance. Start by sewing the first two squares in each row, then add the third square to each row.
- Once your rows are complete, press the seams. For the best results, press the seams toward the darker fabrics to avoid any shadowing.
- Sew the three rows together, matching the seams where the squares meet.
Press your finished nine-patch block flat before moving on to the next step. This will ensure that the block lays flat and is easier to cut. If you’re working with multiple blocks, it’s helpful to sew them assembly-line style for efficiency.
5. Cutting the Nine-Patch Block
With your nine-patch block complete, you’re ready for the most exciting part: cutting it into four smaller blocks. Here’s how to do it:
- Using your rotary cutter and ruler, cut the block in half vertically and then in half horizontally. You’ll now have four equal-sized blocks.
- Be sure to make precise cuts to keep all of the blocks evenly sized.
- Once cut, set your blocks aside for the next step: rearranging.
These cuts transform your simple nine-patch into something much more interesting. Cutting and rearranging is where the Disappearing Nine Patch really gets its name, as the original block is no longer recognizable in its new form.
6. Rearranging the Cut Pieces
The magic of the Disappearing Nine Patch pattern happens during the rearranging phase. Here’s how to give your quilt block a whole new look:
- Rotate two of the four blocks 180 degrees.
- You can experiment with different layouts by rotating the blocks in various directions or even swapping their positions.
- Once you’re happy with the arrangement, sew the blocks together using a ¼-inch seam allowance.
The new layout should look entirely different from the original nine-patch design. This step allows for a lot of creativity, as you can play around with different arrangements until you achieve the desired look.
7. Finishing the Quilt Block
After you’ve rearranged and sewn your pieces together, press your completed Disappearing Nine Patch quilt block. The seams should be pressed flat, and your block should measure approximately 13.5 inches. Now, you’re ready to make more blocks and assemble them into a full quilt.
- To make a full quilt, repeat the process until you have the desired number of blocks.
- Arrange the blocks in a pleasing layout. You can alternate the orientation of the blocks or arrange them in a uniform pattern.
- Once you’re satisfied with the layout, sew the blocks together to form rows, then sew the rows together to complete the quilt top.
Quilters often choose to add borders to their quilts for a more finished look. You can use coordinating fabrics or go bold with a contrasting color. After the quilt top is assembled, finish the project by layering it with batting and backing, then quilting and binding the edges.
8. Conclusion: Why Choose the Disappearing Nine Patch Quilt Pattern?
The Disappearing Nine Patch quilt pattern is a versatile and enjoyable project for quilters of all skill levels. Its simplicity in construction combined with the unique visual appeal makes it a favorite among those looking for an easy yet stunning quilt design. Plus, the endless possibilities for customization allow you to create a quilt that’s truly one-of-a-kind.
Whether you’re making a small quilt for a baby shower or a large one for your bed, this pattern adapts to different sizes and styles with ease. And because it’s based on the traditional nine-patch block, it’s also a wonderful introduction to basic quilt patterns for beginners.
Now that you know how to create a Disappearing Nine Patch quilt block, you can start experimenting with different fabrics and arrangements to make a quilt that reflects your personal style. Happy quilting!